Sound Deadening Reference Information Guide
Unfortunately, there is a lot of misinformation and marketing fluff out there when looking for information on properly sound deadening your vehicle. I’m writing this to clear up any misconceptions about installing any sound treatment to your car, as well as provide an easy-to-follow, step-by-step guide that doesn’t misguide you for one reason or the other.
For starters, there are four main categories for sound treatment for your vehicle. The first one, your standard Constrained Layer Damper Sound Deadening Material, is to control structure-borne vibration, also known as resonance. Constrained Layer Dampers, usually referred to as CLD, are the most common type of product to handle this job.
The second category, Vibration Decouplers, is to decouple panels and prevent them from vibrating against each other. A typical product for this is Closed Cell Foam (aka CCF) or Fiber Mat. Speaking of ResoNix Fiber Mat, up next is Sound Absorbers. This is something relatively less spoken about but it can yield significant improvements to your vehicle. Using modern materials such as our ResoNix Fiber Mat, a relatively inexpensive and very lightweight product, you can drastically reduce noise in your vehicle with ease.
The last category of sound treatment for your car is blocking outside noise with Noise Barriers. For this, you need something with mass. ResoNix Barrier is a modern solution to a variety of problems when trying to block outside noise. Keep reading to learn all about how these types of products are used and the science behind how they reduce the overall noise floor of your vehicle.
Remember, all of these products work as a system. There is not one product that handles everything, and there is not a situation where using only one of these products will yield the best results possible. Read on to learn more about how they all individually work, and how they work together.
General synopsis of sound deadening materials & how they work
Please note that this is just a quick explanation that leaves out much detail for the sake of keeping things quick and simple. The more detailed "deep dive" section below covers EVERYTHING and should be read if you want to understand everything about these materials, how they work, and how they are used.
Constrained Layer Damper (CLD) materials, like ResoNix CLD Squares or ResoNix Mega CLD Squares, reduce structural resonance of panels. They consist of a visco-elastic butyl rubber layer bonded to an aluminum constraining layer. When panels that have a CLD applied flex (resonate), the butyl stretches and resists with shear forces due to the visco-elasticity of the butyl combined with the reference of the aluminum’s stiffness, converting mechanical energy into heat. Applied to metal and plastic panels such as doors, trunk lids, floors, various trim panels, and roofs, CLD is typically the first sound treatment used.
In car audio, CLD prevents rattling and resonance from powerful speakers, reducing distortion and improving sound quality. During regular driving, it reduces noise from wind, turbulence, and mechanical vibrations, lowering the overall noise floor. Larger, continuous pieces are more effective than multiple small ones, and only one layer is necessary for effective damping.
CLD does not block external noise but reduces the resonance of the panels it covers. It should not be heated during installation, and surfaces must be clean for proper adhesion. High-quality CLD resists melting and maintains performance at high temperatures; low-quality products may melt, off-gas, and have reduced damping effectiveness. Avoid products that come in rolls or have embossed patterns, as these can compromise the material’s performance.
Specifically designed to lower structure-borne vibrations, CLD will not block road noise or prevent panel-on-panel vibration by itself. Roofing products from big box stores are unsuitable substitutes, lacking the necessary visco-elastic properties and potentially being toxic. Investing in high-quality CLD materials from reputable companies ensures better performance and longevity, avoiding issues associated with cheaper alternatives.
In summary, properly applied CLD reduces vehicle panel resonance, improving audio quality and reducing noise generated by the vehicle itself. Use single layers of large pieces on clean surfaces without heating the material. High-quality CLD offers superior performance and durability, making it a worthwhile investment over lower-quality options that may fail under automotive conditions.
Vibration Decouplers and Sound Deadening Foams prevent rattles between vehicle panels by cushioning them and providing an air gap for noise barriers. Modern decouplers like ResoNix Fiber Mat use fibrous materials that can outperform traditional closed-cell foams (CCF). Closed Cell Foams, such as ResoNix CCF Decoupler still are a better option for tight tolerance areas though. Ideal decouplers are thick enough to fill gaps but compressible to avoid hindering reassembly; key properties are low Compression Deflection and Compression Set, measured by ASTM D 1056. High-compliance materials like ResoNix CCF Decoupler 7S (maximum 1 psi) are preferable over stiffer options that are found in every other aftermarket automotive sound deadening foams (which are typically made out of cheap ensolite foams), or god forbid gym mats which some inexperienced/uneducated hobbyists are occasionally suggesting, which are unsuitable due to high compression deflection.
Installation is simple: cut the decoupler to size and apply it with peel-and-stick adhesive, preferably attaching it to the trim panel for better serviceability. Use ResoNix Fiber Mat for larger areas and smaller CCF Decouplers for tight spaces. Avoid open-cell foams or materials like shredded denim, as they retain moisture and can cause mold. Also, be cautious of products/companies that falsely claim that their foam sound deadening material blocks or absorbs noise; closed-cell foam does not significantly perform these functions due to their lightweight and closed-cell nature.
In summary, selecting appropriate high-compliance decoupling materials and proper installation effectively eliminate rattles and enhance the vehicle’s acoustic environment without relying on misleading claims about noise absorption or blocking capabilities.
Automotive sound absorbers are essential materials used to reduce unwanted noises inside a vehicle, such as wind, engine, exhaust, and tire sounds. They function by converting airborne sound energy into mechanical and thermal energy, thereby lowering the overall noise level within the cabin. This process involves materials that absorb sound waves through microscopic deformation or friction as the sound passes through them.
Sound absorbers typically utilize fibrous or porous materials. Fibrous materials absorb sound by allowing sound waves to enter and cause the fibers to vibrate and deform at a microscopic level, dissipating the sound energy as heat. Porous materials have interconnected pores that let sound waves enter and create friction, which also converts sound energy into heat. The effectiveness of a sound absorber depends on several factors:
- Frequency of Sound Waves: Higher frequencies with shorter wavelengths are easier to absorb, while lower frequencies with longer wavelengths require thicker materials for effective absorption.
- Thickness of the Material: Thicker absorbers can handle lower frequencies more effectively because they provide more material for the sound waves to interact with.
- Material Properties: The density and absorption coefficients of the material influence how well it absorbs different frequencies.
Sound absorbers are used in various parts of a vehicle to address specific noise issues. They are commonly installed behind door panels to reduce external noises like traffic and wind, enhancing the audio quality inside the cabin. Applying absorbers to the roof area minimizes rain and wind noise, improving comfort during adverse weather conditions. Floors and wheel wells are close to sources of tire and road noise; adding absorbers here can significantly reduce these sounds. Pillars and quarter panels, which can transmit vibrations and noise, also benefit from the application of sound absorbers.
The benefits of using sound absorbers in vehicles are numerous. They are generally cost-effective compared to other noise reduction methods like installing noise barriers. Their ease of installation is another advantage; sound absorbers do not require perfect coverage or precise installation techniques. Any amount added contributes to noise reduction, making them accessible for do-it-yourself applications. By reducing unwanted noises, sound absorbers enhance the overall sound quality of the vehicle’s audio system and increase passenger comfort.
When selecting sound absorbers, it is important to choose materials suitable for automotive environments. Materials should be resistant to heat and moisture and should not promote mold or mildew growth. Avoid using generic acoustic foams, shredded denim, or jute, as these can retain moisture and degrade over time. Proper thickness should be selected based on the frequencies you aim to absorb—thicker materials for low-frequency noises and thinner ones for high-frequency sounds.
Installation should be done carefully to avoid over-compressing the material, as compression reduces its ability to absorb sound. Sound absorbers should be installed in a way that allows them to remain as uncompressed as possible. Placement is also important; while absorbers can be effective in many areas, they should be kept away from moving parts or mechanisms to prevent interference or damage.
In summary, automotive sound absorbers are an effective solution for reducing airborne noise inside vehicles. By understanding how they work and strategically placing them in areas where noise reduction is most needed, vehicle owners can enhance the driving experience by creating a quieter cabin environment. Selecting the right materials and installing them properly ensures maximum effectiveness while avoiding issues like mold growth or reduced efficiency due to over-compression.
Noise barriers, such as ResoNix Barrier, are materials installed in vehicles to block external sounds like tire, engine, exhaust, and wind noise from entering the cabin. They work by providing a heavy, non-resonant mass that reflects or deflects acoustic energy away from the interior space. The effectiveness of a noise barrier depends on its weight and inertness—the heavier and more non-resonant the material, the better it blocks sound.
Unlike sound absorbers, which convert sound energy into heat, noise barriers prevent sound waves from passing through by reflecting them elsewhere. Due to this, for optimal performance, noise barriers require complete coverage without gaps; even small openings allow sound to bypass the barrier, greatly reducing effectiveness. This is similar to how a partially closed window doesn’t significantly reduce outside noise.
Proper decoupling is crucial. The noise barrier must be isolated from the vehicle’s body and interior panels using a soft material like closed-cell foam. This prevents vibrations from being transferred to the barrier, which would cause it to resonate and diminish its sound-blocking properties.
Materials like Mass Loaded Vinyl (MLV) are commonly used but can be thick and difficult to install in modern vehicles with complex shapes, while ResoNix Barrier is much thinner, moldable, and much easier to work with while also being more effective than traditional MLV-based products. Noise barriers are most effective in areas where full coverage is feasible, such as the vehicle’s floor. Treating only isolated areas is usually ineffective because sound will find paths through untreated sections, but there are some rare scenarios where it can work.
In summary, when properly installed with full coverage and decoupling, noise barriers effectively block external noises from entering the vehicle’s cabin, significantly enhancing the driving experience.
ResoNix CCF Strips
ResoNix CCF Strips are a product that is used to couple your car speakers to the panel and grille that reside in front of them. The purpose is to direct all acoustic energy created by the speaker through the grille into the listening space instead of losing acoustic energy to the open areas behind your door panels and dash panels. This has two main benefits. First, we gain more output since we can force all acoustic energy into the listening space. The second is less resonance and distortion created by the panels themselves since the acoustic energy is no longer getting trapped behind and exciting the panel. They also provide minor stability for the panel they are coupling to. Long story short, install these around your speakers, especially midbass speakers for a free lunch of more volume, lower distortion, and fewer rattles and resonance.
ResoNix Butyl Rope
ResoNix Butyl Rope is precisely what it sounds like. It is a 3/8″ diameter butyl rope used for various sound treatments in your vehicle. Two popular uses include stuffing it between the crash bar and outer door skin to help further stabilize the outer skin, and using it in small areas where two layers of a panel may overlap and introduce the possibility of them rattling together. It can also be used on the base of clips to prevent them from rattling. See the product page for installation examples.
OEM Audi/VW Interior Non-Woven Tape
This “cloth tape” is commonly used in installations for various reasons. But for sound treatment purposes, you can use it to bundle wire harnesses that reside behind panels to prevent them from rattling and buzzing, or you can use them on clips and/or clip openings to help reduce their vibrations. The difference between the tape we sell and the popular option, ours will not turn sticky and gooey over time. See the product page for installation examples.
Deep dive of sound deadening materials & how they work
What is a Constrained Layer Damper Sound Deadener? How does it work?
Constrained Layer Damper (CLD) materials, like ResoNix CLD Squares or ResoNix Mega CLD Squares, reduce structural resonance of panels. They consist of a visco-elastic butyl rubber layer bonded to an aluminum constraining layer. When panels that have a CLD applied flex (resonate), the butyl stretches and resists with shear forces due to the visco-elasticity of the butyl combined with the reference of the aluminum’s stiffness, converting mechanical energy into heat. Applied to metal and plastic panels such as doors, trunk lids, floors, various trim panels, and roofs, CLD is typically the first sound treatment used.
How a Constrained Layer Damper works is for the most part, pretty simple. When the panel that it’s adhered to bends and flexes (resonance), and subsequently, so does the CLD sound deadening material. The aluminum constraining layer provides a stiff reference across the top surface of the visco-elastic butyl. The radius differences that form between the panel that the CLD is adhered to, and the top aluminum constraining layer causes the butyl to stretch, resist, and want to snap back into position. These shear forces generated by the viscoelastic butyl is what “Constrains” the panel to prevent flexing. This process converts the mechanical energy of the panel into minuscule amounts of heat. This conversion of energy is the reduction of resonance that we are looking for.
The stiffer the aluminum constraining layer, the more of a “hold” it has on the butyl. The better the butyl formula, the better it constrains the panel against the aluminum constraining layer.
The goal when installing this product onto a panel is it will ideally go from sounding like a hollow drum when knocking on it to sounding something like a wooden table top.
Again, the point of a CLD is to lower the resonance of the panel or surface it is adhered to. It does this by using the natural shear resistance of the visco-elastic butyl stretching and wanting to snap back into place. Note how I said it “lowers resonance”, not “lowers the panels resonant frequency”. They are two different things, and a proper Constrained Layer Damper works by damping the resonance, not by lowering its resonance frequency, although the latter is usually a side effect of the added mass of the CLD on the panel. See Figure 1 below.

When and where do we use Constrained Layer Damper Sound Deadeners?
Constrained Layer Damper Sound Deadening Materials are typically the first product to consider, and the first to apply before any other major type of sound treatment product (besides small pieces of butyl rope for tight tolerance areas, more on this later in the article), and they are installed directly onto metal and plastic panels of a vehicle, and are even used in marine, industrial, commercial, residential, aviation, and aerospace applications. In automotive applications, panels typically treated with CLD include, but are not limited to the doors, trunk lid, floor, quarter panels, firewall, pillars, wheel wells, fender liners, rear deck, roof, various interior trim panels, etc. Essentially anything and anywhere that can resonate.
Why do we use Constrained Layer Damper Sound Deadeners In A Vehicle?
Why is this product type an important and arguably the most essential step in the process? Let’s break it down in two ways. Car audio installations first, and regular driving installations after.
Constrained Layer Damper Sound Deadener Use In Car Audio
In car audio, we add larger, more powerful speakers with a lot of power being applied to them to the vehicle. With these more powerful speakers, there is a lot more acoustic energy being introduced into the cabin of the vehicle. The most notable areas for this type of product in a car audio installation would be the door panels, door skins (outer door skin being more important than the inner door skin), trunk lids/hatches, roofs, rear decks and their trim panels, floors, various interior plastic trim panels that will resonate, and anywhere else in a vehicle that is susceptible to resonance. The doors (door panels included) are usually the worst offenders, so let’s focus on those for the example. When you have a speaker mounted to a door, the front wave of that speaker, when installed correctly, is only partially radiated directly forward through the door panel grille and into the cabin. The rest of that front wave doesn’t make it out of that door grille due to the speaker’s dispersion pattern, and that energy must go somewhere.
This acoustic energy will end up between the door panel and the inner door skin, and that acoustic energy will transfer into both the door panel and inner skin and be converted into mechanical energy. That mechanical energy does two things. First, it will rattle the hell out of your door. I don’t think I need to tell you why this is undesirable. And second, it will cause resonance.
Resonance will be heard as distortion and will cause the system to sound muddy and lack dynamics and impact. Applying a constrained layer damper to the door panel and inner door skin will constrain those panels, and the mechanical energy of the panels moving will then be absorbed and converted into minuscule amounts of heat by the CLD. It’s a pretty simple concept. Another reminder, while they do add mass, which will help lower the resonant frequency of the panel, mass-loading is NOT the main reason why or how a CLD works. Constraining the panel and converting mechanical energy into heat, therefore lowering resonance is how they work.
Constrained Layer Damper Sound Deadening Use To Lower Noise While Driving
Now, how will a Constrained Layer Damper help with lowering the noise heard inside of a vehicle in everyday driving? Simple. It’s the same concept. When driving, wind/turbulence, and mechanical energy transferred from the tires/suspension will cause the same panels mentioned before to move, vibrate, and resonate. This will be heard as resonance, drone, and general automotive “noise.” Think of the panel acting like it’s a speaker cone, moving in and out to convert mechanical energy (movement) into acoustical energy. Applying a Constrained Layer Damper to these resonating panels will prevent that resonance and lower the overall noise floor that is being generated by the cars’ body itself while driving.
How Much Sound Deadener Should I Use?
Now, something to note. Every vehicle is different, and every vehicle will behave differently. Each vehicle and each individuals end goal will require a different amount of CLD and sometimes a different approach to the overall game plan of applying a CLD. This can come down to the locations it’s placed, how much is needed in certain areas, etc. I find that economy cars benefit more from these products than rugged premium and luxury cars. When we work on something like a Toyota or Honda, there is a more noticeable difference when applying a CLD vs. applying CLD to, say, a Mercedes. This is because these higher-end vehicles have much more robust and sturdier parts. That said, I have yet to find a vehicle that I have worked on that wouldn’t benefit from having CLD applied, even considering diminishing returns and time spent on the project. This goes from 80’s Toyotas, all the way up to modern Rolls Royce models. Every vehicle can benefit from a Constrained Layer Damper
What Surfaces Can CLD Be Applied To?
Constrained Layer Dampers can be applied to metal, plastic, wood, etc. Please make sure the substrate you are applying it to is clean and free of dirt, oil, and grease. I prefer to use isopropyl alcohol to clean panels before application.
Heating CLD Sound Deadening Materials – DON’T DO IT
Do not heat the Constrained Layer Damper. Too much heat can damage the butyl layer and cause performance and reliability loss. My rule of thumb to customers with this is if it is too cold to work with, it’s too cold for you to work on your car. Go inside and make yourself some hot chocolate, preferably with marshmallows.
How Much Coverage Is Required When Using a Constrained Layer Damper?
This is a much-debated topic by enthusiasts, and as with any other topic often debated by enthusiasts, it is greatly misunderstood. Some people say the rule of thumb is a minimum of 25% coverage, while others say anything more than 25% coverage is a waste of time and materials. Others say 50% coverage is where diminishing returns kick in. Others swear that anything less than 100% coverage is wasting your time. So what gives? Who’s right? Buckle up……. NO ONE. That’s right. A Constrained Layer Damper doesn’t work based on the percentage of the area covered. Constrained Layer Dampers only constrain the parts of the panels that they cover. Think of a CLD sound deadener as a “support” for the panel it is adhered to. Just because you support one area, doesn’t mean the other areas are supported. What this means is there is no magic number for the percentage of coverage before you hit a point where diminishing returns kicks in. This purely comes down to a couple of things.
- Your particular personal goal for the amount of resonance you want to reduce in your application.
- The size of the panel in question.
Part one, obviously everyone’s goals are different. One person might be after something simple where they want to make sure that their doors don’t audibly resonate while driving down the road, or to prevent audible distortion when upgrading speakers in their door. The next guy very well might be doing a full soundproofing installation, or a competition-level car audio system where every bit of distortion reduced counts. For one person to say anothers application, goals, and willingness to reach for a given level of performance is “too much”… that’s silly. No one should be gatekeeping a level of desired performance.
Part two, this is where things get tricky. I will do my best to make this easy to understand. Some panels are small enough or rigid enough not to require CLD treatment. To not need CLD treatment would require that panel to be small enough to where its weight and stiffness are at a point where its resonant frequency is well above a critical frequency range, and it doesn’t have any ringing. Large, flat panels, on the other hand, will be very resonant and will ring since there is no rigidity, and the resonance frequency is in a critical frequency range. When you treat a large panel and leave areas unrelated, you are essentially creating other “smaller” untreated panels. Are these new “panels” small enough to where they do not resonate, or at least are pushed outside of the scope of the given application and the user’s particular goals? If so, they can be left untreated. But, if that left over area can act as an individual panel that is large enough to resonate at a level that is unacceptable for the goals at hand, then it needs to be treated as such.
Let’s provide an example.
Let’s take two flat panels on a vehicle, say the outer door skin and the roof skin of a large SUV. For the sake of keeping this simple and easy to follow, let’s say the outer door skin is a perfect 10 square feet, and the roof skin is a perfect 100 square feet. Now let’s treat these panels each with 25% coverage. This leaves the outer door skin with a leftover 7.5 Square feet that are untreated and “unsupported,” and it leaves the roof skin with 75 square feet that are untreated and “unsupported.” If you saw any general areas that had about 7.5 square feet that could be treated for resonance control, even if broken up into smaller sections, you’d probably treat it. But if you saw an area with 75 square feet of resonant panels, you’d very well immediately think that this area needs to be treated. Remember, the product itself works as a system, but all of the individual pieces work on their own. The panel has no idea if it has 25% coverage or 85% coverage. But the areas that are left untreated are left to act as their own, resonant panel.
To summarize all of this, resonance is a very complex thing, and every panel size, shape, material, and its given environment will change its behavior. To say you only need X amount to hit diminishing returns is grossly misleading, especially when we consider that everyone’s goals, tolerance, and budgets are different. And that most people chit chatting on the internet do not have a basic understanding of how it works.

Applying Sound Deadening Material To The Vehicle
When applying, make sure you roll it down after sticking it on. You do not need, nor want to press down very hard. You want to use just enough pressure to ensure the whole piece has contact with the panel on a relatively microscopic level. Using too much force can deform the butyl and stretch/weaken the aluminum which will cause performance loss. That brings me to another point: flat pieces that haven’t been rolled, creased, deformed, etc., will have noticeably better performance than their deformed, beaten, and mangled counterparts. This performance drop also goes for products that already come in rolls. CLD products are manufactured in flat sheets. Rolling them up reduces their performance through the deformation, therefore degradation and weakening, of the butyl and aluminum layers before their product even leaves their warehouse.
What About Sound Deadener Products That Come With “Rolling Pressure Indication Patterns”
The very same concept goes for products that come in stamped patterns. These patterns act as a relief cut of sorts which allows the product to flex with the panel more freely. Yes, I know. They say right on their webpage and in their marketing materials that these patterns are meant to be used by the user to let you know how much pressure you need to apply while rolling it on. This is simply false. The only things that these patterns accomplish is giving them a nonsense marketing point as stated that most of the general public will believe, and makes their product look “cool” and eye catching. It’s marketing at the expense of performance, and is a process that adds to the overall cost, which means you are paying extra for the product to be degraded.
Quick Tip for CLD Installation
A quick note about installations where you intend to use as little as possible to achieve a given goal, it is best to place the CLD in the middle of the panel, and work your way out, as seen in the Gif below. If you are doing this method in a sound system installation, I would also put a focus on the area directly near/behind the speaker. See the GIF below as a generalized example.

How Many Layers Of CLD Should I Use?
True Constrained Layer Dampers only really benefit from 1 layer. Many people on the internet talk about using 2, or sometimes even more layers. Frankly, these guys are wasting their time and materials. To re-cap how a constrained layer damper works, the shear forces generated in the butyl rubber when in between a flexing panel and the constraining layer cause the resistance of panel flex. The aluminum constraining layer provides a stiff reference for the butyl to snap to. Keeping this in mind, a second layer only treats the flex of the first layers’ aluminum constraining layer. This isn’t very beneficial.
Now, notice how I started that last paragraph saying “TRUE Constrained Layer Dampers”? This is because there are CLD products on the market that perform so poorly as an actual constrained layer damper, that their minimal stiffness, and added weight are their main source of panel resonance reduction. For these types of products, yes, more layers will be beneficial, but still will not be as effective as a high quality constrained layer damper, even with these multiple layers. Don’t believe me? Click this link to see testing results that show as such (Coming soon, will write this in once I finish this article)
Do Constrained Layer Damper Sound Deadeners Block Noise?
One more thing about Constrained Layer Dampers, they do NOT block noise. That is right. Nearly EVERY other sound deadener company will claim this about their CLD product, and many hobbyist automotive forum members will say this, but it is just not true. A good Constrained Layer Damper Sound Deadener can most definitely lower the noise floor of a vehicle since it will reduce the amount of noise generated by the resonance of panels, but it will NOT block outside noise from entering the vehicle. Any company claiming this about their product is lying to you. Why it doesn’t block noise is simple. Noise from the outside of the car is transferred through the body of the car, and again radiated out as the same sound. All it is, is energy transfer through molecules. The CLD being coupled to these panels will just transfer the energy as well. While it will technically lower the transfer, it won’t be by anything measurable. This is a totally separate behavior that has nothing to do with the CLD constraining the panel it is adhered to in order to reduce mechanical resonance.
Now, notice how I started that last paragraph saying “TRUE Constrained Layer Dampers”? This is because there are CLD products on the market that perform so poorly as an actual constrained layer damper, that their minimal stiffness, and added weight are their main source of panel resonance reduction. For these types of products, yes, more layers will be beneficial, but still will not be as effective as a high quality constrained layer damper, even with these multiple layers. Don’t believe me? Click this link to see testing results that show as such (Coming soon, will write this in once I finish this article)
What About The Heat Resistance & Long-Term Reliability Of Lower-Quality Constrained Layer Damper Products?
Lower-quality sound deadener products can indeed be prone to melting when installed in a car, primarily due to their poor heat resistance, poor adhesion, and poor longevity. Here’s a detailed explanation of why this happens and the implications:
- Material Composition: Lower-quality sound deadeners often use inferior materials in their composition. For example, instead of using high-quality butyl rubber, they might use asphalt-based compounds or other cheap filler materials that give the product a lower melting point. When exposed to high temperatures—like those found in automotive environments, especially near the roof, doors, engine bay, or exhaust system, these materials can soften and eventually melt.
- Heat Exposure: Cars can get extremely hot, especially under the hood, roof, doors, quarter panels, trunk lids, or on the floor panels above the exhaust. Temperatures can easily exceed the melting point of the materials used in low-quality sound deadening materials. This is especially true in warmer climates or during the summer months. High-quality sound deadeners are designed to withstand these temperatures without degrading. US-made sound deadening materials also typically follow very strict standards set by Tier-1 OEM’s such as Ford, which include heat resistance requirements. At ResoNix, we use the Ford WSS-M5G58-A2 standards and practices for our CLD Sound Deadener materials.
- Consequences of Melting:
When a sound deadener melts, it can lead to several issues: Reduced Effectiveness: The primary function of a sound deadener is to reduce noise and vibration. Melting can cause it to lose its structural integrity, significantly diminishing its effectiveness. Please Note: CLD sound deadeners become ineffective long before they start to sag or drip. Said product stopped being able to effectively reduce panel resonance much lower in temperature than when it started to sag or drip. Messy Cleanup: Melted material can seep into the car’s interior spaces, creating a sticky and entangled mess that’s extremely difficult to remove and will most likely permanently stain or damage the interior. Odor: Melting can release unpleasant odors as the chemicals in the sound deadener decompose. This is usually due to the commonality that lower quality products use lower quality materials and will not only melt lower in temperature, but will also off gas as they heat up. Potential Damage: The melted material might damage other parts of the car’s interior. As mentioned earlier, these types of materials are not really possible to fully remove and will almost always permanently stain or even fully contaminate fabrics such as carpet, cloth, and headliner materials. Sound Damping Performance At Various Temperatures Example Below, the standardized SAE-J1637 Composite Loss Factor testing results for the ResoNix CLD Squares are presented. This universally recognized testing method evaluates the Composite Loss Factor (resonance damping performance) across different temperatures. It is evident from the results that performance diminishes as temperatures increase, not just with ResoNix products, but with any CLD product. The tests conducted are significantly before the point in temperature where any high-quality CLD product would begin to melt. The point of this paragraph, melting is not the only drawback of cheap, low-performing products. Their damping performance drastically declines at higher temperatures, temperatures that your car WILL see, to the extent that they are virtually ineffective. The second image illustrates the same SAE-J1637 Composite Loss Factor testing conducted at the same facility, but this time for the ResoNix Mega CLD Squares. Although they utilize the same butyl formula and thickness as our original ResoNix CLD Squares, they feature a thicker and significantly stiffer aluminum constraining layer. This modification is evident in its performance—while peak performance is clearly higher, there’s a very noticeable improvement in performance at higher temperatures. Should the opportunity arise (i.e., if we have a surplus of funds great enough to pay for third-party standardized testing of various products), we plan to run tests on other products at these elevated temperatures to demonstrate this effect. For the time being, our focus is on showcasing how a high-performing product like ours fares under various temperature conditions. - Avoidance: To avoid these issues, it’s advisable to invest in higher-quality sound deadening products. Look for products that specify high temperature resistance and are made from butyl rubber or other high-quality materials known for their durability and heat resistance. It’s also wise to check reviews and recommendations from automotive forums or trusted sources before making a purchase. Something I have personally noticed and somewhat touched on earlier… Pretty much every product that has a history of melting is one that is sourced from overseas. I obviously have seen first hand what goes behind making these products, and the standards between what is made here in the US and select European countries is far superior in not only resonance damping performance, but temperature resistance and longevity as well, as the factories in these locations usually abide by the aforementioned Tier-1 standards since they are the largest customers. No Tier-1 Automotive Manufacturer is using products found on Amazon or made overseas.
- Installation Considerations: Proper installation is key. Even high-quality products can fail if installed incorrectly. It’s important to follow the manufacturer’s instructions closely and ensure that the product is not applied too close to heat sources without adequate protection or heat shielding. In conclusion, while opting for cheaper sound deadening products might seem like a good way to save money upfront, the potential for melting and the associated problems can lead to more expenses and headaches down the line. Investing in high-quality materials and proper installation will provide better, longer-lasting results and avoid the pitfalls of lower-quality alternatives.

Key Notes for Constrained Layer Damper Sound Deadening Materials
CLD is only for lowering structure-borne vibration, aka resonance.
CLD does *not* block road noise. While it does help lower the overall noise floor by reducing structure-borne vibration, you should use a noise barrier for blocking outside noise, or a sound absorber for absorbing outside noise.
CLD will most likely not lower panel-on-panel vibration if used alone. While panel rattling is a symptom of two panels resonating, these are two different things. (see decoupling below).
Using multiple layers of CLD Sound Deadening Material is a waste of time and money. Just use one layer of the best product you can get your hands on. It will be better, cheaper, and require less time and effort in the long run.
Many smaller pieces of CLD are not as effective as a single piece of CLD with a similar overall size. Our typical smallest size piece we bother with (for resonance damping purposes) is at least 8 square inches. Small pieces are only used by us to prevent small panels and clips from buzzing.
Roofing products from big box stores are not a suitable solution and do not work at all. This is because they do not feature a viscoelastic layer. Instead, they use asphalt (which is toxic), which provides none of the required viscoelasticity to the adhering layer. The constraining layers are also usually made out of very thin and weak aluminized mylar, not actual aluminum. Just becuase it looks like a duck, doesn't mean it's a duck.
Using cheap CLD Sound Deadening products will always cost more to hit a desired performance target. They also take more time and effort to achieve said performance target, and many times will still not yield the same result of a better product that is carefully and properly installed. If you care even a little bit about performance, buy your CLD from a true sound deadening company, not a cash-grabbing amazon vendor.
Beware of products that come in rolls or as a folded mat, or have an embossed pattern. Bending and shaping the material compromises the viscoelastic properties of the butyl layer and weakens the aluminum layer, which lowers the products' performance before it even makes it into the box they ship it in.
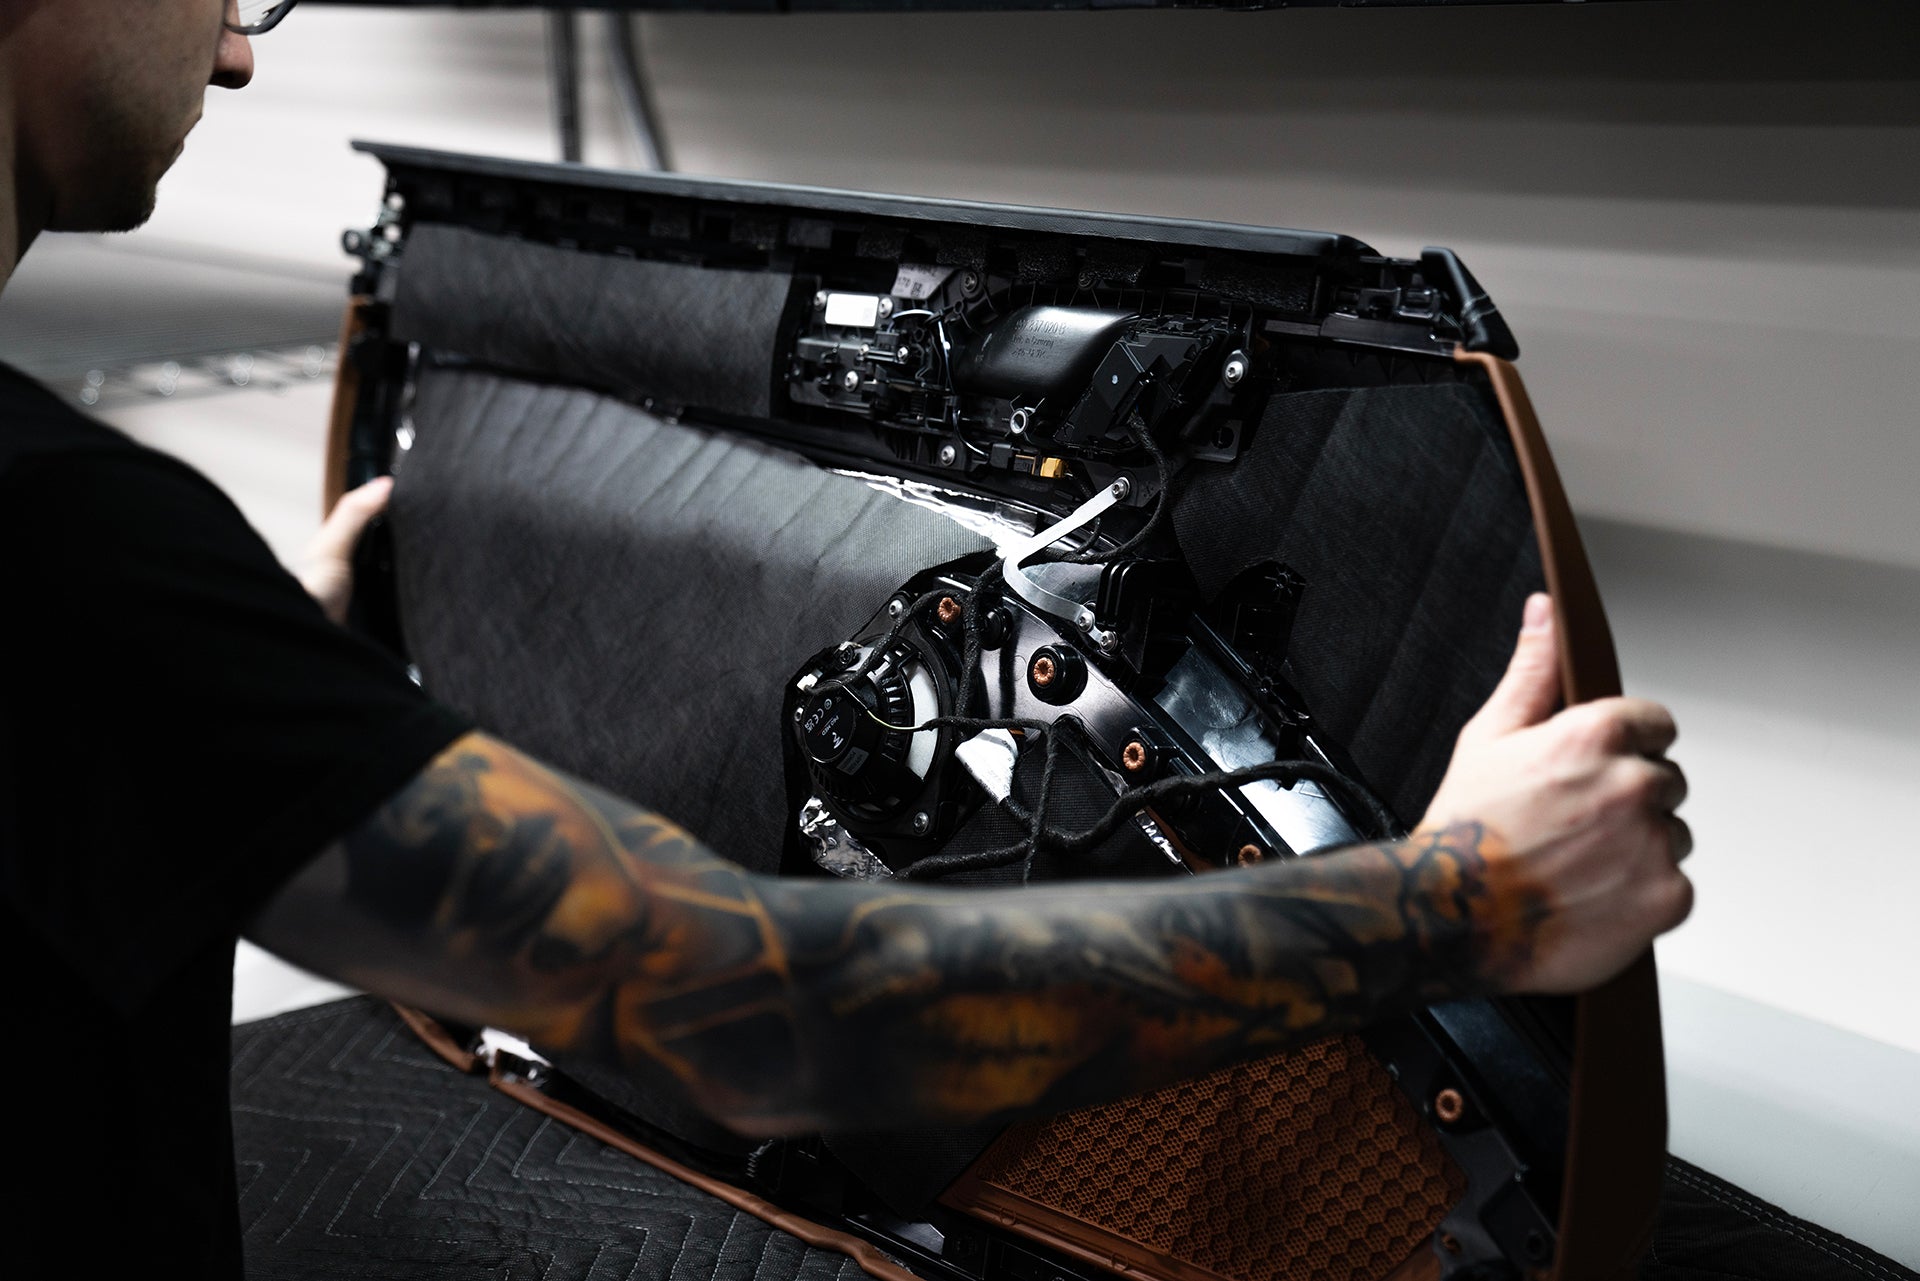
Installation examples
These photos illustrate the correct methods for applying a Constrained Layer Damper in vehicles.


Examples Of What Happens When Using A Poor Performing Sound Deadening Material


What Are Vibration Decouplers & Sound Deadening Foams? What Makes A Good One?
Vibration Decouplers and sound deadening foams are the second product category that will get installed in almost every traditional automotive sound treatment application. These products were typically a closed-cell sound deadening foam, but better, more modern products utilize a fibrous mat material. These are used to accomplish two different goals. First, it acts as a high-compliance cushion between two panels that could otherwise vibrate together and cause annoying buzzes and rattle sounds. Second, to act as an air gap and isolator for a Noise Barrier, but we will touch on that second part later in the Noise Barrier section of this article. Sound deadening foams are almost always a Closed Cell Foam, aka a “CCF,” but are sometimes, as in our case with our Fiber Mat products, a fibrous, non-woven mat material. These types of products are usually an even better performing vibration decoupler than sound deadening foams. You can also use something like ResoNix Butyl Rope as a decoupler for very tight and small areas to prevent buzzing and vibration of specific areas. See the picture gallery below for examples.
The vibration decouplers compliance and thickness will separate an ideal foam from a not-so-ideal foam in different situations. I prefer to use a sound deadening foam or Fiber Mat that’s as thick as possible without compromising the integrity of the re-installation of the panels, while also having a high compliance, but without being too weak like the open-cell foam that is used to absorb sound in rooms. To go into more detail, the properties that are used to pick an appropriate decoupling material for our uses are Compression Deflection and Compression Set. Compression Deflection is a measure of the resistance of a material to force applied to a known surface area over a controlled distance. The lower the compression deflection, the softer the foam is. Compression Set is the amount of permanent deformation that occurs when a material is compressed to a specific deformation, for a specified time, at a specific temperature. The standard testing for these is ASTM D 1056.
Why Do We Use Sound Deadening Foams & Other Vibration Decouplers?
These are very simple products. As mentioned above, a Vibration Decoupler’s/sound deadening foam’s typical use case is to provide a cushion between two panels to prevent them from rattling against each other. What makes one decoupler more ideal than another? Well, in my experience, being thick enough to touch as much of both panels as possible, yet still have enough compliance and is soft enough to compress down and not cause issues when re-installing these panels. Having a specific Compression Set specification (spec that tells you how well it holds its shape once compressed) can also help provide a Decoupler that can compress a lot of itself down but still provide some resistance for the panel instead of acting like a soft sponge.
Heads Up, Not All Materials Are Suitable To Be Used In A Vehicle As A Sound Deadening Decoupling Foam
Speaking of sponges, we do not want to use open-cell foam as a Decoupler. Generic open-cell foam products will hold and retain moisture and cause mold and mildew to grow in your car. I see some people who try using polyurethane foam (ordinary acoustic foam) for this in an effort to “beat the system” and save money. This generic acoustic foam, shredded denim, jute, etc., will all hold moisture and cause issues.
Another popular product among those that want to save money is using gym and yoga mats. The problem here is that the foams that these are made of defeat the purpose of a decoupler. They are too hard and stiff to decouple properly, will not effectively reduce panel vibration, and will certainly not provide correct isolation and an air gap for a Noise Barrier. A popular choice in these products that budget-conscious hobbyists use has the specifications for the foam that it’s comprised of listed on the website. It has a Compression Deflection (stiffness) spec of 18-26psi. This means it takes between at least 18 and up to 26 pounds per square inch to compress the foam by 25%. That is exceptionally stiff for our uses. Our CCF decoupler 7, for comparison, has a Compression Deflection spec of 1psi maximum, so it is 18+ times less stiff than a popular DIY option. As with all of our products, buy once, cry once.
Installing A Vibration Decoupler In A Vehicle
How to install a Decoupler is simple. Most of these products, ours included, feature a peel-and-stick adhesive; you can cut it to shape and stick it where needed. Our ResoNix Fiber Mat Black Edition products will be the most used decouplers in most installations. They will be used in large areas that can accommodate their size and thickness, such as behind door panels, rear deck trim, A/B/C-Pillar trim, roofs/headliners, rear walls on trucks, trunk lid trim, rear hatch trim, etc. Our CCF Decoupler 7S, CCF Decoupler 3S, and CCF Decoupler 3F will typically be used on smaller plastic trim, or on the metal where plastic trim will touch that has tighter tolerances where our Fiber Mat products are too thick and/or cumbersome to use. Anywhere a trim panel can vibrate against another panel, this is where you want to apply a decoupler. On larger panel decoupler installations, I usually prefer to adhere the decoupler directly to the trim panel that is getting installed into the car instead of directly on the vehicle itself. I find this works better and also has much better serviceability and longevity.
Misconceptions About Sound Deadening Foam
What closed-cell foam decouplers do not do, even though many other companies claim this, is reduce, absorb, and/or block noise. It does NONE of those in any meaningful way, shape, or form. Beware of companies that advertise their CCF products as being able to do this. They are lying and preying on the ignorant. A quick summary of why they do not block or absorb noise is that you need a lot of mass to block noise, and you need open cells or a fibrous mat to absorb sound. A lightweight closed-cell product has no chance of blocking noise or absorbing noise. Also, beware of products from companies that claim that their decouplers block heat or are excellent thermal insulators. While many thermal insulation products are comprised of a closed-cell foam construction, it is usually a VERY different type of closed-cell foam that is used for decoupling. The foams that are used for decoupling are generally not great thermal insulators.
We provide several decoupling solutions to meet diverse needs. Our CCF Decoupler series is perfect for smaller, intricate applications, while our Fiber Mat 25 and Fiber Mat 45 excel in larger areas, offering superior decoupling and added absorption benefits. Choose based on your specific requirements for optimal results.
Key Notes For Sound Deadening Foams & Other Vibration Decouplers
It has two primary purposes; to prevent panels from vibrating against each other and to provide an air gap for a noise barrier (more on this below).
Closed Cell Foam based decouplers will not reduce road noise by any amount, period, and should not be used to attempt to block outside noise from entering the cabin. Fiber Mat style decouplers on the other hand, will absorb noise that tries to pass through. More on this below.
The ideal decoupler is very compressible but still has a firmness that can still provide some stability between panels.
If a closed cell foam is being advertised as a sound absorber, they are lying to you. If a foam is being advertised to block noise, they are lying to you.
Sound Deadening Foam & Vibration Decoupler Examples
These photos illustrate the correct methods for applying Sound Deadening Foam & Vibration Decouplers in vehicles.


What Does An Automotive Sound Absorber Do? How Do They Work?
Utilizing Automotive Sound Absorbers is next and third on the list of sound treatment products to be installed into a vehicle. Absorption is pretty simple for the most part. The process of acoustic absorption converts airborne noise into another form of energy (mechanical and thermal), therefore reducing the overall noise level in the vehicle. Open-cell foams or fibrous non-woven materials are two typical types of acoustical absorption products. Something to keep in mind before reading the Noise Barrier portion of this article, sound absorbers work by lowering the amount of sound energy that exists in the space. More on this later.
In a vehicle, it only makes sense to use a soft, fibrous or porous absorber, so we will stick with how those work. The fibrous materials absorb sound by deforming randomly at a microscopic level as sound passes through. The porous materials absorb sound by creating friction against sound waves as they pass through. How much sound is absorbed comes down to a few things.
- The frequency of the soundwave that you are trying to absorb.
- The smaller the wavelength (higher in frequency), the easier it is to absorb.
- The thickness of the absorption material - The thicker it is, the longer the wavelengths (lower in frequency) you can absorb effectively.
- And where it gets more complicated - Materials. Different materials behave differently and have different absorption coefficients. (I may add a section on this in the future)
- The overall thickness, density, size, weight, and more, of the fibers or open cells, contribute to what frequencies are absorbed, and how effectively they are absorbed. As mentioned, higher frequencies are easier to absorb than low frequencies and arent too difficult to deal with in a vehicle. However, some modern materials can effectively absorb relatively low frequencies in a vehicle, such as our ResoNix Fiber Mat Black Edition, as well as our ResoNix Guardian and ResoNix Lockout. Both have two different areas and reasons for application, so we will break them down individually. But first, why do we use sound absorbers in a vehicle?
Why Do We Use Sound Absorbers In A Vehicle?
Using sound absorbers to tackle airborne noise problems in vehicles is both a straightforward and efficient method. These products are less expensive than alternatives like noise barriers and offer a clear advantage for anyone looking to improve their vehicle’s sound environment without a hefty investment. This cost-effectiveness makes sound absorbers a perfect choice for most, striking the perfect balance between performance, affordability, and ease of installation.
The real beauty of sound absorbers lies in their installation simplicity. Unlike the relatively complex and tedious installation required for noise barriers (more on this in their own section down below. To sum it up, a non-perfect installation will punish you with unideal end results), sound absorbers can be easily applied without much thought put into perfect coverage, bypassing the need for meticulous precision or extensive prep work. Again, sound absorbers work by allowing sound to pass through them, and converting the sound energy into mechanical and thermal energy. Due to this, you do not have to do 100% coverage with a sound absorber in order to get the benefits, unlike a noise barrier. Whatever you put into it will essentially be what you get out of it. This ease of installation not only makes them more appealing to a wider audience but also minimizes the chance of mistakes negatively affecting the end results. Sound absorbers offer a practical and straightforward solution for vehicle owners seeking to improve the acoustics of their vehicles with minimal hassle.
What Are The Types Of Automotive Sound Absorbing Materials, & Where Are They Used?
Two main types of materials are used as sound absorbers for automotive use. The first, and generally most effective and lower cost is non-woven fibrous synthetics, such as ResoNix Fiber Mat. The second, more specialized for specific situations that non-woven fibrous sound absorbers cannot handle, is Hyrdophobic Melamine Foam.
Non-Woven Synthetic Automotive Sound Absorbers - ResoNix Fiber Mat
ResoNix Fiber Mat, as mentioned earlier, is an acoustic absorption and a decoupling product. Our ResoNix Fiber Mat products are made out of microscopic synthetic melt-blown fibers that are formed into a non-woven mat, have a peel-and-stick adhesive on the back, are 100% okay with being installed in the harshest automotive environments (as long as it’s away from moving parts) and will not grow mold or mildew, and are naturally water resistant. They handle water, heat, cold, and anything else just fine, so ResoNix Fiber Mat can be installed practically anywhere without worry. They are typically used on door panels, quarter panels, rear decks, roofs, wheel wells, fender liners, pillars, sometimes even floors, trunk floors, and anywhere else you can think of.
Hydrophobic Melamine Foam - ResoNix Guardian & ResoNix Lockout
Hydrophobic Melamine Foam is the second sound absorber type suitable for automotive and marine (and more) applications. Hydrophobic melamine foam is an open-cell foam that is derived from melamine resin, and is then treated throughout its entire volume to be hydrophobic to repel water. It is also an incredible thermal insulator and due to its incredible resistance to heat, and its natural structure makes it a great candidate for specific applications. Our ResoNix Guardian and ResoNix Lockout, which both feature hydrophobic melamine were made with the purpose to handle a few select tasks. For car audio applications, they are perfect to use inside of door cavities on the outer door skin to act as a rear-wave absorber for door-mounted midbass speakers. This lowers the amount of acoustic energy that can resonate the door and further reduces resonance, rattles, and distortion as a whole. They are also great for conversation van build outs, as well as the ultimate product to use as marine engine compartment insulation.
Installation & General Information About ResoNix Fiber Mat
Installing it is very simple. Just cut to shape with heavy-duty scissors, peel the backing paper, and apply it to the desired surface. As with anything, ensure the surface is clean and clear of dirt, oil, and grease. I prefer to clean the panels with isopropyl alcohol beforehand. You can stick this anywhere you want, so long as it is clear of any moving parts. I do not recommend installing these inside door cavities as an absorber as I worry that window mechanisms can snag the material and cause issues. Same with seat belt areas. But everywhere else, free game.
When cutting ResoNix Fiber Mat, you will sometimes find that it does not perfectly seal, or may not seal at all. First, this is okay. It does not negatively affect the material in any way. The material as a whole can handle anything an automotive installation will throw at it, regardless if the edges are fully sealed or not. What I find causes the edges to seal or not seems to come down to the cutting device used. Some scissors and shears seal it perfectly, others do not.
Tip: I suggest these Tajima Insulation Shears, or these Worx Electric Scissors. Note, the Worx Electric Scissors that I linked are the ones that I have and use. The Fiber Mat 45 is too thick for these to cut. There are other models with a larger blade, but I have not used them.
General Information Regarding ResoNix Fiber Mat
The general rule of thumb with ResoNix Fiber Mat 0.5″ & 1″, or any sound absorbing material for that matter, is that any application is always increasingly beneficial. Any time you add more of an absorption product, you will absorb more noise. There is one caveat, though. Stuffing it to the point of compression will alter the product’s behavior and shift and change the acoustic absorption properties, usually in a way that is negative to our end goals in the automotive environment. For larger voids such as roofs, quarter panels, etc., only fill them until they are full, but do not add extra to the point that the Fiber Mat compresses. Fiber Mat should remain “lofty” for the best performance. The only time compressing is preferred is when you are using Fiber Mat as a decoupler as well. Light compression of ResoNix Fiber Mat will drastically increase decoupling performance and panel stabilization without having enough adverse effects on absorption to be concerned. Door panels and rear decks come to mind here since these are areas that we are typically very concerned about with panel-on-panel vibration, especially in sound system applications. Obviously, some areas will have to be compressed, at least a little bit. This is okay if some areas are compressed and others are not. We just want to minimize material compression if the end goal is to absorb outside noise. If the goal is decoupling, compress it as much as you want.
ResoNix Fiber Mat Fitment & Suggested Installation Locations
We are currently working on a document that will list all of the vehicles that our customers have submitted installation information regarding Fiber Mat fitment. This will be posted here and on the Fiber Mat product pages, and will be updated as customers submit their installations to us, and as we do more installations ourselves.
Regarding picking Fiber Mat 0.5″ or Fiber Mat 1.0″ for your installation in your specific vehicle, that can be hard to say. While we have done many vehicles and customers have submitted information about many vehicles, we still haven’t done most. While we can help guide you based on our experience, it is ultimately up to you to determine which thickness best suits your application. If you have used this product in your vehicle, feel free to email us with your year/make/model along with what products you used, where you used it, and how it worked out (if it fit, could fit more, could double up, if there are any OEM materials that need to be worked around or removed, etc). Thanks!
Remember, when it comes to sound absorption fill, but do not compress. So far, in my experience Fiber Mat 45 will be better suited for larger tolerance door panels, rear decks, rear hatch trim panels, quarter panels, roofs, fender liners, etc. Fiber Mat 0.5″ is typically suited for smaller tolerance door panels, pillars, floors, trunk floors, tire wells, etc.
ResoNix Guardian & Lockout: Installation & General Information
ResoNix Guardian and ResoNix Lockout are new products from ResoNix Sound Solutions. They are a familiar concept to some, but has been further improved. ResoNix Guardian is a composite-style product that consists of ¼” Hydrophobic Melamine foam, 1/8″ thick 1lb Mass Loaded Vinyl (MLV), another layer of 1″ Hydrophobic Melamine, and an Acoustic Polyester Facing. ResoNix Lockout, the baby brother of Guardian, is just the 1″ Hydrophobic Melamine Foam and Acoustic Polyester Facing. Both feature a peel-and-stick adhesive for easy installation. These products are multi-faceted, so we will give a general breakdown of each use case.
ResoNix Guardian & Lockout Use Cases
The typical use case for ResoNix Guardian and ResoNix Lockout is inside car doors, subwoofer enclosures, or anywhere else with a flat surface behind speakers that produce a lot of energy. The point here is to absorb the acoustic energy inside the door or enclosure BEFORE that acoustic energy makes it to the door skin or enclosure wall. Since ResoNix Guardian and Lockout’s Hydrophobic Melamine layer absorbs noise, and the Mass Loaded Vinyl layer that’s in ResoNix Guardian helps deflect noise and act as a sacrificial layer for resonance, all before said noise reaches the door skin or enclosure wall, the amount of acoustic energy that even reaches those boundaries is significantly lessened, therefore reducing the overall amount of resonance and vibration that is created.
The second use for ResoNix Guardian is to make use of the floating layer of 1/8″ thick, 1 pound per square foot Mass Loaded Vinyl (MLV) Layer. We haven’t covered noise barriers yet, but this is the first product that makes it extremely easy to install a noise barrier to your vehicle’s roof and vertical sides of larger vans and RV’s. Previously, installing a noise barrier on vertical, or god forbid overhanging surfaces, was difficult, tedious, and not consistently effective. Mechanical fasteners, specific Velcro (that we still offer), or other hoops must be jumped through to install noise barriers, such as Mass Loaded Vinyl or ResoNix Barrier, onto these surfaces. Now, it’s just peel, stick, done. All of this is done with the added benefit of the MLV being fully decoupled and isolated and with the help of acoustic absorption of the Hydrophobic Melamine. In my experience, this use is only applicable for vehicles with very large and flat surfaces, such as vans and RV’s. Otherwise, if your car features complex shapes, ResoNix Barrier is a better option.
The third use for ResoNix Guardian and ResoNix Lockout is for their thermal insulation properties. While Hydrophobic Melamine is an excellent acoustic absorber, it is also a top-tier thermal insulator. So much so, that it is even used in aerospace applications to protect from heat. ResoNix Guardian and Lockout are the ultimate solutions for treating a camper van or RV since you get not only the acoustic benefits but also the thermal insulation benefits. It will help keep heat in when its needed, and heat out when not desired.
ResoNix Guardian & Lockout: Installation & General Information
Installing ResoNix Guardian and ResoNix Lockout is pretty straightforward. As mentioned before, any further application of a sound absorber is a further benefit to the goal of noise reduction. Use a sharp box cutter (have extra blades on hand) and a sacrificial cardboard or wood layer to cut through it with ease. See this video for how to cut through ResoNix Guardian and Lockout without any issues.
One thing to note is to be careful of the adhesive as it is EXTREMELY strong. Once it touches something, there is no pulling it off without damaging the Hydrophobic Melamine Foam. Here is another video that gives a full rundown on what to do and what to keep in mind when installing ResoNix Guardian and ResoNix Lockout.
Automotive sound absorbers reduce noise inside a vehicle by converting airborne noise into mechanical and thermal energy. They are typically made out of materials like open-cell foams and fibrous non-woven materials.
Using any old acoustic foam in your doors is not a good idea. Using materials that are not suitable and designed for the automotive environment will grow mold and mildew and will smell once it holds water for some time. A sound absorber that is full of water is also no longer absorbing noise.
Do not overly compress a sound absorber material. This will reduce its effectiveness.
There are two primary types of automotive sound absorbers - Non-woven fibrous synthetics (e.g., ResoNix Fiber Mat) for general use in various interior car parts, and hydrophobic melamine foam (e.g., ResoNix Guardian & Lockout) for specific situations such as inside of door cavities and subwoofer enclosures for rear-wave absorption, for marine applications such as engine compartments and rooms, and areas needing thermal insulation such as in RV's and camper vans.
The effectiveness of a given sound absorber depends on the frequency of the sound wave and the thickness of the absorber material, with higher frequencies being easier to absorb and thicker materials being able to handle lower frequencies more effectively.
Due to the constraints of a vehicle, we cannot use very thick/dense absorbers; therefore, typical acoustic absorbers are only good for reducing high-frequency noise. ResoNix Fiber Mat 0.5", ResoNix Fiber Mat 1", and ResoNix Guardian and ResoNix Lockout are all modern and more advanced materials that overcome this.
Most absorption products will only be effective for mid to high frequencies. It can help lower overall noise floor, but will not take care of road noise like a noise barrier will. ResoNix Fiber Mat 45 is able to absorb effectively below 200hz, and ResoNix Guardian is also great at lower frequencies thanks to its built-in noise barrier.
Stuffing empty cavities in the vehicle can help lower overall noise floor even further. Areas such as quarter panels, B-Pillars, etc. Just make sure it will not interfere with moving parts or see excessive moisture (such as in door cavities).
Sound absorbers offer a cost-effective and straightforward solution for reducing the overall noise floor that is experienced in a given vehicle. Sound absorbers are easy to install without the need for perfect coverage (unlike noise barriers), making them accessible to a wide range of users.
ResoNix Fiber Mat products are designed to handle harsh automotive environments, being water-resistant and capable of handling various conditions. They are suitable for installation in numerous locations throughout a vehicle, including door panels and quarter panels, roofs, pillars, floors, wheel wells, and more.
Besides absorbing sound, ResoNix Fiber Mat also an excellent panel vibration decoupler, which can enhance panel stabilization and reduce vibration, particularly in sound system applications.
ResoNix Guardian and ResoNix Lockout are highlighted for their ability to be used inside of door cavities, and other areas as rear wave sound absorbers for midbass drivers and subwoofers, as well as their exceptional thermal insulation properties and resistance to heat, making them ideal for specific automotive and marine applications, as well as thermal insulation in camper vans or RVs.


What Is A Noise Barrier? How Do They Work?
The fourth and final official step and category of sound treatment application is noise barriers. While they can be hugely beneficial and arguably the most effective wide-band sound treatment you can apply when installed correctly, they are almost always difficult to install, very picky about the installation, and can be costly. The point of a noise barrier and how they work is simple. A noise barrier is made from a material to act as a limp and decoupled mass, and said mass is used to block, reflect, deflect, whatever you prefer to call it, acoustic energy away from the area you are shielding with it. The only driving factors in the performance of a noise barrier product are its weight, and how non-resonant it is. The heavier and more inert the noise barrier is, the more noise it will block.
The Challenge Of Full Coverage With Noise Barriers
What makes them very picky is the fact that a noise barrier ideally needs FULL coverage to be effective. While not having full coverage can still yield some improvement, it will be minuscule compared to full coverage. When you do not have full coverage, sound acoustic energy will travel around and take the path of least resistance right past the noise barrier. Written in our more detailed section, I use this analogy…
Say your annoying and inconsiderate next-door neighbor decides to cut his grass with his obnoxiously loud mower at 7 am on a Sunday while you’re trying to sleep in on your only day off. It just so happens that it was a warm night, and you slept with your window open. The second he fires up that old John Deer of his, it wakes you up. You think to yourself, “Ugh, here we go again. Better close my window and try to get back to sleep”. What happens to your perceived volume of his mower when you close your window halfway? Nothing, right? What about when you close it 90% of the way? Still pretty much no different than with it fully open. What about when you close it pretty much all the way but don’t lock it and have a good seal? Yeah, perceived volume is lower, but not by as much as you had hoped. Your perceived volume of his mower only becomes significantly lower and tolerable when you fully seal that window shut. It’s no different when trying to sound-proof your vehicle.
While this is a very generalized explanation and it’s not as perfectly clear cut as 100% or nothing, this is a good way to look at it and approach it. Any flanking paths will drastically reduce performance. Unlike sound absorbers, you don’t necessarily get out of it what you put into it until you start getting very close to full coverage. One thing I suggest to someone who doesn’t want to do full coverage, is to at least do full coverage of the floor of a vehicle. This allows sound coming from under the vehicle to be deflected to the sides, where you can easily use a sound absorber such as ResoNix Fiber Mat to eliminate it. It will not be as effective, but it is a good in-between.
Another part that makes them picky and selective is that noise barriers need a decoupling layer, ideally on both sides, to isolate them from the vehicle. Noise barriers need to be decoupled from the body of the vehicle and the panels that cover them. Otherwise, the resonance of the body panels will be transferred directly to the noise barrier, which will also resonate and radiate its own noise, rendering the noise barrier mostly ineffective.
Mass Loaded Vinyl, aka MLV, A Popular Option
The most popular type of noise barrier is Mass Loaded Vinyl, aka MLV. It is popular because it is heavy, limp, and, most importantly, cheap. The downsides are how thick it needs to be to achieve the desired weight and its poor flexibility and moldability. Most MLV is 1/8″ thick and weighs 1 pound per square foot. Couple that with a decoupling layer on both sides, and you have an extremely thick product that is not moldable to complex contours. In short, you end up with a product that will be extremely difficult to work with and fit behind the panels of almost all newer and even many older vehicles.
ResoNix Barrier: A Superior Alternative To MLV
ResoNix’s solution to this is our ResoNix Barrier, which is comprised of 1/32″ sheet lead encapsulated in our 3mm thick CCF Decoupler 3S, or 7mm thick CCF Decoupler 7S. This gives us a noise barrier that is much thinner yet twice as heavy per square foot as the standard 1/8″ thick MLV, is much more flexible, and is moldable to complex contours. Long story short, ResoNix Barrier is a much higher-performing noise barrier and is much easier to work with. The downside, it is admittedly not nearly as inexpensive as MLV.
Installing A Noise Barrier
ResoNix Barrier is very easy to install. For floors, just remove the carpet, roll it out, contour it to dips, peaks, bends, etc., as tightly as you can, overlap layers and even fold them once over to lock them together to prevent sound from leaking through, and let gravity hold them in place. For vertical surfaces, I prefer to use riv-nuts and stainless steel machine screws with fender washers to hold ResoNix Barrier into place. I do not suggest using Velcro to hold up ResoNix Barrier. The foam will not be able to bear the weight and will rip. The adhesive will also tear the foam apart if you try to remove it. For roofs, this isn’t easy. You can again use mechanical fasteners into the roof braces or can somehow install it directly onto the headliner, but I am not sure how that will hold up as it may be too heavy for a headliner to support. This is where ResoNix Guardian or ResoNix Fiber Mat comes in, making treating the roof much more manageable.
Using A Noise Barrier As Block-Off Plates For Door-Mounted Midbass Installations
ResoNix Barrier can also be used as block-off plates to seal access holes on inner door skins to turn the door into a quasi-sealed enclosure. Typically, sturdy plastic is used for this, but in many new cars, these inner door skins are more than just a flat opening. They are 3-dimensional and have complex curves and contours that can make it difficult to mold a plastic sheet to do this job, especially with the tighter tolerances of many newer vehicle door panels. ResoNix Barrier is flexible and moldable, but strong and sturdy and non-resonant enough to be used as a block-off plate on inner door skin access holes. Using ResoNix Barrier as a block-off plate is quicker, easier, and just as good if not better than using standard plastic block-off plates, and will contour to the shapes that you need it to with ease. Pictures showcasing this are featured below.


ResoNix CCF Strips
ResoNix CCF Strips are a product that is used to couple your car speakers to the panel and grille that reside in front of them. The purpose is to direct all acoustic energy created by the speaker through the grille into the listening space instead of losing acoustic energy to the open areas behind your door panels and dash panels. This has two main benefits. First, we gain more output since we can force all acoustic energy into the listening space. The second is less resonance and distortion created by the panels themselves since the acoustic energy is no longer getting trapped behind and exciting the panel. They also provide minor stability for the panel they are coupling to. Long story short, install these around your speakers, especially midbass speakers for a free lunch of more volume, lower distortion, and fewer rattles and resonance.
ResoNix Butyl Rope
ResoNix Butyl Rope is precisely what it sounds like. It is a 3/8″ diameter butyl rope used for various sound treatments in your vehicle. Two popular uses include stuffing it between the crash bar and outer door skin to help further stabilize the outer skin, and using it in small areas where two layers of a panel may overlap and introduce the possibility of them rattling together. It can also be used on the base of clips to prevent them from rattling. See the product page for installation examples.
OEM Audi/VW Interior Non-Woven Tape
This “cloth tape” is commonly used in installations for various reasons. But for sound treatment purposes, you can use it to bundle wire harnesses that reside behind panels to prevent them from rattling and buzzing, or you can use them on clips and/or clip openings to help reduce their vibrations. The difference between the tape we sell and the popular option, ours will not turn sticky and gooey over time. See the product page for installation examples.


What is a Constrained Layer Damper Sound Deadener? How does it work?
Constrained Layer Damper (CLD) materials, like ResoNix CLD Squares or ResoNix Mega CLD Squares, reduce structural resonance of panels. They consist of a visco-elastic butyl rubber layer bonded to an aluminum constraining layer. When panels that have a CLD applied flex (resonate), the butyl stretches and resists with shear forces due to the visco-elasticity of the butyl combined with the reference of the aluminum’s stiffness, converting mechanical energy into heat. Applied to metal and plastic panels such as doors, trunk lids, floors, various trim panels, and roofs, CLD is typically the first sound treatment used.
How a Constrained Layer Damper works is for the most part, pretty simple. When the panel that it’s adhered to bends and flexes (resonance), and subsequently, so does the CLD sound deadening material. The aluminum constraining layer provides a stiff reference across the top surface of the visco-elastic butyl. The radius differences that form between the panel that the CLD is adhered to, and the top aluminum constraining layer causes the butyl to stretch, resist, and want to snap back into position. These shear forces generated by the viscoelastic butyl is what “Constrains” the panel to prevent flexing. This process converts the mechanical energy of the panel into minuscule amounts of heat. This conversion of energy is the reduction of resonance that we are looking for.
The stiffer the aluminum constraining layer, the more of a “hold” it has on the butyl. The better the butyl formula, the better it constrains the panel against the aluminum constraining layer.
The goal when installing this product onto a panel is it will ideally go from sounding like a hollow drum when knocking on it to sounding something like a wooden table top.
Again, the point of a CLD is to lower the resonance of the panel or surface it is adhered to. It does this by using the natural shear resistance of the visco-elastic butyl stretching and wanting to snap back into place. Note how I said it “lowers resonance”, not “lowers the panels resonant frequency”. They are two different things, and a proper Constrained Layer Damper works by damping the resonance, not by lowering its resonance frequency, although the latter is usually a side effect of the added mass of the CLD on the panel. See Figure 1 below.
When and where do we use Constrained Layer Damper Sound Deadeners?
Constrained Layer Damper Sound Deadening Materials are typically the first product to consider, and the first to apply before any other major type of sound treatment product (besides small pieces of butyl rope for tight tolerance areas, more on this later in the article), and they are installed directly onto metal and plastic panels of a vehicle, and are even used in marine, industrial, commercial, residential, aviation, and aerospace applications. In automotive applications, panels typically treated with CLD include, but are not limited to the doors, trunk lid, floor, quarter panels, firewall, pillars, wheel wells, fender liners, rear deck, roof, various interior trim panels, etc. Essentially anything and anywhere that can resonate.
Why do we use Constrained Layer Damper Sound Deadeners In A Vehicle?
Why is this product type an important and arguably the most essential step in the process? Let’s break it down in two ways. Car audio installations first, and regular driving installations after.
Constrained Layer Damper Sound Deadener Use In Car Audio
In car audio, we add larger, more powerful speakers with a lot of power being applied to them to the vehicle. With these more powerful speakers, there is a lot more acoustic energy being introduced into the cabin of the vehicle. The most notable areas for this type of product in a car audio installation would be the door panels, door skins (outer door skin being more important than the inner door skin), trunk lids/hatches, roofs, rear decks and their trim panels, floors, various interior plastic trim panels that will resonate, and anywhere else in a vehicle that is susceptible to resonance. The doors (door panels included) are usually the worst offenders, so let’s focus on those for the example. When you have a speaker mounted to a door, the front wave of that speaker, when installed correctly, is only partially radiated directly forward through the door panel grille and into the cabin. The rest of that front wave doesn’t make it out of that door grille due to the speaker’s dispersion pattern, and that energy must go somewhere.
This acoustic energy will end up between the door panel and the inner door skin, and that acoustic energy will transfer into both the door panel and inner skin and be converted into mechanical energy. That mechanical energy does two things. First, it will rattle the hell out of your door. I don’t think I need to tell you why this is undesirable. And second, it will cause resonance.
Resonance will be heard as distortion and will cause the system to sound muddy and lack dynamics and impact. Applying a constrained layer damper to the door panel and inner door skin will constrain those panels, and the mechanical energy of the panels moving will then be absorbed and converted into minuscule amounts of heat by the CLD. It’s a pretty simple concept. Another reminder, while they do add mass, which will help lower the resonant frequency of the panel, mass-loading is NOT the main reason why or how a CLD works. Constraining the panel and converting mechanical energy into heat, therefore lowering resonance is how they work.
Constrained Layer Damper Sound Deadening Use To Lower Noise While Driving
Now, how will a Constrained Layer Damper help with lowering the noise heard inside of a vehicle in everyday driving? Simple. It’s the same concept. When driving, wind/turbulence, and mechanical energy transferred from the tires/suspension will cause the same panels mentioned before to move, vibrate, and resonate. This will be heard as resonance, drone, and general automotive “noise.” Think of the panel acting like it’s a speaker cone, moving in and out to convert mechanical energy (movement) into acoustical energy. Applying a Constrained Layer Damper to these resonating panels will prevent that resonance and lower the overall noise floor that is being generated by the cars’ body itself while driving.
How Much Sound Deadener Should I Use?
Now, something to note. Every vehicle is different, and every vehicle will behave differently. Each vehicle and each individuals end goal will require a different amount of CLD and sometimes a different approach to the overall game plan of applying a CLD. This can come down to the locations it’s placed, how much is needed in certain areas, etc. I find that economy cars benefit more from these products than rugged premium and luxury cars. When we work on something like a Toyota or Honda, there is a more noticeable difference when applying a CLD vs. applying CLD to, say, a Mercedes. This is because these higher-end vehicles have much more robust and sturdier parts. That said, I have yet to find a vehicle that I have worked on that wouldn’t benefit from having CLD applied, even considering diminishing returns and time spent on the project. This goes from 80’s Toyotas, all the way up to modern Rolls Royce models. Every vehicle can benefit from a Constrained Layer Damper
What Surfaces Can CLD Be Applied To?
Constrained Layer Dampers can be applied to metal, plastic, wood, etc. Please make sure the substrate you are applying it to is clean and free of dirt, oil, and grease. I prefer to use isopropyl alcohol to clean panels before application.
Heating CLD Sound Deadening Materials – DON’T DO IT
Do not heat the Constrained Layer Damper. Too much heat can damage the butyl layer and cause performance and reliability loss. My rule of thumb to customers with this is if it is too cold to work with, it’s too cold for you to work on your car. Go inside and make yourself some hot chocolate, preferably with marshmallows.
How Much Coverage Is Required When Using a Constrained Layer Damper?
This is a much-debated topic by enthusiasts, and as with any other topic often debated by enthusiasts, it is greatly misunderstood. Some people say the rule of thumb is a minimum of 25% coverage, while others say anything more than 25% coverage is a waste of time and materials. Others say 50% coverage is where diminishing returns kick in. Others swear that anything less than 100% coverage is wasting your time. So what gives? Who’s right? Buckle up……. NO ONE. That’s right. A Constrained Layer Damper doesn’t work based on the percentage of the area covered. Constrained Layer Dampers only constrain the parts of the panels that they cover. Think of a CLD sound deadener as a “support” for the panel it is adhered to. Just because you support one area, doesn’t mean the other areas are supported. What this means is there is no magic number for the percentage of coverage before you hit a point where diminishing returns kicks in. This purely comes down to a couple of things.
- Your particular personal goal for the amount of resonance you want to reduce in your application.
- The size of the panel in question.
Part one, obviously everyone’s goals are different. One person might be after something simple where they want to make sure that their doors don’t audibly resonate while driving down the road, or to prevent audible distortion when upgrading speakers in their door. The next guy very well might be doing a full soundproofing installation, or a competition-level car audio system where every bit of distortion reduced counts. For one person to say anothers application, goals, and willingness to reach for a given level of performance is “too much”… that’s silly. No one should be gatekeeping a level of desired performance.
Part two, this is where things get tricky. I will do my best to make this easy to understand. Some panels are small enough or rigid enough not to require CLD treatment. To not need CLD treatment would require that panel to be small enough to where its weight and stiffness are at a point where its resonant frequency is well above a critical frequency range, and it doesn’t have any ringing. Large, flat panels, on the other hand, will be very resonant and will ring since there is no rigidity, and the resonance frequency is in a critical frequency range. When you treat a large panel and leave areas unrelated, you are essentially creating other “smaller” untreated panels. Are these new “panels” small enough to where they do not resonate, or at least are pushed outside of the scope of the given application and the user’s particular goals? If so, they can be left untreated. But, if that left over area can act as an individual panel that is large enough to resonate at a level that is unacceptable for the goals at hand, then it needs to be treated as such.
Let’s provide an example.
Let’s take two flat panels on a vehicle, say the outer door skin and the roof skin of a large SUV. For the sake of keeping this simple and easy to follow, let’s say the outer door skin is a perfect 10 square feet, and the roof skin is a perfect 100 square feet. Now let’s treat these panels each with 25% coverage. This leaves the outer door skin with a leftover 7.5 Square feet that are untreated and “unsupported,” and it leaves the roof skin with 75 square feet that are untreated and “unsupported.” If you saw any general areas that had about 7.5 square feet that could be treated for resonance control, even if broken up into smaller sections, you’d probably treat it. But if you saw an area with 75 square feet of resonant panels, you’d very well immediately think that this area needs to be treated. Remember, the product itself works as a system, but all of the individual pieces work on their own. The panel has no idea if it has 25% coverage or 85% coverage. But the areas that are left untreated are left to act as their own, resonant panel.
To summarize all of this, resonance is a very complex thing, and every panel size, shape, material, and its given environment will change its behavior. To say you only need X amount to hit diminishing returns is grossly misleading, especially when we consider that everyone’s goals, tolerance, and budgets are different. And that most people chit chatting on the internet do not have a basic understanding of how it works.
Applying Sound Deadening Material To The Vehicle
When applying, make sure you roll it down after sticking it on. You do not need, nor want to press down very hard. You want to use just enough pressure to ensure the whole piece has contact with the panel on a relatively microscopic level. Using too much force can deform the butyl and stretch/weaken the aluminum which will cause performance loss. That brings me to another point: flat pieces that haven’t been rolled, creased, deformed, etc., will have noticeably better performance than their deformed, beaten, and mangled counterparts. This performance drop also goes for products that already come in rolls. CLD products are manufactured in flat sheets. Rolling them up reduces their performance through the deformation, therefore degradation and weakening, of the butyl and aluminum layers before their product even leaves their warehouse.
What About Sound Deadener Products That Come With “Rolling Pressure Indication Patterns”
The very same concept goes for products that come in stamped patterns. These patterns act as a relief cut of sorts which allows the product to flex with the panel more freely. Yes, I know. They say right on their webpage and in their marketing materials that these patterns are meant to be used by the user to let you know how much pressure you need to apply while rolling it on. This is simply false. The only things that these patterns accomplish is giving them a nonsense marketing point as stated that most of the general public will believe, and makes their product look “cool” and eye catching. It’s marketing at the expense of performance, and is a process that adds to the overall cost, which means you are paying extra for the product to be degraded.
Quick Tip for CLD Installation
A quick note about installations where you intend to use as little as possible to achieve a given goal, it is best to place the CLD in the middle of the panel, and work your way out, as seen in the Gif below. If you are doing this method in a sound system installation, I would also put a focus on the area directly near/behind the speaker. See the GIF below as a generalized example.
How Many Layers Of CLD Should I Use?
True Constrained Layer Dampers only really benefit from 1 layer. Many people on the internet talk about using 2, or sometimes even more layers. Frankly, these guys are wasting their time and materials. To re-cap how a constrained layer damper works, the shear forces generated in the butyl rubber when in between a flexing panel and the constraining layer cause the resistance of panel flex. The aluminum constraining layer provides a stiff reference for the butyl to snap to. Keeping this in mind, a second layer only treats the flex of the first layers’ aluminum constraining layer. This isn’t very beneficial.
Now, notice how I started that last paragraph saying “TRUE Constrained Layer Dampers”? This is because there are CLD products on the market that perform so poorly as an actual constrained layer damper, that their minimal stiffness, and added weight are their main source of panel resonance reduction. For these types of products, yes, more layers will be beneficial, but still will not be as effective as a high quality constrained layer damper, even with these multiple layers. Don’t believe me? Click this link to see testing results that show as such (Coming soon, will write this in once I finish this article)
Do Constrained Layer Damper Sound Deadeners Block Noise?
One more thing about Constrained Layer Dampers, they do NOT block noise. That is right. Nearly EVERY other sound deadener company will claim this about their CLD product, and many hobbyist automotive forum members will say this, but it is just not true. A good Constrained Layer Damper Sound Deadener can most definitely lower the noise floor of a vehicle since it will reduce the amount of noise generated by the resonance of panels, but it will NOT block outside noise from entering the vehicle. Any company claiming this about their product is lying to you. Why it doesn’t block noise is simple. Noise from the outside of the car is transferred through the body of the car, and again radiated out as the same sound. All it is, is energy transfer through molecules. The CLD being coupled to these panels will just transfer the energy as well. While it will technically lower the transfer, it won’t be by anything measurable. This is a totally separate behavior that has nothing to do with the CLD constraining the panel it is adhered to in order to reduce mechanical resonance.
Now, notice how I started that last paragraph saying “TRUE Constrained Layer Dampers”? This is because there are CLD products on the market that perform so poorly as an actual constrained layer damper, that their minimal stiffness, and added weight are their main source of panel resonance reduction. For these types of products, yes, more layers will be beneficial, but still will not be as effective as a high quality constrained layer damper, even with these multiple layers. Don’t believe me? Click this link to see testing results that show as such (Coming soon, will write this in once I finish this article)
What About The Heat Resistance & Long-Term Reliability Of Lower-Quality Constrained Layer Damper Products?
Lower-quality sound deadener products can indeed be prone to melting when installed in a car, primarily due to their poor heat resistance, poor adhesion, and poor longevity. Here’s a detailed explanation of why this happens and the implications:
- Material Composition: Lower-quality sound deadeners often use inferior materials in their composition. For example, instead of using high-quality butyl rubber, they might use asphalt-based compounds or other cheap filler materials that give the product a lower melting point. When exposed to high temperatures—like those found in automotive environments, especially near the roof, doors, engine bay, or exhaust system, these materials can soften and eventually melt.
- Heat Exposure: Cars can get extremely hot, especially under the hood, roof, doors, quarter panels, trunk lids, or on the floor panels above the exhaust. Temperatures can easily exceed the melting point of the materials used in low-quality sound deadening materials. This is especially true in warmer climates or during the summer months. High-quality sound deadeners are designed to withstand these temperatures without degrading. US-made sound deadening materials also typically follow very strict standards set by Tier-1 OEM’s such as Ford, which include heat resistance requirements. At ResoNix, we use the Ford WSS-M5G58-A2 standards and practices for our CLD Sound Deadener materials.
- Consequences of Melting:
When a sound deadener melts, it can lead to several issues: Reduced Effectiveness: The primary function of a sound deadener is to reduce noise and vibration. Melting can cause it to lose its structural integrity, significantly diminishing its effectiveness. Please Note: CLD sound deadeners become ineffective long before they start to sag or drip. Said product stopped being able to effectively reduce panel resonance much lower in temperature than when it started to sag or drip. Messy Cleanup: Melted material can seep into the car’s interior spaces, creating a sticky and entangled mess that’s extremely difficult to remove and will most likely permanently stain or damage the interior. Odor: Melting can release unpleasant odors as the chemicals in the sound deadener decompose. This is usually due to the commonality that lower quality products use lower quality materials and will not only melt lower in temperature, but will also off gas as they heat up. Potential Damage: The melted material might damage other parts of the car’s interior. As mentioned earlier, these types of materials are not really possible to fully remove and will almost always permanently stain or even fully contaminate fabrics such as carpet, cloth, and headliner materials. Sound Damping Performance At Various Temperatures Example Below, the standardized SAE-J1637 Composite Loss Factor testing results for the ResoNix CLD Squares are presented. This universally recognized testing method evaluates the Composite Loss Factor (resonance damping performance) across different temperatures. It is evident from the results that performance diminishes as temperatures increase, not just with ResoNix products, but with any CLD product. The tests conducted are significantly before the point in temperature where any high-quality CLD product would begin to melt. The point of this paragraph, melting is not the only drawback of cheap, low-performing products. Their damping performance drastically declines at higher temperatures, temperatures that your car WILL see, to the extent that they are virtually ineffective. The second image illustrates the same SAE-J1637 Composite Loss Factor testing conducted at the same facility, but this time for the ResoNix Mega CLD Squares. Although they utilize the same butyl formula and thickness as our original ResoNix CLD Squares, they feature a thicker and significantly stiffer aluminum constraining layer. This modification is evident in its performance—while peak performance is clearly higher, there’s a very noticeable improvement in performance at higher temperatures. Should the opportunity arise (i.e., if we have a surplus of funds great enough to pay for third-party standardized testing of various products), we plan to run tests on other products at these elevated temperatures to demonstrate this effect. For the time being, our focus is on showcasing how a high-performing product like ours fares under various temperature conditions. - Avoidance: To avoid these issues, it’s advisable to invest in higher-quality sound deadening products. Look for products that specify high temperature resistance and are made from butyl rubber or other high-quality materials known for their durability and heat resistance. It’s also wise to check reviews and recommendations from automotive forums or trusted sources before making a purchase. Something I have personally noticed and somewhat touched on earlier… Pretty much every product that has a history of melting is one that is sourced from overseas. I obviously have seen first hand what goes behind making these products, and the standards between what is made here in the US and select European countries is far superior in not only resonance damping performance, but temperature resistance and longevity as well, as the factories in these locations usually abide by the aforementioned Tier-1 standards since they are the largest customers. No Tier-1 Automotive Manufacturer is using products found on Amazon or made overseas.
- Installation Considerations: Proper installation is key. Even high-quality products can fail if installed incorrectly. It’s important to follow the manufacturer’s instructions closely and ensure that the product is not applied too close to heat sources without adequate protection or heat shielding. In conclusion, while opting for cheaper sound deadening products might seem like a good way to save money upfront, the potential for melting and the associated problems can lead to more expenses and headaches down the line. Investing in high-quality materials and proper installation will provide better, longer-lasting results and avoid the pitfalls of lower-quality alternatives.
Key Notes for Constrained Layer Damper Sound Deadening Materials
CLD is only for lowering structure-borne vibration, aka resonance.
CLD does *not* block road noise. While it does help lower the overall noise floor by reducing structure-borne vibration, you should use a noise barrier for blocking outside noise, or a sound absorber for absorbing outside noise.
CLD will most likely not lower panel-on-panel vibration if used alone. While panel rattling is a symptom of two panels resonating, these are two different things. (see decoupling below).
Using multiple layers of CLD Sound Deadening Material is a waste of time and money. Just use one layer of the best product you can get your hands on. It will be better, cheaper, and require less time and effort in the long run.
Many smaller pieces of CLD are not as effective as a single piece of CLD with a similar overall size. Our typical smallest size piece we bother with (for resonance damping purposes) is at least 8 square inches. Small pieces are only used by us to prevent small panels and clips from buzzing.
Roofing products from big box stores are not a suitable solution and do not work at all. This is because they do not feature a viscoelastic layer. Instead, they use asphalt (which is toxic), which provides none of the required viscoelasticity to the adhering layer. The constraining layers are also usually made out of very thin and weak aluminized mylar, not actual aluminum. Just becuase it looks like a duck, doesn't mean it's a duck.
Using cheap CLD Sound Deadening products will always cost more to hit a desired performance target. They also take more time and effort to achieve said performance target, and many times will still not yield the same result of a better product that is carefully and properly installed. If you care even a little bit about performance, buy your CLD from a true sound deadening company, not a cash-grabbing amazon vendor.
Beware of products that come in rolls or as a folded mat, or have an embossed pattern. Bending and shaping the material compromises the viscoelastic properties of the butyl layer and weakens the aluminum layer, which lowers the products' performance before it even makes it into the box they ship it in.
Installation examples
These photos illustrate the correct methods for applying a Constrained Layer Damper in vehicles.
Examples Of What Happens When Using A Poor Performing Sound Deadening Material
What Are Vibration Decouplers & Sound Deadening Foams? What Makes A Good One?
Vibration Decouplers and sound deadening foams are the second product category that will get installed in almost every traditional automotive sound treatment application. These products were typically a closed-cell sound deadening foam, but better, more modern products utilize a fibrous mat material. These are used to accomplish two different goals. First, it acts as a high-compliance cushion between two panels that could otherwise vibrate together and cause annoying buzzes and rattle sounds. Second, to act as an air gap and isolator for a Noise Barrier, but we will touch on that second part later in the Noise Barrier section of this article. Sound deadening foams are almost always a Closed Cell Foam, aka a “CCF,” but are sometimes, as in our case with our Fiber Mat products, a fibrous, non-woven mat material. These types of products are usually an even better performing vibration decoupler than sound deadening foams. You can also use something like ResoNix Butyl Rope as a decoupler for very tight and small areas to prevent buzzing and vibration of specific areas. See the picture gallery below for examples.
The vibration decouplers compliance and thickness will separate an ideal foam from a not-so-ideal foam in different situations. I prefer to use a sound deadening foam or Fiber Mat that’s as thick as possible without compromising the integrity of the re-installation of the panels, while also having a high compliance, but without being too weak like the open-cell foam that is used to absorb sound in rooms. To go into more detail, the properties that are used to pick an appropriate decoupling material for our uses are Compression Deflection and Compression Set. Compression Deflection is a measure of the resistance of a material to force applied to a known surface area over a controlled distance. The lower the compression deflection, the softer the foam is. Compression Set is the amount of permanent deformation that occurs when a material is compressed to a specific deformation, for a specified time, at a specific temperature. The standard testing for these is ASTM D 1056.
Why Do We Use Sound Deadening Foams & Other Vibration Decouplers?
These are very simple products. As mentioned above, a Vibration Decoupler’s/sound deadening foam’s typical use case is to provide a cushion between two panels to prevent them from rattling against each other. What makes one decoupler more ideal than another? Well, in my experience, being thick enough to touch as much of both panels as possible, yet still have enough compliance and is soft enough to compress down and not cause issues when re-installing these panels. Having a specific Compression Set specification (spec that tells you how well it holds its shape once compressed) can also help provide a Decoupler that can compress a lot of itself down but still provide some resistance for the panel instead of acting like a soft sponge.
Heads Up, Not All Materials Are Suitable To Be Used In A Vehicle As A Sound Deadening Decoupling Foam
Speaking of sponges, we do not want to use open-cell foam as a Decoupler. Generic open-cell foam products will hold and retain moisture and cause mold and mildew to grow in your car. I see some people who try using polyurethane foam (ordinary acoustic foam) for this in an effort to “beat the system” and save money. This generic acoustic foam, shredded denim, jute, etc., will all hold moisture and cause issues.
Another popular product among those that want to save money is using gym and yoga mats. The problem here is that the foams that these are made of defeat the purpose of a decoupler. They are too hard and stiff to decouple properly, will not effectively reduce panel vibration, and will certainly not provide correct isolation and an air gap for a Noise Barrier. A popular choice in these products that budget-conscious hobbyists use has the specifications for the foam that it’s comprised of listed on the website. It has a Compression Deflection (stiffness) spec of 18-26psi. This means it takes between at least 18 and up to 26 pounds per square inch to compress the foam by 25%. That is exceptionally stiff for our uses. Our CCF decoupler 7, for comparison, has a Compression Deflection spec of 1psi maximum, so it is 18+ times less stiff than a popular DIY option. As with all of our products, buy once, cry once.
Installing A Vibration Decoupler In A Vehicle
How to install a Decoupler is simple. Most of these products, ours included, feature a peel-and-stick adhesive; you can cut it to shape and stick it where needed. Our ResoNix Fiber Mat Black Edition products will be the most used decouplers in most installations. They will be used in large areas that can accommodate their size and thickness, such as behind door panels, rear deck trim, A/B/C-Pillar trim, roofs/headliners, rear walls on trucks, trunk lid trim, rear hatch trim, etc. Our CCF Decoupler 7S, CCF Decoupler 3S, and CCF Decoupler 3F will typically be used on smaller plastic trim, or on the metal where plastic trim will touch that has tighter tolerances where our Fiber Mat products are too thick and/or cumbersome to use. Anywhere a trim panel can vibrate against another panel, this is where you want to apply a decoupler. On larger panel decoupler installations, I usually prefer to adhere the decoupler directly to the trim panel that is getting installed into the car instead of directly on the vehicle itself. I find this works better and also has much better serviceability and longevity.
Misconceptions About Sound Deadening Foam
What closed-cell foam decouplers do not do, even though many other companies claim this, is reduce, absorb, and/or block noise. It does NONE of those in any meaningful way, shape, or form. Beware of companies that advertise their CCF products as being able to do this. They are lying and preying on the ignorant. A quick summary of why they do not block or absorb noise is that you need a lot of mass to block noise, and you need open cells or a fibrous mat to absorb sound. A lightweight closed-cell product has no chance of blocking noise or absorbing noise. Also, beware of products from companies that claim that their decouplers block heat or are excellent thermal insulators. While many thermal insulation products are comprised of a closed-cell foam construction, it is usually a VERY different type of closed-cell foam that is used for decoupling. The foams that are used for decoupling are generally not great thermal insulators.
We provide several decoupling solutions to meet diverse needs. Our CCF Decoupler series is perfect for smaller, intricate applications, while our Fiber Mat 25 and Fiber Mat 45 excel in larger areas, offering superior decoupling and added absorption benefits. Choose based on your specific requirements for optimal results.
Key Notes For Sound Deadening Foams & Other Vibration Decouplers
It has two primary purposes; to prevent panels from vibrating against each other and to provide an air gap for a noise barrier (more on this below).
Closed Cell Foam based decouplers will not reduce road noise by any amount, period, and should not be used to attempt to block outside noise from entering the cabin. Fiber Mat style decouplers on the other hand, will absorb noise that tries to pass through. More on this below.
The ideal decoupler is very compressible but still has a firmness that can still provide some stability between panels.
If a closed cell foam is being advertised as a sound absorber, they are lying to you. If a foam is being advertised to block noise, they are lying to you.
Sound Deadening Foam & Vibration Decoupler Examples
These photos illustrate the correct methods for applying Sound Deadening Foam & Vibration Decouplers in vehicles.
What Does An Automotive Sound Absorber Do? How Do They Work?
Utilizing Automotive Sound Absorbers is next and third on the list of sound treatment products to be installed into a vehicle. Absorption is pretty simple for the most part. The process of acoustic absorption converts airborne noise into another form of energy (mechanical and thermal), therefore reducing the overall noise level in the vehicle. Open-cell foams or fibrous non-woven materials are two typical types of acoustical absorption products. Something to keep in mind before reading the Noise Barrier portion of this article, sound absorbers work by lowering the amount of sound energy that exists in the space. More on this later.
In a vehicle, it only makes sense to use a soft, fibrous or porous absorber, so we will stick with how those work. The fibrous materials absorb sound by deforming randomly at a microscopic level as sound passes through. The porous materials absorb sound by creating friction against sound waves as they pass through. How much sound is absorbed comes down to a few things.
- The frequency of the soundwave that you are trying to absorb.
- The smaller the wavelength (higher in frequency), the easier it is to absorb.
- The thickness of the absorption material - The thicker it is, the longer the wavelengths (lower in frequency) you can absorb effectively.
- And where it gets more complicated - Materials. Different materials behave differently and have different absorption coefficients. (I may add a section on this in the future)
- The overall thickness, density, size, weight, and more, of the fibers or open cells, contribute to what frequencies are absorbed, and how effectively they are absorbed. As mentioned, higher frequencies are easier to absorb than low frequencies and arent too difficult to deal with in a vehicle. However, some modern materials can effectively absorb relatively low frequencies in a vehicle, such as our ResoNix Fiber Mat Black Edition, as well as our ResoNix Guardian and ResoNix Lockout. Both have two different areas and reasons for application, so we will break them down individually. But first, why do we use sound absorbers in a vehicle?
Why Do We Use Sound Absorbers In A Vehicle?
Using sound absorbers to tackle airborne noise problems in vehicles is both a straightforward and efficient method. These products are less expensive than alternatives like noise barriers and offer a clear advantage for anyone looking to improve their vehicle’s sound environment without a hefty investment. This cost-effectiveness makes sound absorbers a perfect choice for most, striking the perfect balance between performance, affordability, and ease of installation.
The real beauty of sound absorbers lies in their installation simplicity. Unlike the relatively complex and tedious installation required for noise barriers (more on this in their own section down below. To sum it up, a non-perfect installation will punish you with unideal end results), sound absorbers can be easily applied without much thought put into perfect coverage, bypassing the need for meticulous precision or extensive prep work. Again, sound absorbers work by allowing sound to pass through them, and converting the sound energy into mechanical and thermal energy. Due to this, you do not have to do 100% coverage with a sound absorber in order to get the benefits, unlike a noise barrier. Whatever you put into it will essentially be what you get out of it. This ease of installation not only makes them more appealing to a wider audience but also minimizes the chance of mistakes negatively affecting the end results. Sound absorbers offer a practical and straightforward solution for vehicle owners seeking to improve the acoustics of their vehicles with minimal hassle.
What Are The Types Of Automotive Sound Absorbing Materials, & Where Are They Used?
Two main types of materials are used as sound absorbers for automotive use. The first, and generally most effective and lower cost is non-woven fibrous synthetics, such as ResoNix Fiber Mat. The second, more specialized for specific situations that non-woven fibrous sound absorbers cannot handle, is Hyrdophobic Melamine Foam.
Non-Woven Synthetic Automotive Sound Absorbers - ResoNix Fiber Mat
ResoNix Fiber Mat, as mentioned earlier, is an acoustic absorption and a decoupling product. Our ResoNix Fiber Mat products are made out of microscopic synthetic melt-blown fibers that are formed into a non-woven mat, have a peel-and-stick adhesive on the back, are 100% okay with being installed in the harshest automotive environments (as long as it’s away from moving parts) and will not grow mold or mildew, and are naturally water resistant. They handle water, heat, cold, and anything else just fine, so ResoNix Fiber Mat can be installed practically anywhere without worry. They are typically used on door panels, quarter panels, rear decks, roofs, wheel wells, fender liners, pillars, sometimes even floors, trunk floors, and anywhere else you can think of.
Hydrophobic Melamine Foam - ResoNix Guardian & ResoNix Lockout
Hydrophobic Melamine Foam is the second sound absorber type suitable for automotive and marine (and more) applications. Hydrophobic melamine foam is an open-cell foam that is derived from melamine resin, and is then treated throughout its entire volume to be hydrophobic to repel water. It is also an incredible thermal insulator and due to its incredible resistance to heat, and its natural structure makes it a great candidate for specific applications. Our ResoNix Guardian and ResoNix Lockout, which both feature hydrophobic melamine were made with the purpose to handle a few select tasks. For car audio applications, they are perfect to use inside of door cavities on the outer door skin to act as a rear-wave absorber for door-mounted midbass speakers. This lowers the amount of acoustic energy that can resonate the door and further reduces resonance, rattles, and distortion as a whole. They are also great for conversation van build outs, as well as the ultimate product to use as marine engine compartment insulation.
Installation & General Information About ResoNix Fiber Mat
Installing it is very simple. Just cut to shape with heavy-duty scissors, peel the backing paper, and apply it to the desired surface. As with anything, ensure the surface is clean and clear of dirt, oil, and grease. I prefer to clean the panels with isopropyl alcohol beforehand. You can stick this anywhere you want, so long as it is clear of any moving parts. I do not recommend installing these inside door cavities as an absorber as I worry that window mechanisms can snag the material and cause issues. Same with seat belt areas. But everywhere else, free game.
When cutting ResoNix Fiber Mat, you will sometimes find that it does not perfectly seal, or may not seal at all. First, this is okay. It does not negatively affect the material in any way. The material as a whole can handle anything an automotive installation will throw at it, regardless if the edges are fully sealed or not. What I find causes the edges to seal or not seems to come down to the cutting device used. Some scissors and shears seal it perfectly, others do not.
Tip: I suggest these Tajima Insulation Shears, or these Worx Electric Scissors. Note, the Worx Electric Scissors that I linked are the ones that I have and use. The Fiber Mat 45 is too thick for these to cut. There are other models with a larger blade, but I have not used them.
General Information Regarding ResoNix Fiber Mat
The general rule of thumb with ResoNix Fiber Mat 0.5″ & 1″, or any sound absorbing material for that matter, is that any application is always increasingly beneficial. Any time you add more of an absorption product, you will absorb more noise. There is one caveat, though. Stuffing it to the point of compression will alter the product’s behavior and shift and change the acoustic absorption properties, usually in a way that is negative to our end goals in the automotive environment. For larger voids such as roofs, quarter panels, etc., only fill them until they are full, but do not add extra to the point that the Fiber Mat compresses. Fiber Mat should remain “lofty” for the best performance. The only time compressing is preferred is when you are using Fiber Mat as a decoupler as well. Light compression of ResoNix Fiber Mat will drastically increase decoupling performance and panel stabilization without having enough adverse effects on absorption to be concerned. Door panels and rear decks come to mind here since these are areas that we are typically very concerned about with panel-on-panel vibration, especially in sound system applications. Obviously, some areas will have to be compressed, at least a little bit. This is okay if some areas are compressed and others are not. We just want to minimize material compression if the end goal is to absorb outside noise. If the goal is decoupling, compress it as much as you want.
ResoNix Fiber Mat Fitment & Suggested Installation Locations
We are currently working on a document that will list all of the vehicles that our customers have submitted installation information regarding Fiber Mat fitment. This will be posted here and on the Fiber Mat product pages, and will be updated as customers submit their installations to us, and as we do more installations ourselves.
Regarding picking Fiber Mat 0.5″ or Fiber Mat 1.0″ for your installation in your specific vehicle, that can be hard to say. While we have done many vehicles and customers have submitted information about many vehicles, we still haven’t done most. While we can help guide you based on our experience, it is ultimately up to you to determine which thickness best suits your application. If you have used this product in your vehicle, feel free to email us with your year/make/model along with what products you used, where you used it, and how it worked out (if it fit, could fit more, could double up, if there are any OEM materials that need to be worked around or removed, etc). Thanks!
Remember, when it comes to sound absorption fill, but do not compress. So far, in my experience Fiber Mat 45 will be better suited for larger tolerance door panels, rear decks, rear hatch trim panels, quarter panels, roofs, fender liners, etc. Fiber Mat 0.5″ is typically suited for smaller tolerance door panels, pillars, floors, trunk floors, tire wells, etc.
ResoNix Guardian & Lockout: Installation & General Information
ResoNix Guardian and ResoNix Lockout are new products from ResoNix Sound Solutions. They are a familiar concept to some, but has been further improved. ResoNix Guardian is a composite-style product that consists of ¼” Hydrophobic Melamine foam, 1/8″ thick 1lb Mass Loaded Vinyl (MLV), another layer of 1″ Hydrophobic Melamine, and an Acoustic Polyester Facing. ResoNix Lockout, the baby brother of Guardian, is just the 1″ Hydrophobic Melamine Foam and Acoustic Polyester Facing. Both feature a peel-and-stick adhesive for easy installation. These products are multi-faceted, so we will give a general breakdown of each use case.
ResoNix Guardian & Lockout Use Cases
The typical use case for ResoNix Guardian and ResoNix Lockout is inside car doors, subwoofer enclosures, or anywhere else with a flat surface behind speakers that produce a lot of energy. The point here is to absorb the acoustic energy inside the door or enclosure BEFORE that acoustic energy makes it to the door skin or enclosure wall. Since ResoNix Guardian and Lockout’s Hydrophobic Melamine layer absorbs noise, and the Mass Loaded Vinyl layer that’s in ResoNix Guardian helps deflect noise and act as a sacrificial layer for resonance, all before said noise reaches the door skin or enclosure wall, the amount of acoustic energy that even reaches those boundaries is significantly lessened, therefore reducing the overall amount of resonance and vibration that is created.
The second use for ResoNix Guardian is to make use of the floating layer of 1/8″ thick, 1 pound per square foot Mass Loaded Vinyl (MLV) Layer. We haven’t covered noise barriers yet, but this is the first product that makes it extremely easy to install a noise barrier to your vehicle’s roof and vertical sides of larger vans and RV’s. Previously, installing a noise barrier on vertical, or god forbid overhanging surfaces, was difficult, tedious, and not consistently effective. Mechanical fasteners, specific Velcro (that we still offer), or other hoops must be jumped through to install noise barriers, such as Mass Loaded Vinyl or ResoNix Barrier, onto these surfaces. Now, it’s just peel, stick, done. All of this is done with the added benefit of the MLV being fully decoupled and isolated and with the help of acoustic absorption of the Hydrophobic Melamine. In my experience, this use is only applicable for vehicles with very large and flat surfaces, such as vans and RV’s. Otherwise, if your car features complex shapes, ResoNix Barrier is a better option.
The third use for ResoNix Guardian and ResoNix Lockout is for their thermal insulation properties. While Hydrophobic Melamine is an excellent acoustic absorber, it is also a top-tier thermal insulator. So much so, that it is even used in aerospace applications to protect from heat. ResoNix Guardian and Lockout are the ultimate solutions for treating a camper van or RV since you get not only the acoustic benefits but also the thermal insulation benefits. It will help keep heat in when its needed, and heat out when not desired.
ResoNix Guardian & Lockout: Installation & General Information
Installing ResoNix Guardian and ResoNix Lockout is pretty straightforward. As mentioned before, any further application of a sound absorber is a further benefit to the goal of noise reduction. Use a sharp box cutter (have extra blades on hand) and a sacrificial cardboard or wood layer to cut through it with ease. See this video for how to cut through ResoNix Guardian and Lockout without any issues.
One thing to note is to be careful of the adhesive as it is EXTREMELY strong. Once it touches something, there is no pulling it off without damaging the Hydrophobic Melamine Foam. Here is another video that gives a full rundown on what to do and what to keep in mind when installing ResoNix Guardian and ResoNix Lockout.
Automotive sound absorbers reduce noise inside a vehicle by converting airborne noise into mechanical and thermal energy. They are typically made out of materials like open-cell foams and fibrous non-woven materials.
Using any old acoustic foam in your doors is not a good idea. Using materials that are not suitable and designed for the automotive environment will grow mold and mildew and will smell once it holds water for some time. A sound absorber that is full of water is also no longer absorbing noise.
Do not overly compress a sound absorber material. This will reduce its effectiveness.
There are two primary types of automotive sound absorbers - Non-woven fibrous synthetics (e.g., ResoNix Fiber Mat) for general use in various interior car parts, and hydrophobic melamine foam (e.g., ResoNix Guardian & Lockout) for specific situations such as inside of door cavities and subwoofer enclosures for rear-wave absorption, for marine applications such as engine compartments and rooms, and areas needing thermal insulation such as in RV's and camper vans.
The effectiveness of a given sound absorber depends on the frequency of the sound wave and the thickness of the absorber material, with higher frequencies being easier to absorb and thicker materials being able to handle lower frequencies more effectively.
Due to the constraints of a vehicle, we cannot use very thick/dense absorbers; therefore, typical acoustic absorbers are only good for reducing high-frequency noise. ResoNix Fiber Mat 0.5", ResoNix Fiber Mat 1", and ResoNix Guardian and ResoNix Lockout are all modern and more advanced materials that overcome this.
Most absorption products will only be effective for mid to high frequencies. It can help lower overall noise floor, but will not take care of road noise like a noise barrier will. ResoNix Fiber Mat 45 is able to absorb effectively below 200hz, and ResoNix Guardian is also great at lower frequencies thanks to its built-in noise barrier.
Stuffing empty cavities in the vehicle can help lower overall noise floor even further. Areas such as quarter panels, B-Pillars, etc. Just make sure it will not interfere with moving parts or see excessive moisture (such as in door cavities).
Sound absorbers offer a cost-effective and straightforward solution for reducing the overall noise floor that is experienced in a given vehicle. Sound absorbers are easy to install without the need for perfect coverage (unlike noise barriers), making them accessible to a wide range of users.
ResoNix Fiber Mat products are designed to handle harsh automotive environments, being water-resistant and capable of handling various conditions. They are suitable for installation in numerous locations throughout a vehicle, including door panels and quarter panels, roofs, pillars, floors, wheel wells, and more.
Besides absorbing sound, ResoNix Fiber Mat also an excellent panel vibration decoupler, which can enhance panel stabilization and reduce vibration, particularly in sound system applications.
ResoNix Guardian and ResoNix Lockout are highlighted for their ability to be used inside of door cavities, and other areas as rear wave sound absorbers for midbass drivers and subwoofers, as well as their exceptional thermal insulation properties and resistance to heat, making them ideal for specific automotive and marine applications, as well as thermal insulation in camper vans or RVs.
What Is A Noise Barrier? How Do They Work?
The fourth and final official step and category of sound treatment application is noise barriers. While they can be hugely beneficial and arguably the most effective wide-band sound treatment you can apply when installed correctly, they are almost always difficult to install, very picky about the installation, and can be costly. The point of a noise barrier and how they work is simple. A noise barrier is made from a material to act as a limp and decoupled mass, and said mass is used to block, reflect, deflect, whatever you prefer to call it, acoustic energy away from the area you are shielding with it. The only driving factors in the performance of a noise barrier product are its weight, and how non-resonant it is. The heavier and more inert the noise barrier is, the more noise it will block.
The Challenge Of Full Coverage With Noise Barriers
What makes them very picky is the fact that a noise barrier ideally needs FULL coverage to be effective. While not having full coverage can still yield some improvement, it will be minuscule compared to full coverage. When you do not have full coverage, sound acoustic energy will travel around and take the path of least resistance right past the noise barrier. Written in our more detailed section, I use this analogy…
Say your annoying and inconsiderate next-door neighbor decides to cut his grass with his obnoxiously loud mower at 7 am on a Sunday while you’re trying to sleep in on your only day off. It just so happens that it was a warm night, and you slept with your window open. The second he fires up that old John Deer of his, it wakes you up. You think to yourself, “Ugh, here we go again. Better close my window and try to get back to sleep”. What happens to your perceived volume of his mower when you close your window halfway? Nothing, right? What about when you close it 90% of the way? Still pretty much no different than with it fully open. What about when you close it pretty much all the way but don’t lock it and have a good seal? Yeah, perceived volume is lower, but not by as much as you had hoped. Your perceived volume of his mower only becomes significantly lower and tolerable when you fully seal that window shut. It’s no different when trying to sound-proof your vehicle.
While this is a very generalized explanation and it’s not as perfectly clear cut as 100% or nothing, this is a good way to look at it and approach it. Any flanking paths will drastically reduce performance. Unlike sound absorbers, you don’t necessarily get out of it what you put into it until you start getting very close to full coverage. One thing I suggest to someone who doesn’t want to do full coverage, is to at least do full coverage of the floor of a vehicle. This allows sound coming from under the vehicle to be deflected to the sides, where you can easily use a sound absorber such as ResoNix Fiber Mat to eliminate it. It will not be as effective, but it is a good in-between.
Another part that makes them picky and selective is that noise barriers need a decoupling layer, ideally on both sides, to isolate them from the vehicle. Noise barriers need to be decoupled from the body of the vehicle and the panels that cover them. Otherwise, the resonance of the body panels will be transferred directly to the noise barrier, which will also resonate and radiate its own noise, rendering the noise barrier mostly ineffective.
Mass Loaded Vinyl, aka MLV, A Popular Option
The most popular type of noise barrier is Mass Loaded Vinyl, aka MLV. It is popular because it is heavy, limp, and, most importantly, cheap. The downsides are how thick it needs to be to achieve the desired weight and its poor flexibility and moldability. Most MLV is 1/8″ thick and weighs 1 pound per square foot. Couple that with a decoupling layer on both sides, and you have an extremely thick product that is not moldable to complex contours. In short, you end up with a product that will be extremely difficult to work with and fit behind the panels of almost all newer and even many older vehicles.
ResoNix Barrier: A Superior Alternative To MLV
ResoNix’s solution to this is our ResoNix Barrier, which is comprised of 1/32″ sheet lead encapsulated in our 3mm thick CCF Decoupler 3S, or 7mm thick CCF Decoupler 7S. This gives us a noise barrier that is much thinner yet twice as heavy per square foot as the standard 1/8″ thick MLV, is much more flexible, and is moldable to complex contours. Long story short, ResoNix Barrier is a much higher-performing noise barrier and is much easier to work with. The downside, it is admittedly not nearly as inexpensive as MLV.
Installing A Noise Barrier
ResoNix Barrier is very easy to install. For floors, just remove the carpet, roll it out, contour it to dips, peaks, bends, etc., as tightly as you can, overlap layers and even fold them once over to lock them together to prevent sound from leaking through, and let gravity hold them in place. For vertical surfaces, I prefer to use riv-nuts and stainless steel machine screws with fender washers to hold ResoNix Barrier into place. I do not suggest using Velcro to hold up ResoNix Barrier. The foam will not be able to bear the weight and will rip. The adhesive will also tear the foam apart if you try to remove it. For roofs, this isn’t easy. You can again use mechanical fasteners into the roof braces or can somehow install it directly onto the headliner, but I am not sure how that will hold up as it may be too heavy for a headliner to support. This is where ResoNix Guardian or ResoNix Fiber Mat comes in, making treating the roof much more manageable.
Using A Noise Barrier As Block-Off Plates For Door-Mounted Midbass Installations
ResoNix Barrier can also be used as block-off plates to seal access holes on inner door skins to turn the door into a quasi-sealed enclosure. Typically, sturdy plastic is used for this, but in many new cars, these inner door skins are more than just a flat opening. They are 3-dimensional and have complex curves and contours that can make it difficult to mold a plastic sheet to do this job, especially with the tighter tolerances of many newer vehicle door panels. ResoNix Barrier is flexible and moldable, but strong and sturdy and non-resonant enough to be used as a block-off plate on inner door skin access holes. Using ResoNix Barrier as a block-off plate is quicker, easier, and just as good if not better than using standard plastic block-off plates, and will contour to the shapes that you need it to with ease. Pictures showcasing this are featured below.
ResoNix CCF Strips
ResoNix CCF Strips are a product that is used to couple your car speakers to the panel and grille that reside in front of them. The purpose is to direct all acoustic energy created by the speaker through the grille into the listening space instead of losing acoustic energy to the open areas behind your door panels and dash panels. This has two main benefits. First, we gain more output since we can force all acoustic energy into the listening space. The second is less resonance and distortion created by the panels themselves since the acoustic energy is no longer getting trapped behind and exciting the panel. They also provide minor stability for the panel they are coupling to. Long story short, install these around your speakers, especially midbass speakers for a free lunch of more volume, lower distortion, and fewer rattles and resonance.
ResoNix Butyl Rope
ResoNix Butyl Rope is precisely what it sounds like. It is a 3/8″ diameter butyl rope used for various sound treatments in your vehicle. Two popular uses include stuffing it between the crash bar and outer door skin to help further stabilize the outer skin, and using it in small areas where two layers of a panel may overlap and introduce the possibility of them rattling together. It can also be used on the base of clips to prevent them from rattling. See the product page for installation examples.
OEM Audi/VW Interior Non-Woven Tape
This “cloth tape” is commonly used in installations for various reasons. But for sound treatment purposes, you can use it to bundle wire harnesses that reside behind panels to prevent them from rattling and buzzing, or you can use them on clips and/or clip openings to help reduce their vibrations. The difference between the tape we sell and the popular option, ours will not turn sticky and gooey over time. See the product page for installation examples.