2022 Volvo S60 Sound System Upgrade & Sound Deadening Installation
Elevating the Volvo S60 Experience: A nearly completely hidden sound system upgrade with one extra goal; to keep it OEM
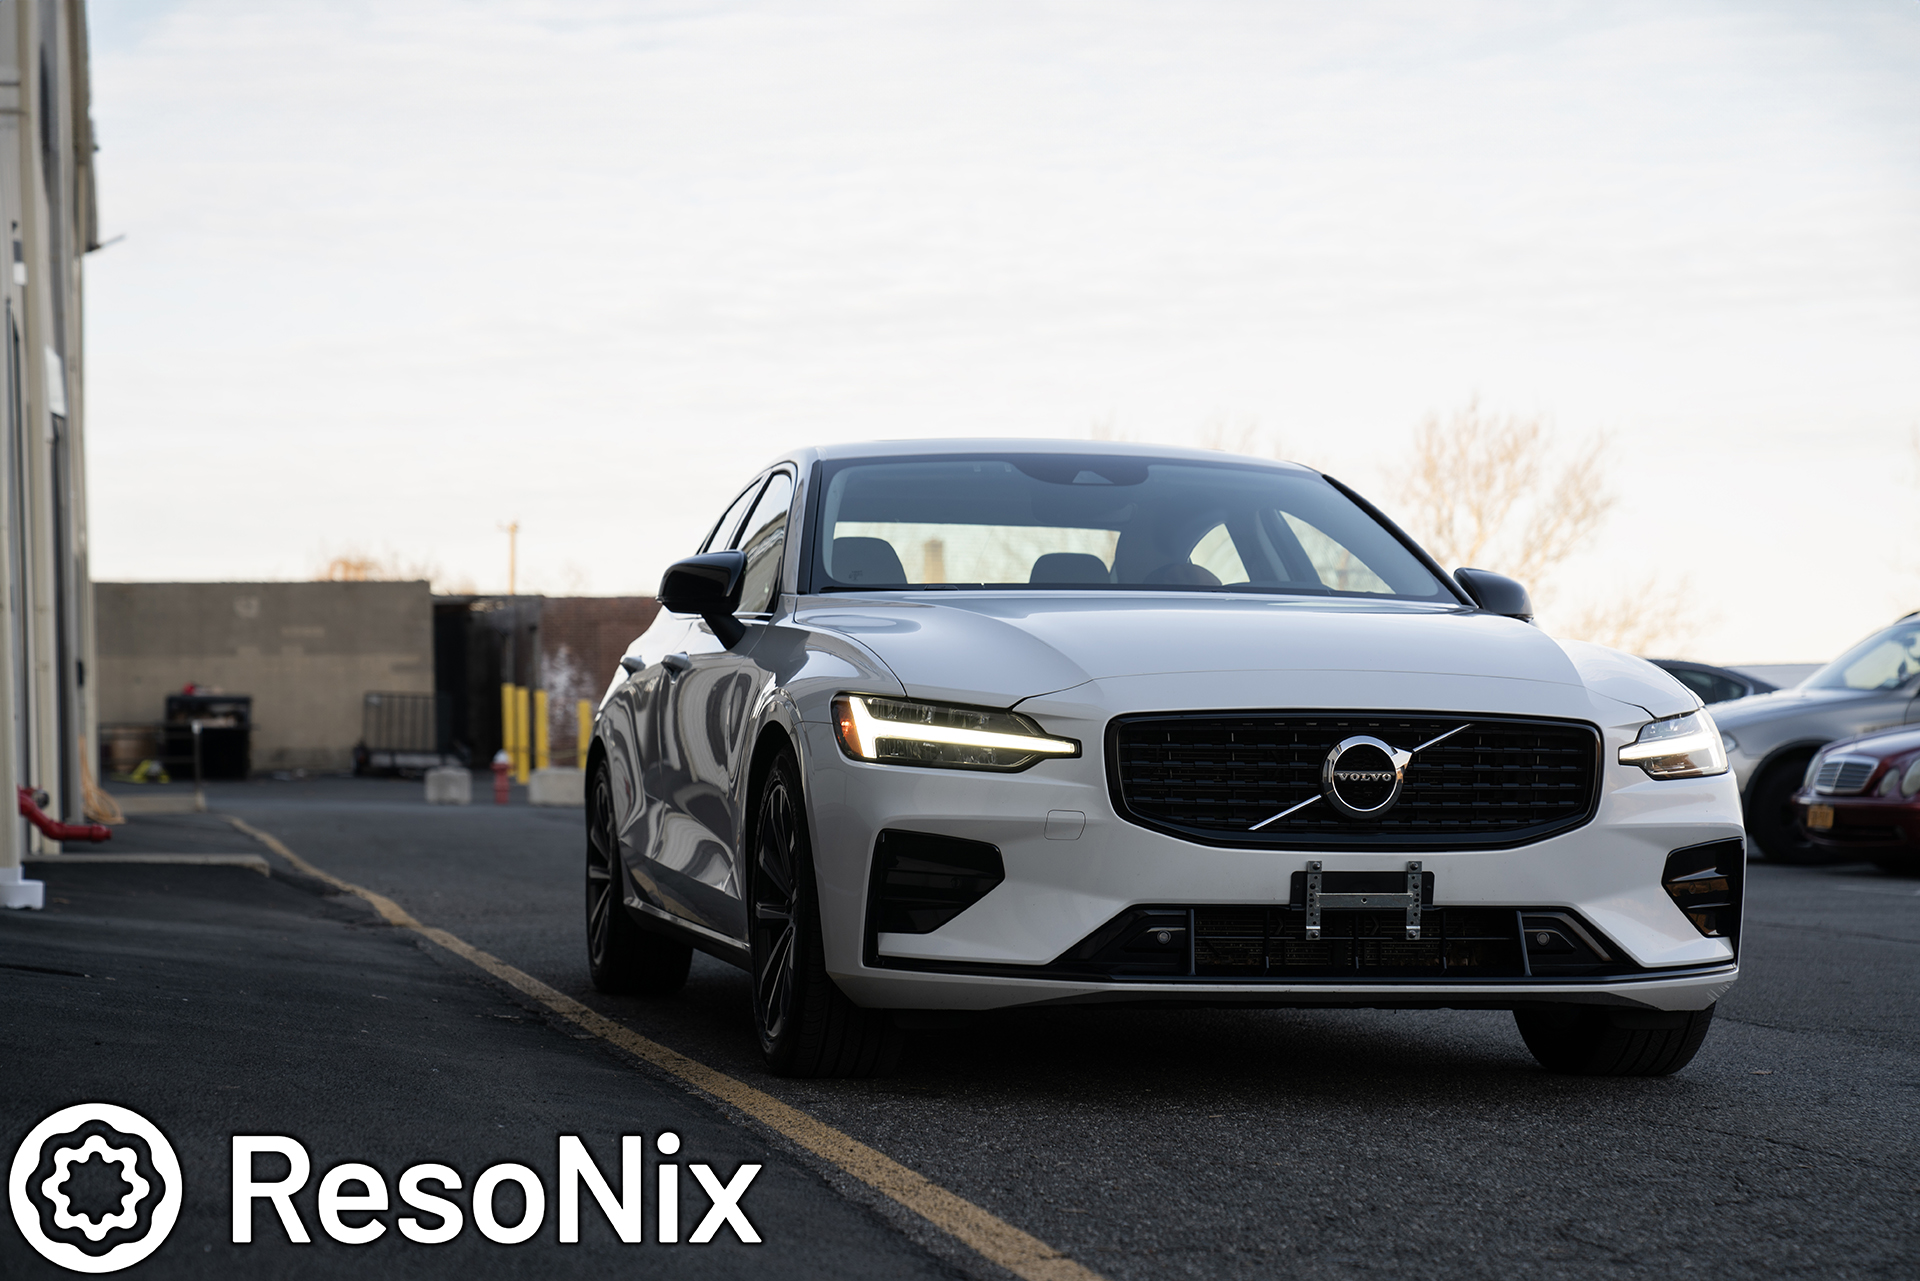
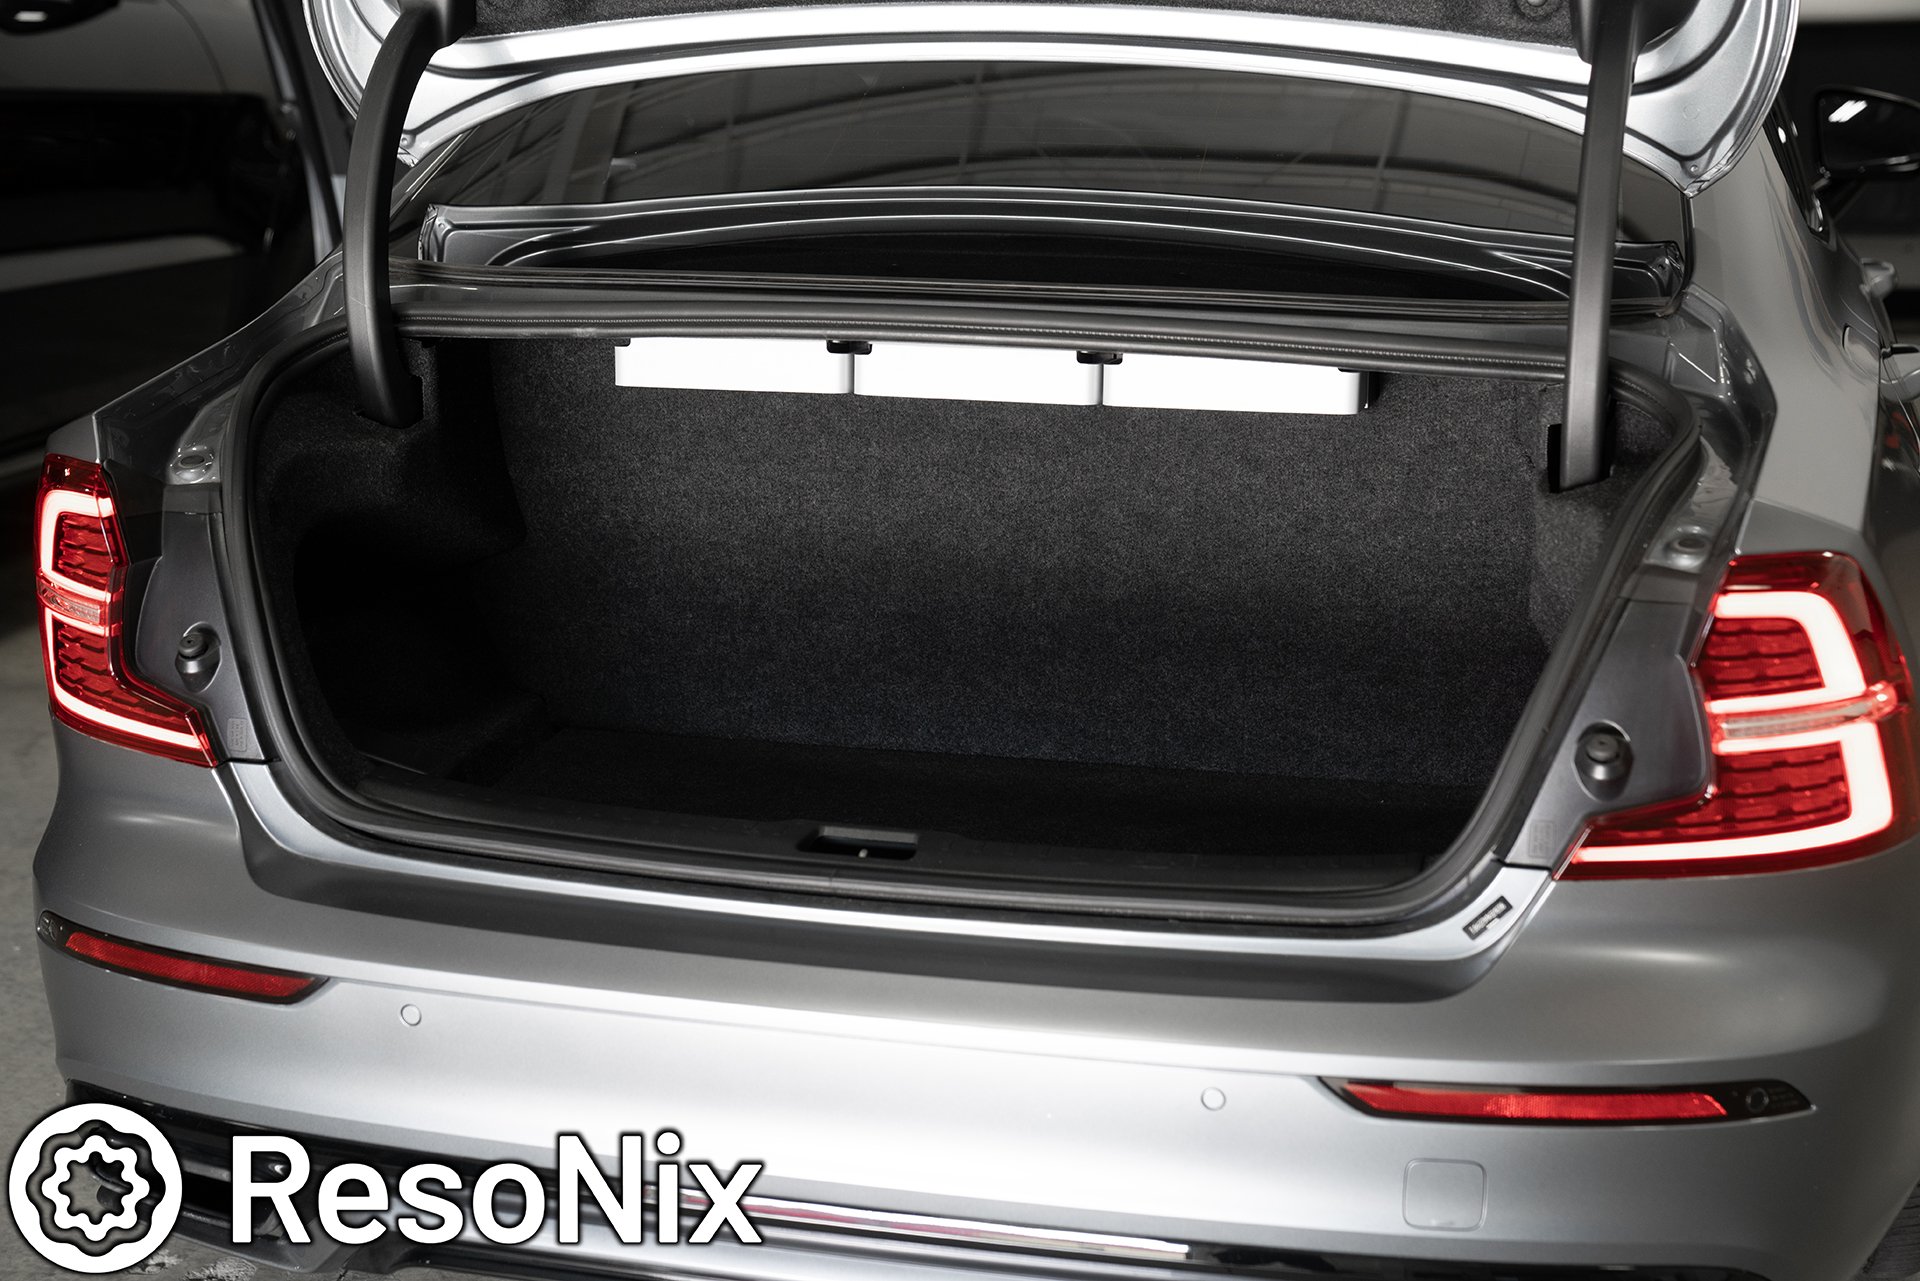
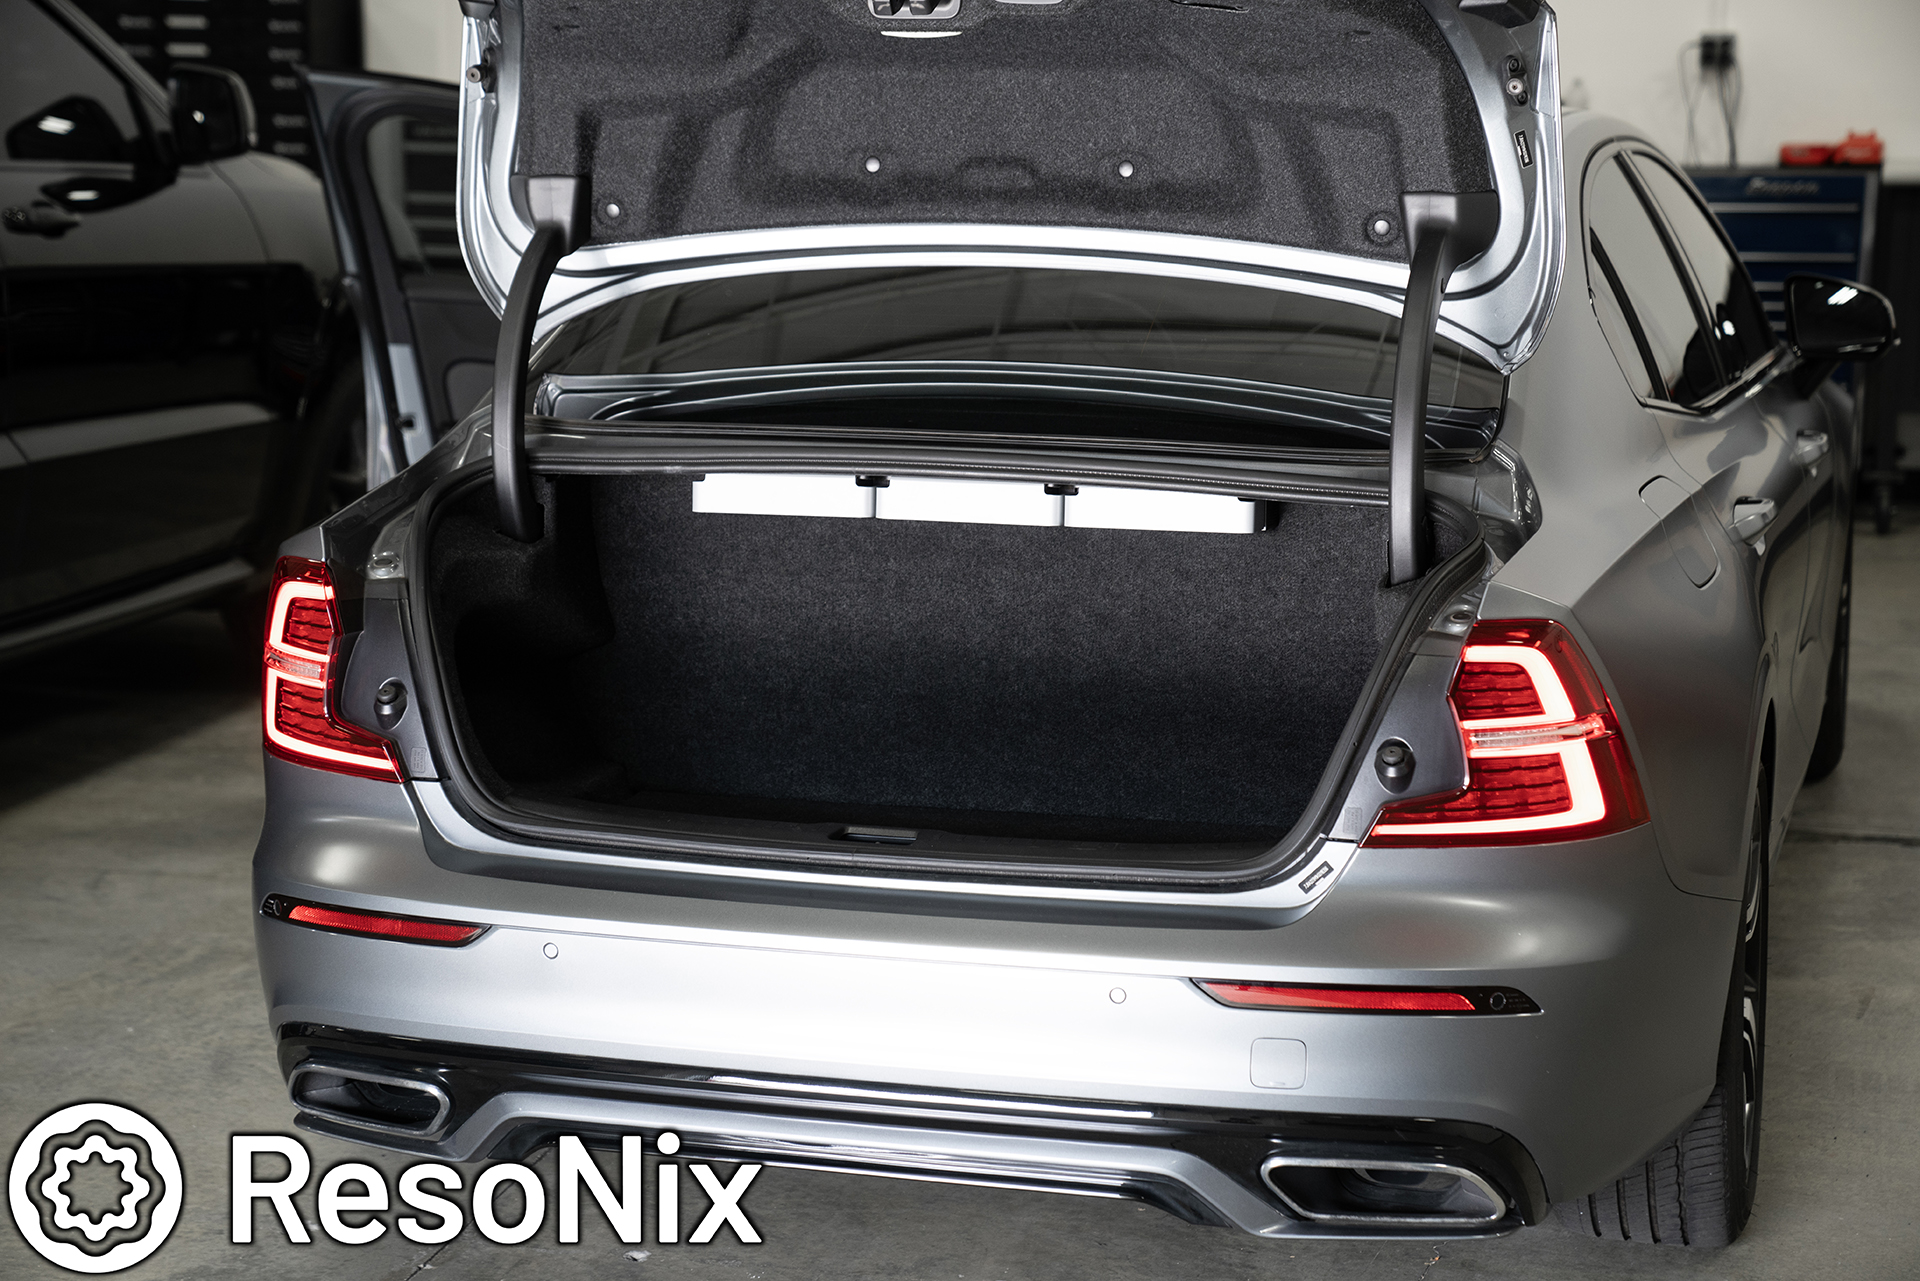
Hey everyone, I have a pretty exciting build log to bring you all today. This time, its my personal 2019 Volvo S60 R-Design that I use as a shop demo car. It features equipment from the different lines that we carry that and can showcase how we can adapt to a specific goal of this particular build. The goal for this vehicle is first and foremost, the highest level of sound quality possible. The next, the car needed to remain pretty much 100% functional. This is what most of our clients are looking for, and we need to prove to them that we can do that without a problem. The third, high volume. Not only do some of our clients like to crank it to 11, but I do as well and I’ll be damned if I cannot reach concert levels of output in my own car. Another thing to note.. this vehicle was chosen for a very specific reason. It checked almost all of the boxes that I required. Full black interior, a look and feel that matched what most of our clients are used to so they can feel like it relates to their vehicle when they sit in and listen to it, good aftermarket AND OEM locations for speakers, something fun to drive, and something that will have the space to house these two semi-separate sound systems while still being able to lug around my snowboard gear in the winter. Two separate systems? Yes. There is a system in the OEM locations, and a system in the new after-market locations. This way I can demo two different types of systems and levels of product in one setting with ease. The only downside to this vehicle was that the trunk is a little bit small, but in the end, I made it work out perfectly.
So what did I use to achieve these goals?
System 1: OEM Locations (no pictures of the mentioned list, sorry)
. OEM Head Unit
. Helix V Twelve DSP Amplifier
. Focal Utopia 3.5WM 3″ Midrange
. Focal Utopa TBM Tweeter
. OEM rear door speakers
. OEM rear deck speakers
. (midbass and rear subs are shared between the two systems)
System 2: Aftermarket Locations. While they may be custom locations, they are still designed to appear OEM.
. OEM Head Unit with optional DAP and USB input (pretty much never used)
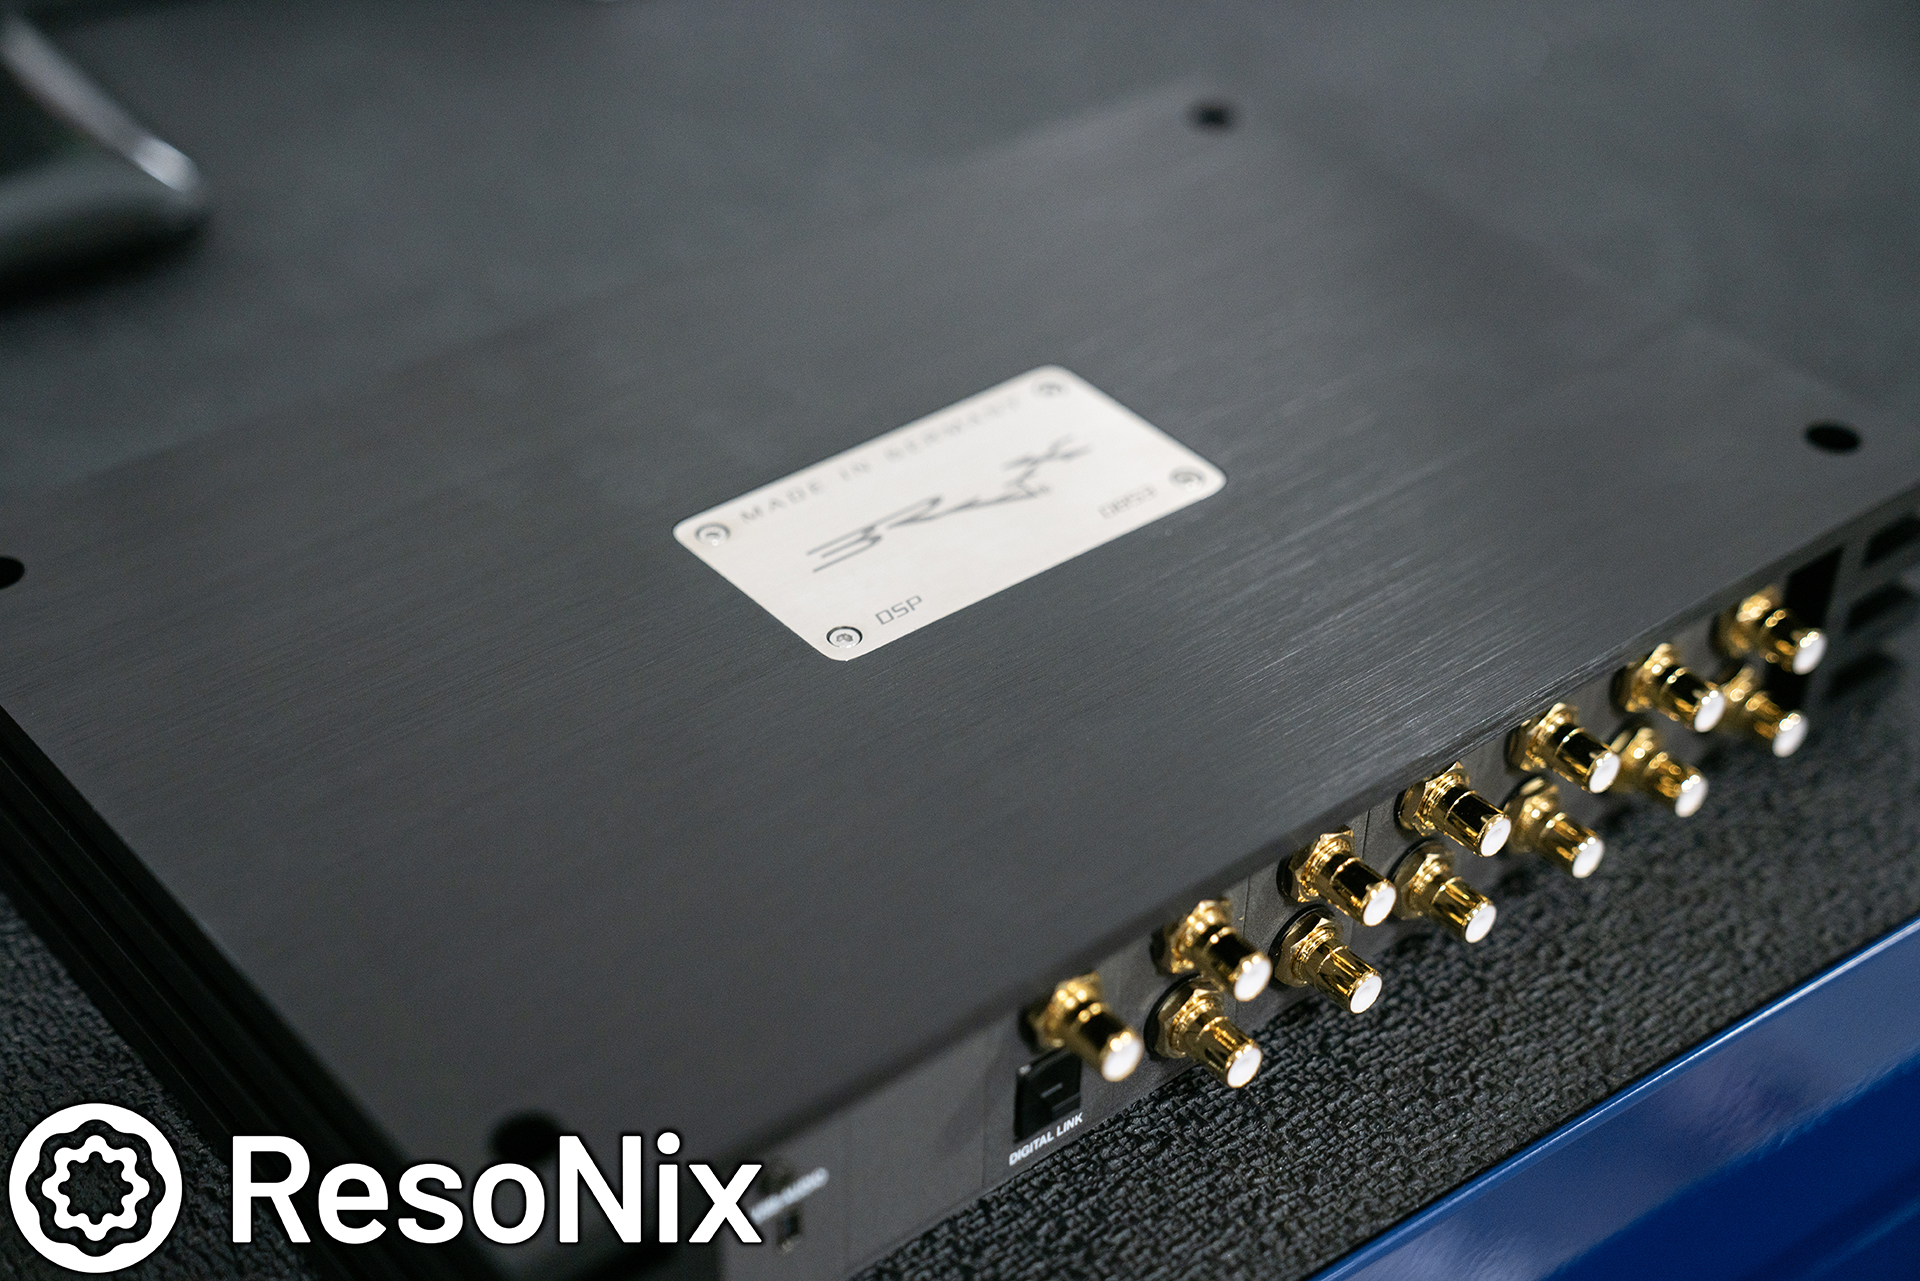
. Brax DSP with Conductor and USB HEC Input
. (3) Mosconi Pro 4|10 4-channel amplifiers (recently updated to 1 Mosconi Pro and 2 Sinfoni Prestigio’s, more info below)
. (3) Mosconi Pro 1|10 mono amplifiers
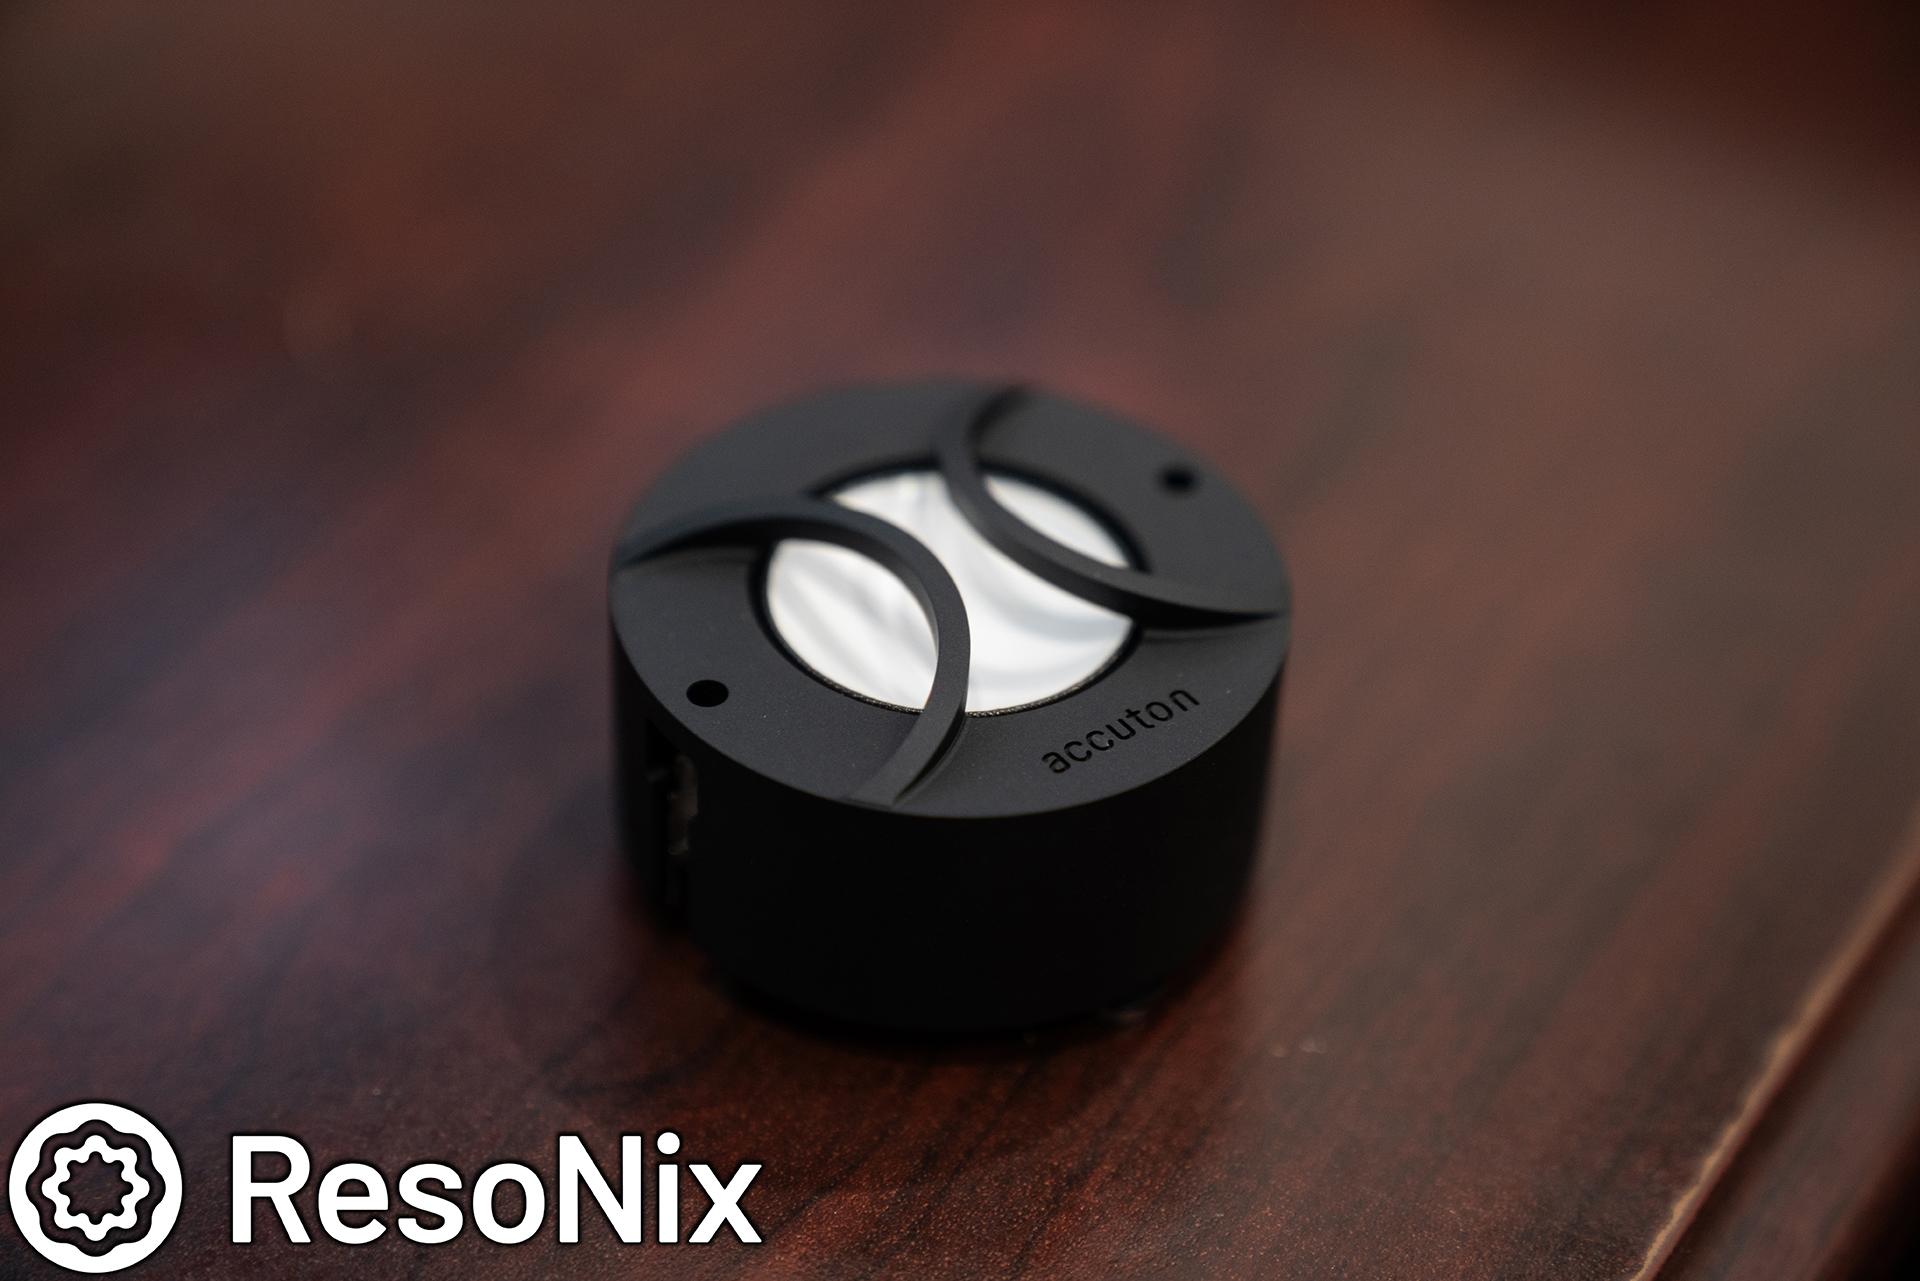
. Accuton Automotive C30 Ceramic Tweeter
. Accuton Automotive C100 Ceramic Midrange
. Accuton Automotive C165 Ceramic Midrange
. Illusion C12 Carbon shallow subwoofer (passenger footwell)
. (2) Illusion C12XL Carbon subwoofers in the trunk And last but certainly not least…
. FULL ResoNix Sound Solutions soundproofing.
There is also a Radenso RC-M Ultimate Edition Radar & Laser defense system installed as well. The car is also fully wrapped in Xpel Stealth Paint Protection Film. AJ at Supreme Shine in Long Island did this for me before we started offering these services in house at ResoNix Sound Solutions. Shout out to AJ. Love you, bud. For those that want to hear it, feel free to reach out. Im always open to giving demos. This very well may be the best sounding car I have produced. Everything seen in this build log was done by me personally, except for an old friend helping with soundproofing, and Matt helping with wiring the radar/laser system.
. ResoNix Mega CLD Squares Sound Deadening Material
. ResoNix CLD Squares Sound Deadening Material
. ResoNix Fiber Mat Automotive Sound Absorbing Material
. ResoNix Guardian Rear-Wave Door Cavity Midbass Absorber
. ResoNix Rope – All Purpose Spot Treatment Sound Deadener
. ResoNix CCF Strips – Foam Speaker Rings
. ResoNix VW/Audi OEM Interior Non-Woven Tape
For those that want to hear it, feel free to reach out. I’m always open to giving demos. This very well may be the best sounding car I have produced.
Everything seen in this build log was done by me personally, except for an old friend helping with soundproofing, and Matt helping with wiring the radar/laser system.
Before we get into this, it is important to note that every situation is different, every application is different, and everyone’s needs/wants are different. If you would like guidance that is specific to your situation, please do not hesitate to reach out to us.
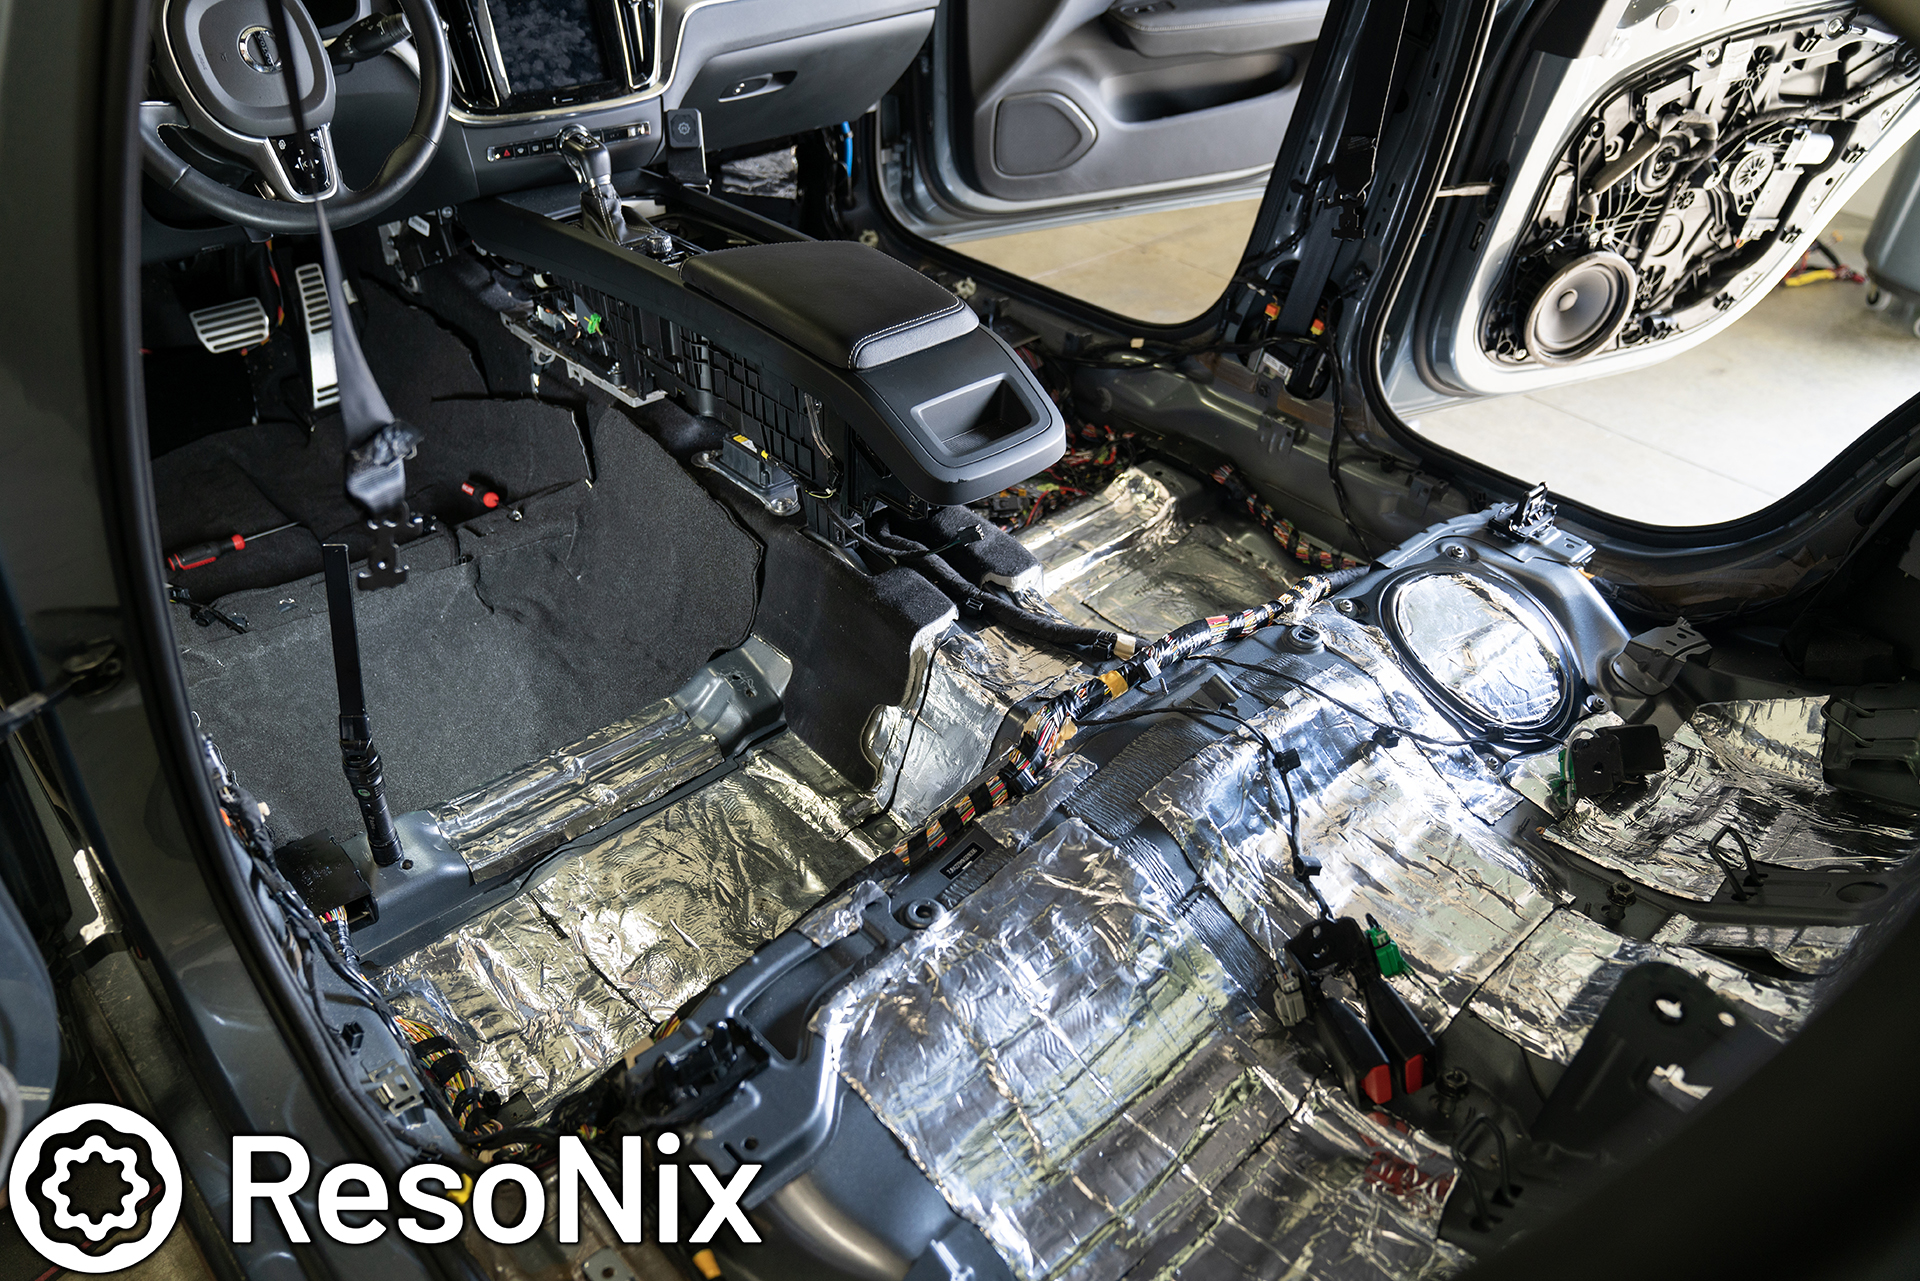
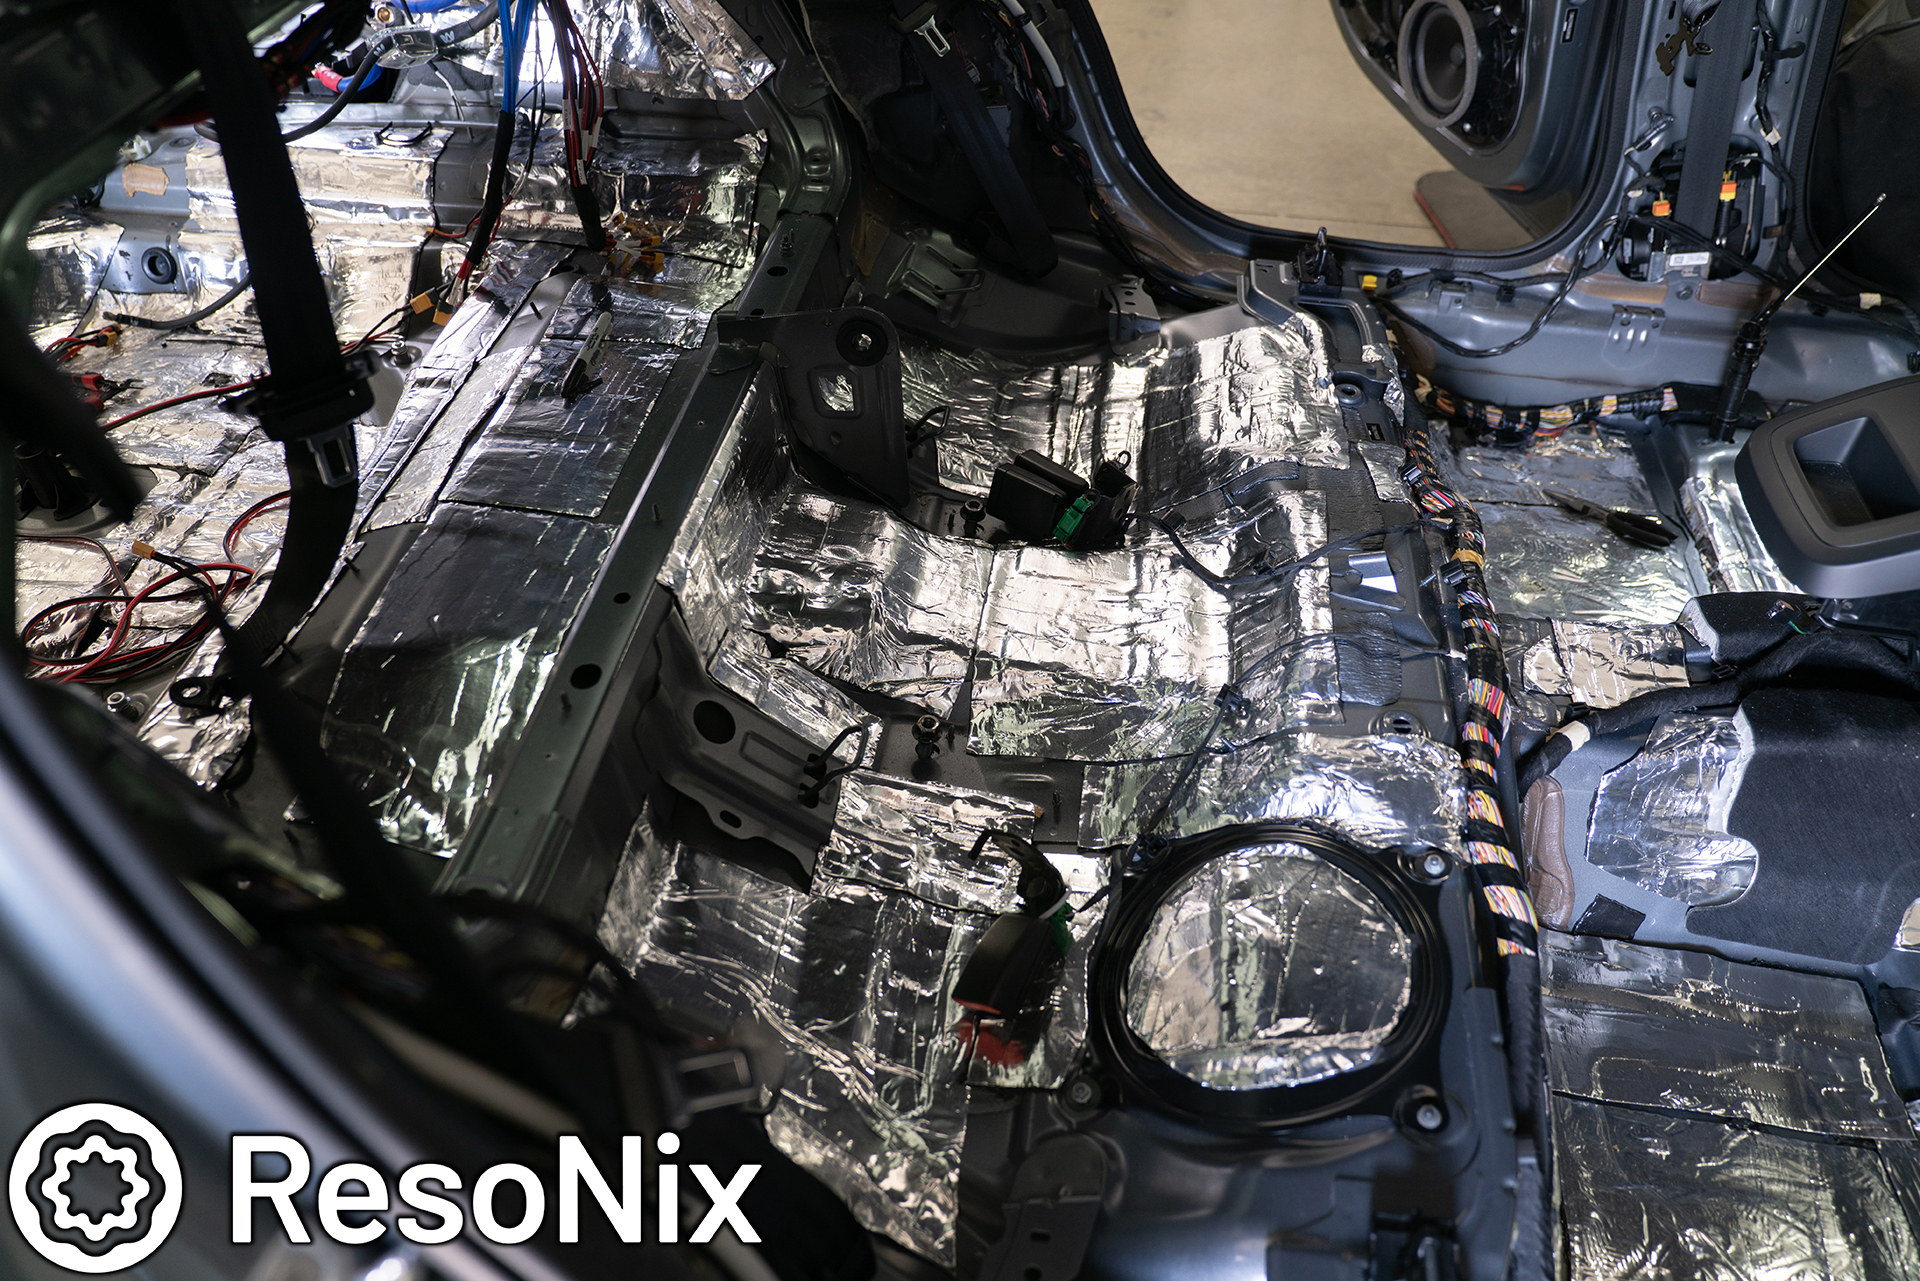
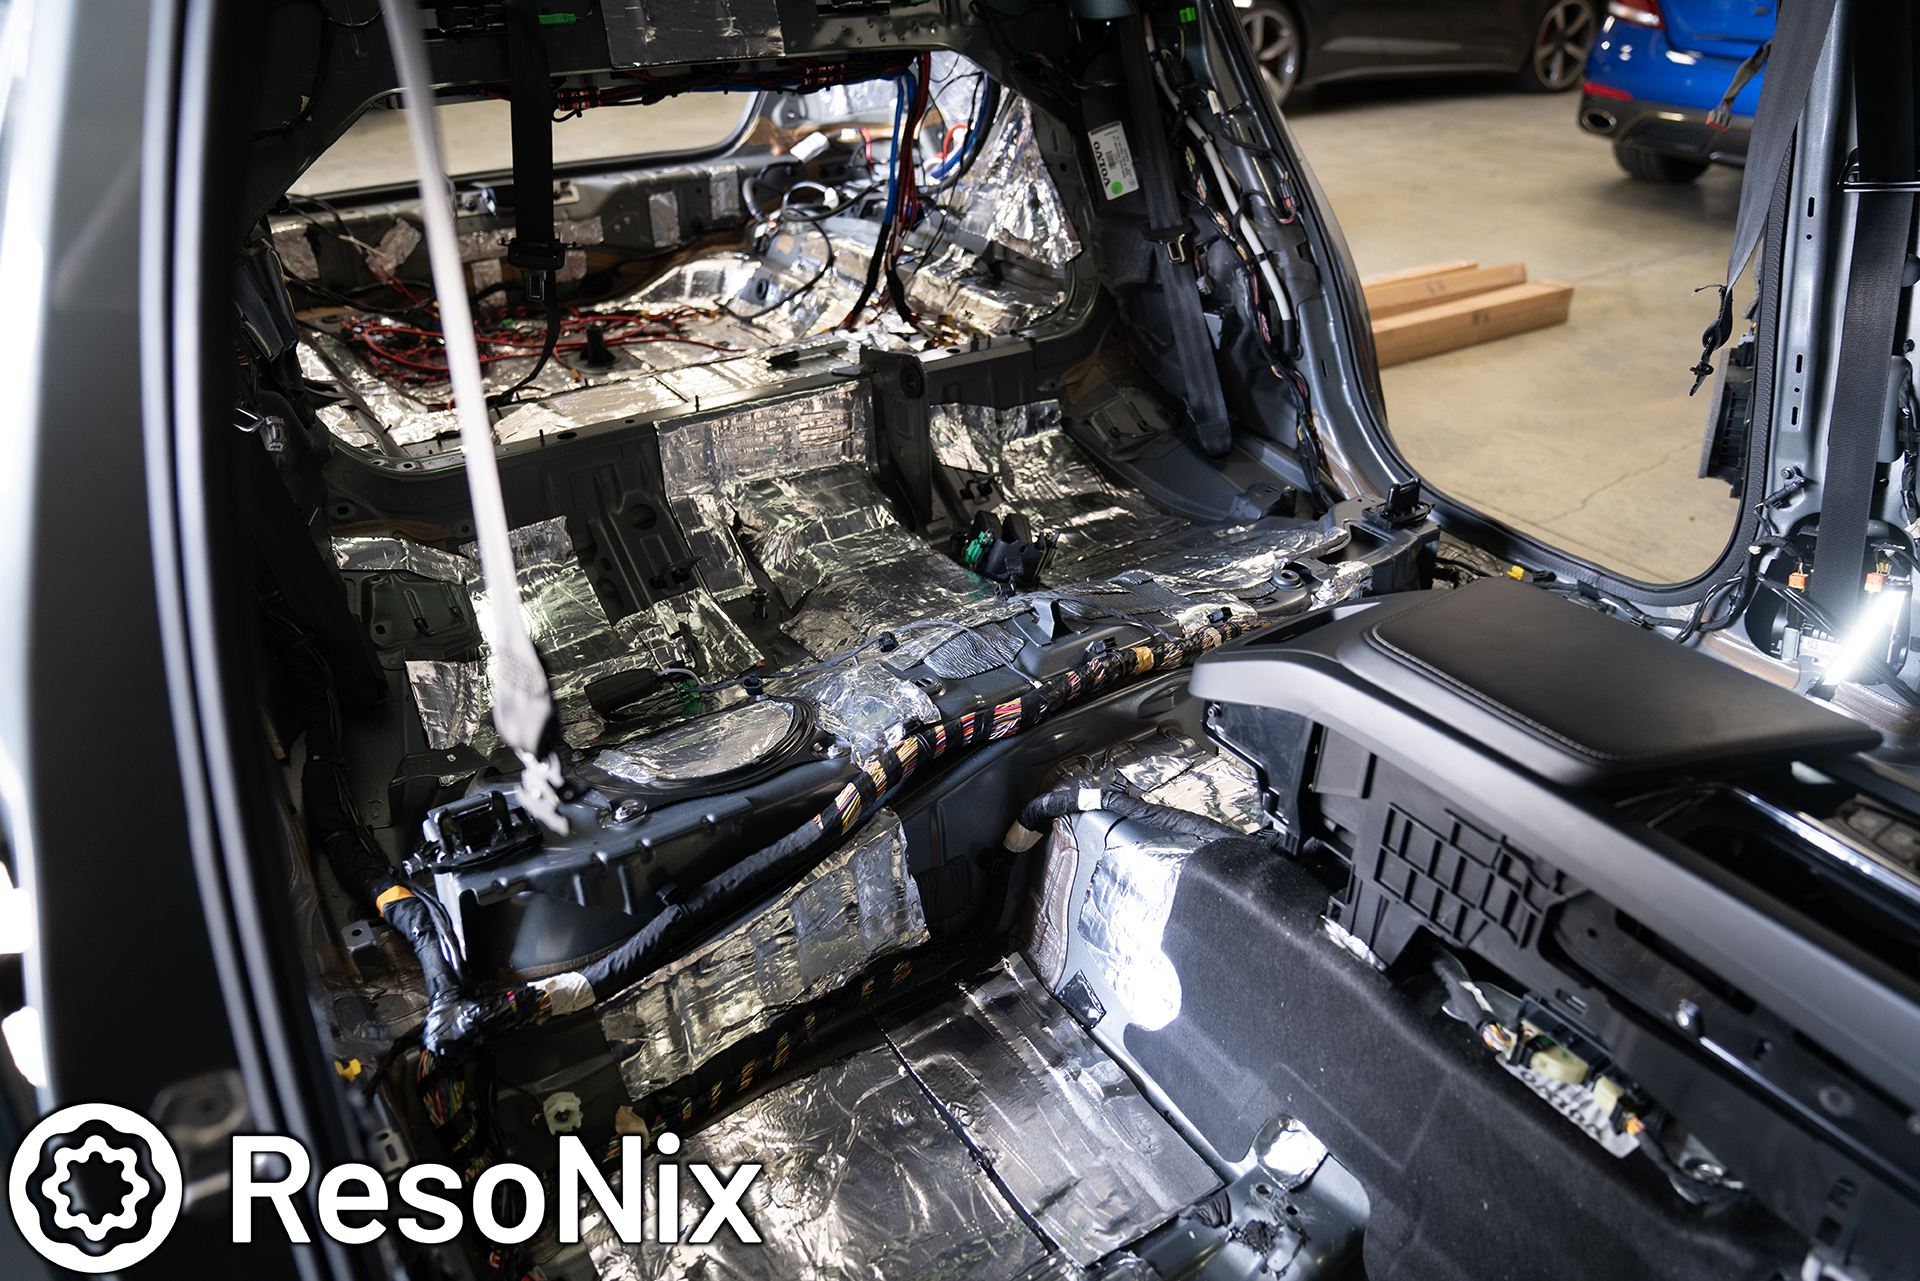
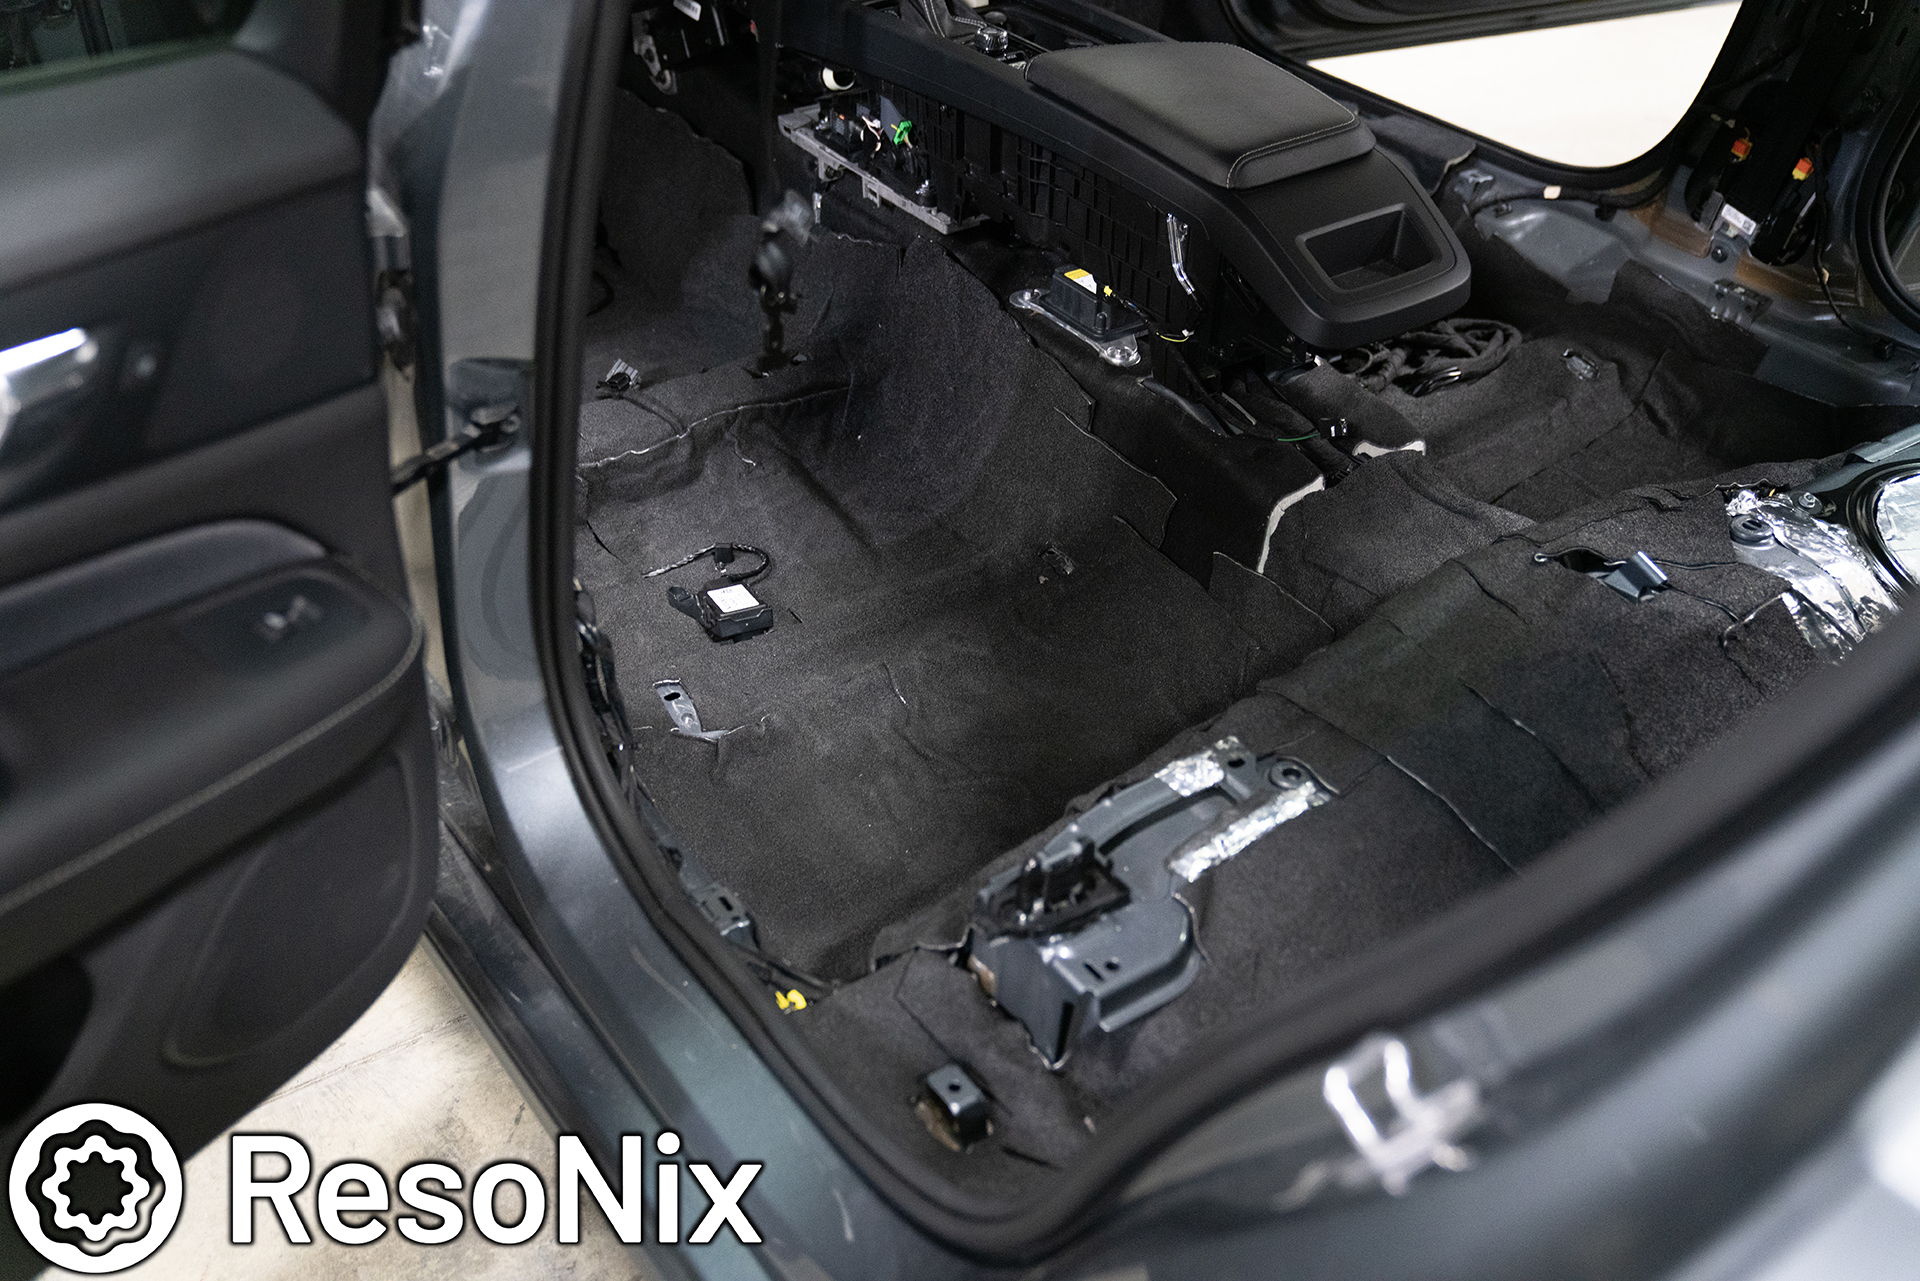
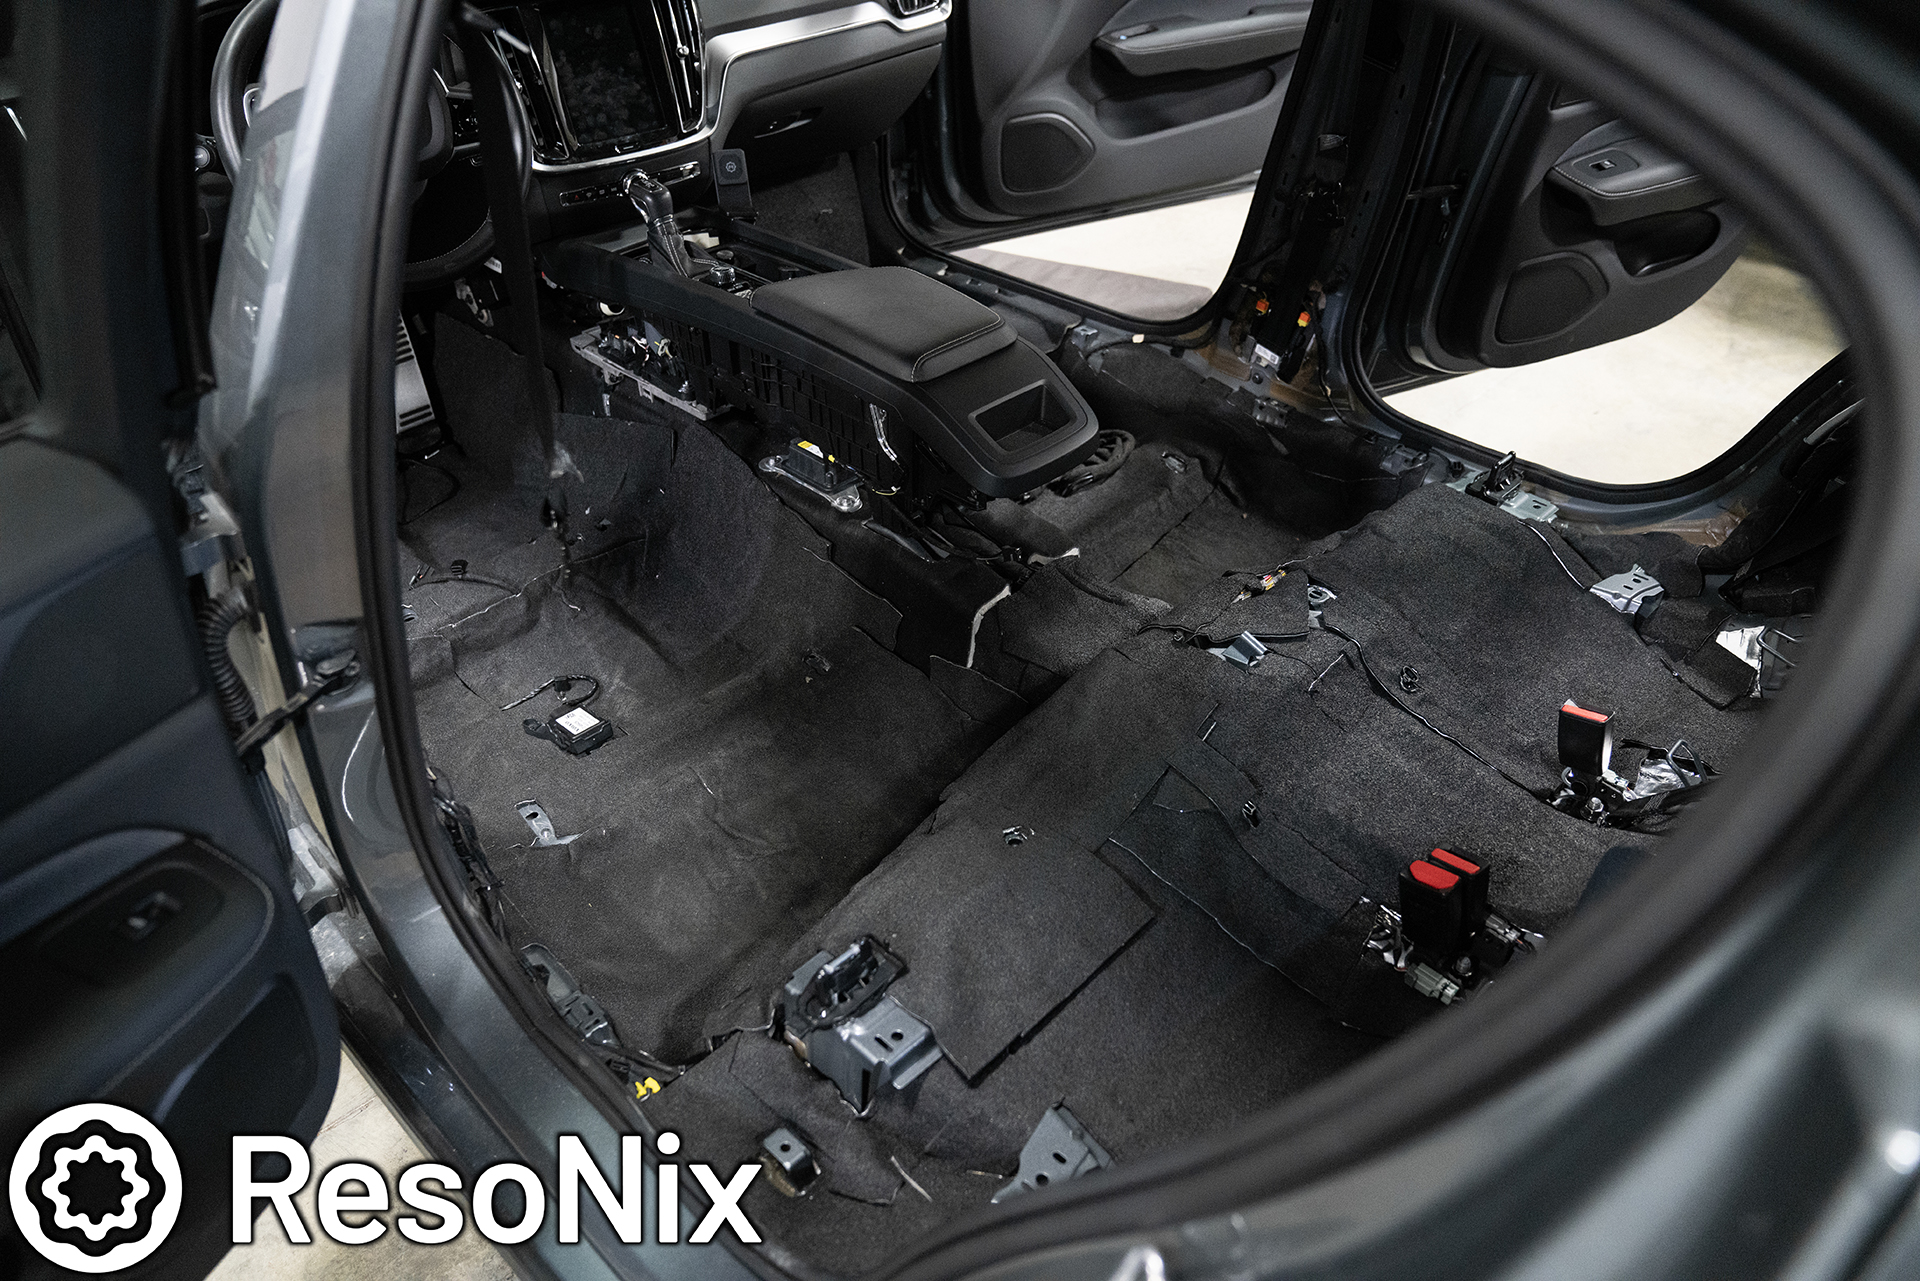
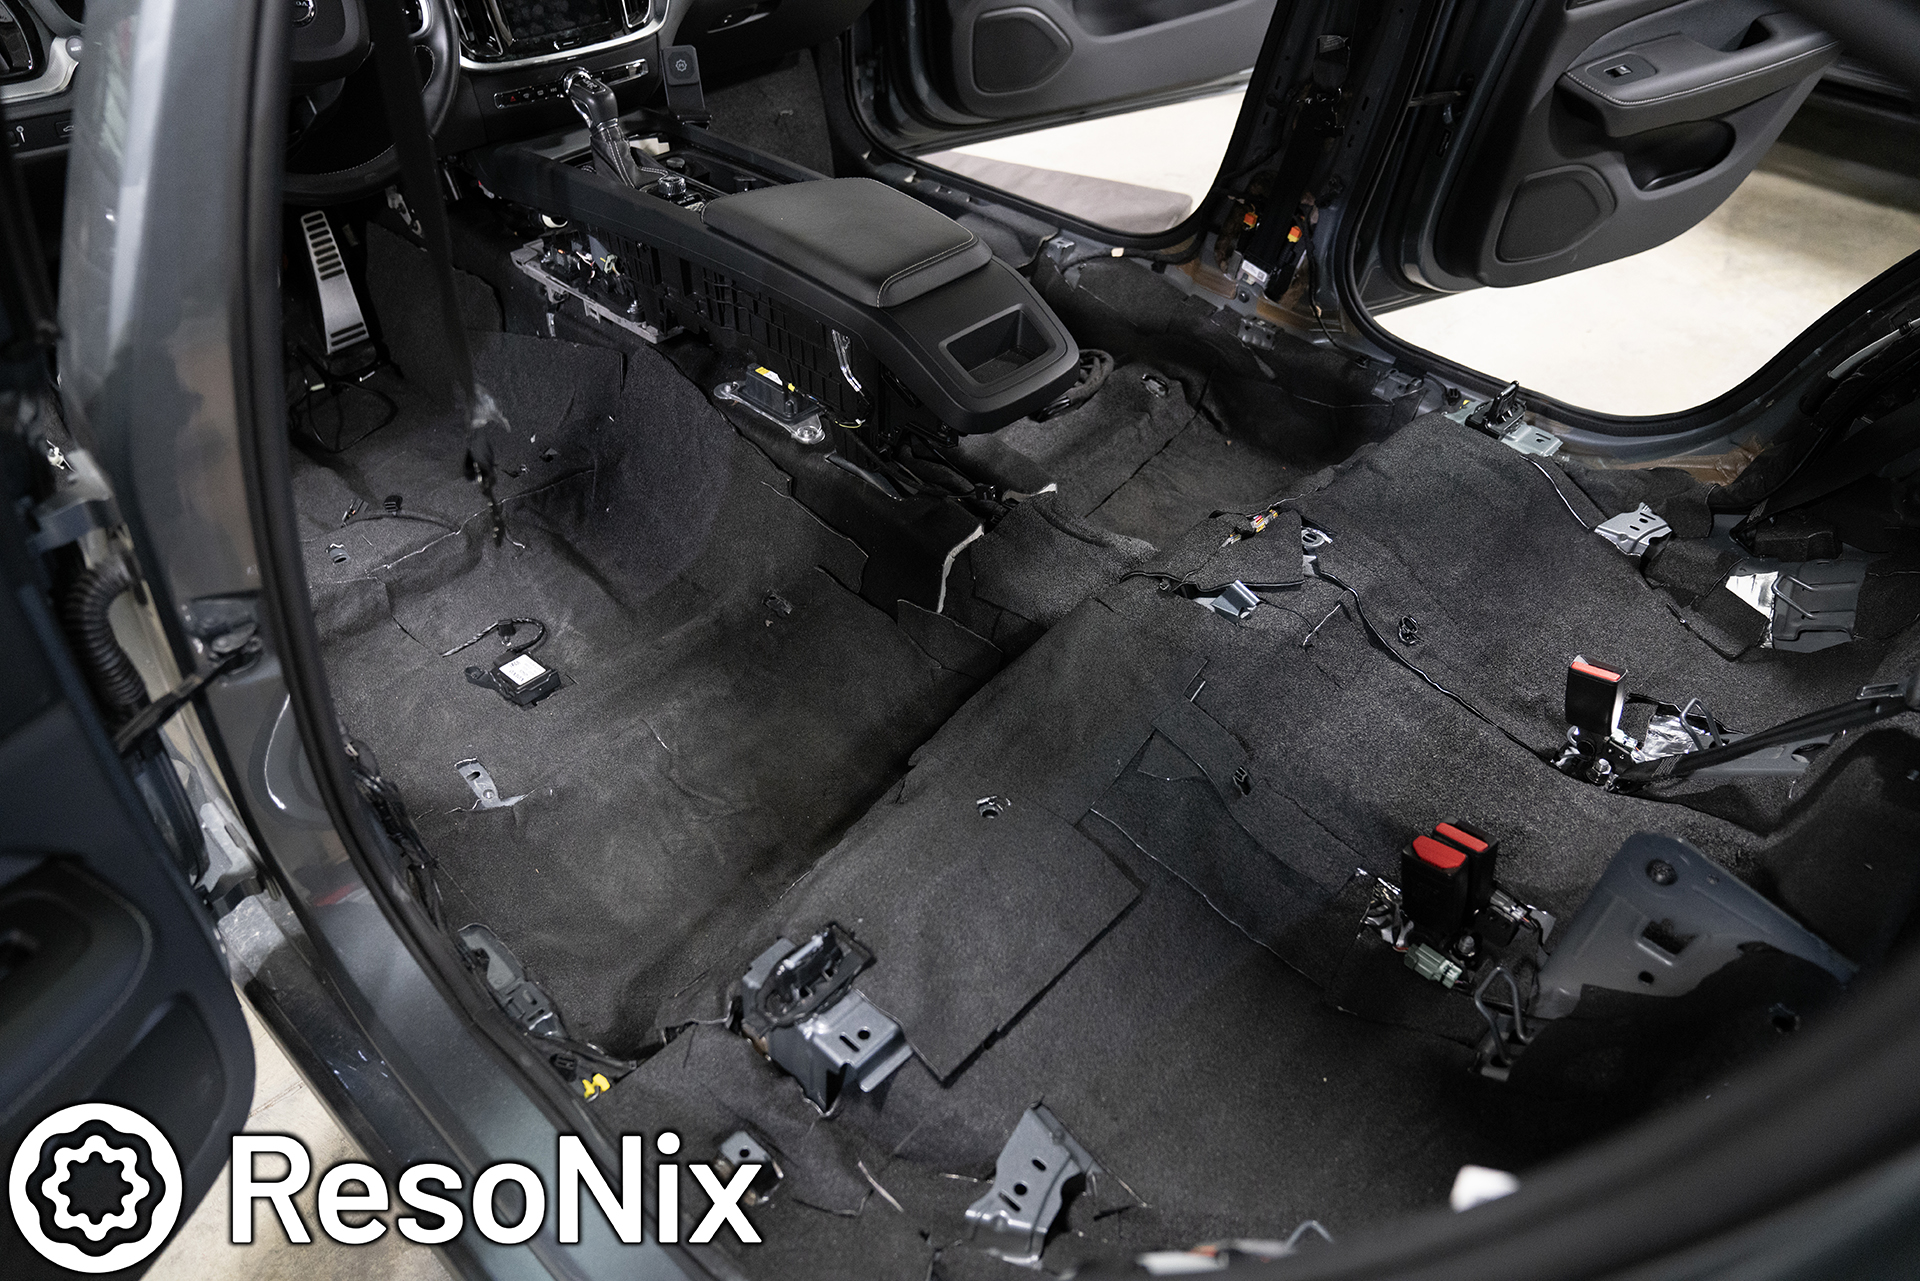
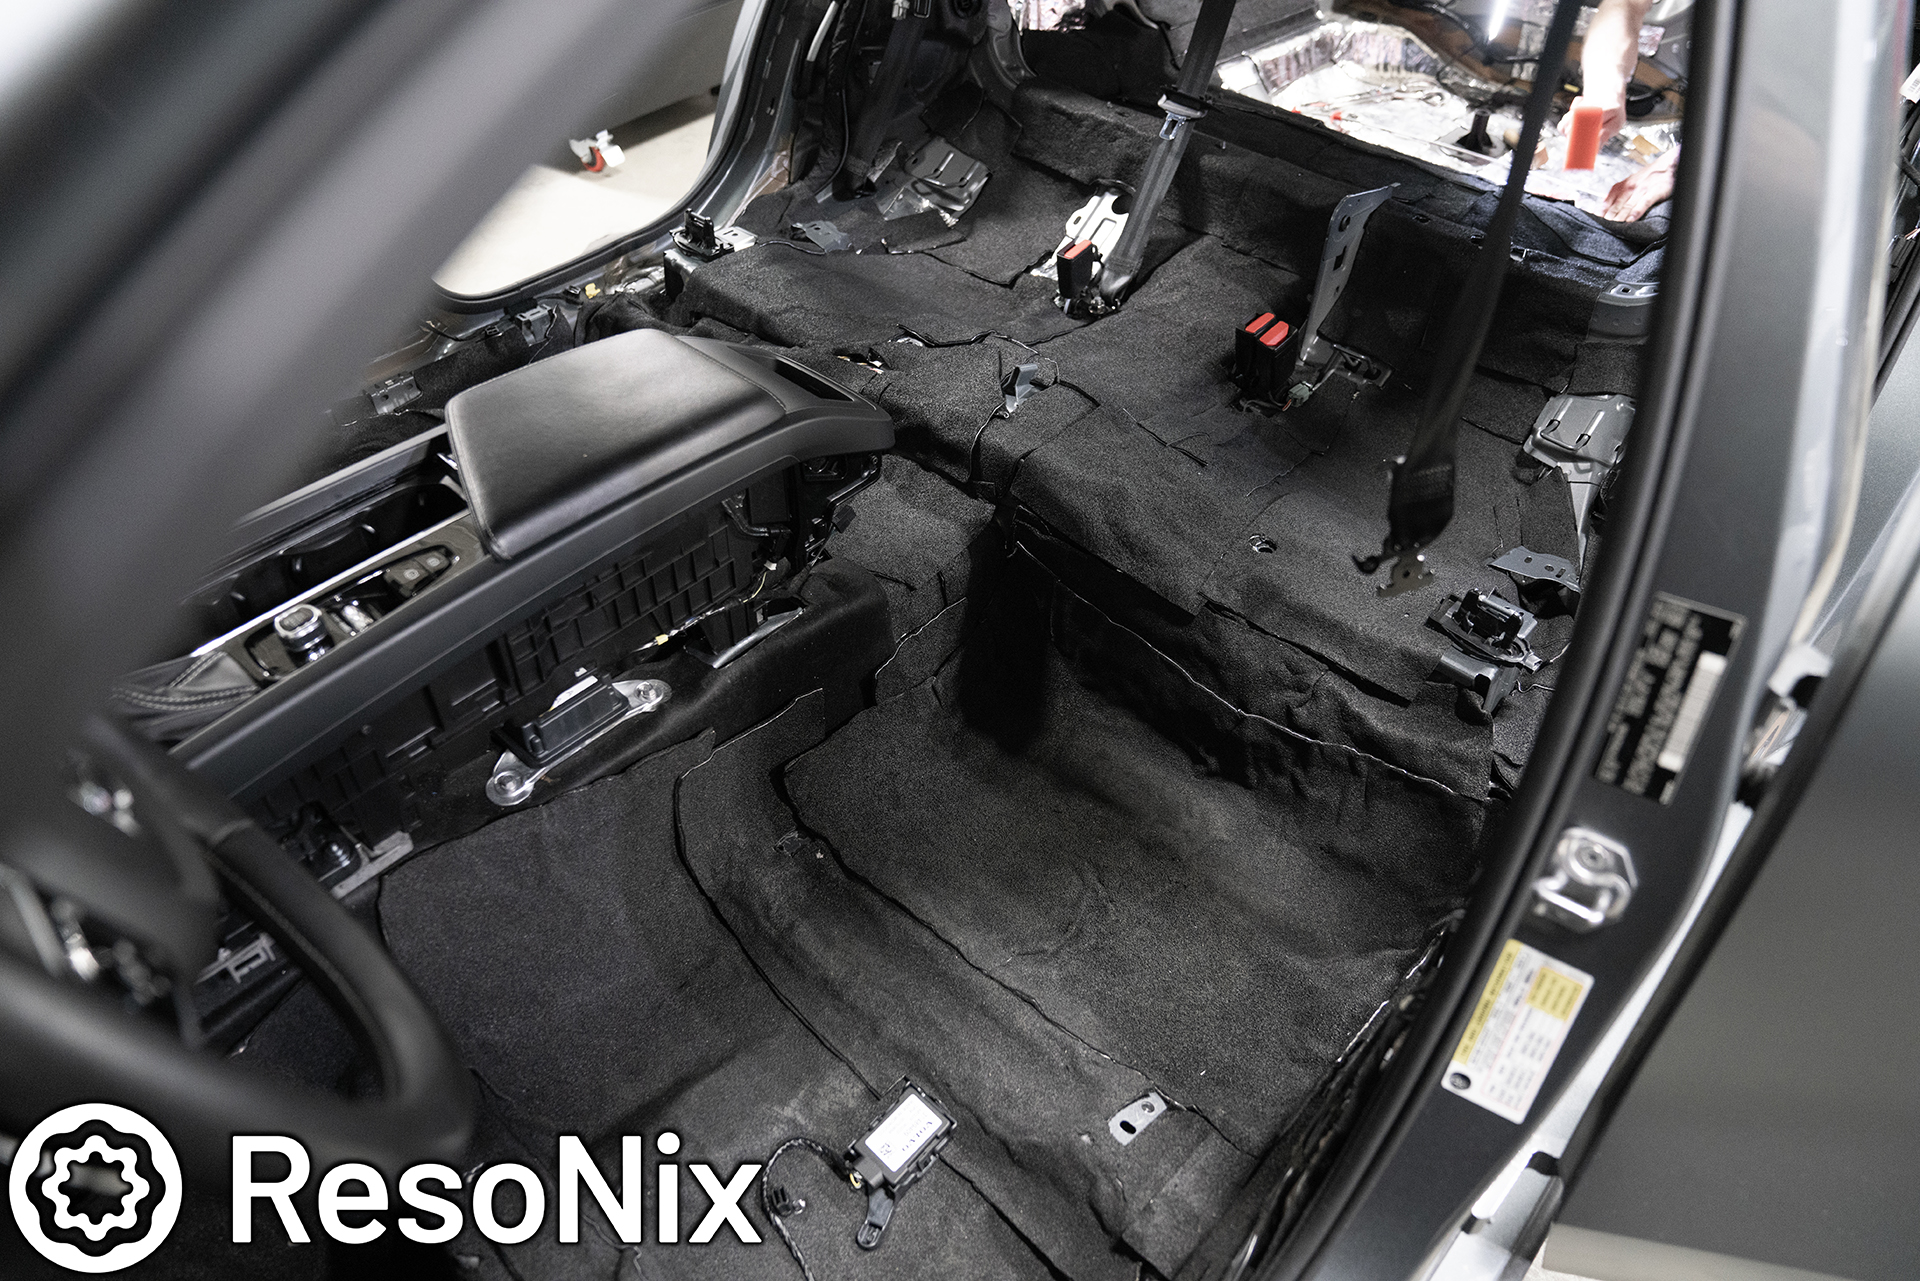
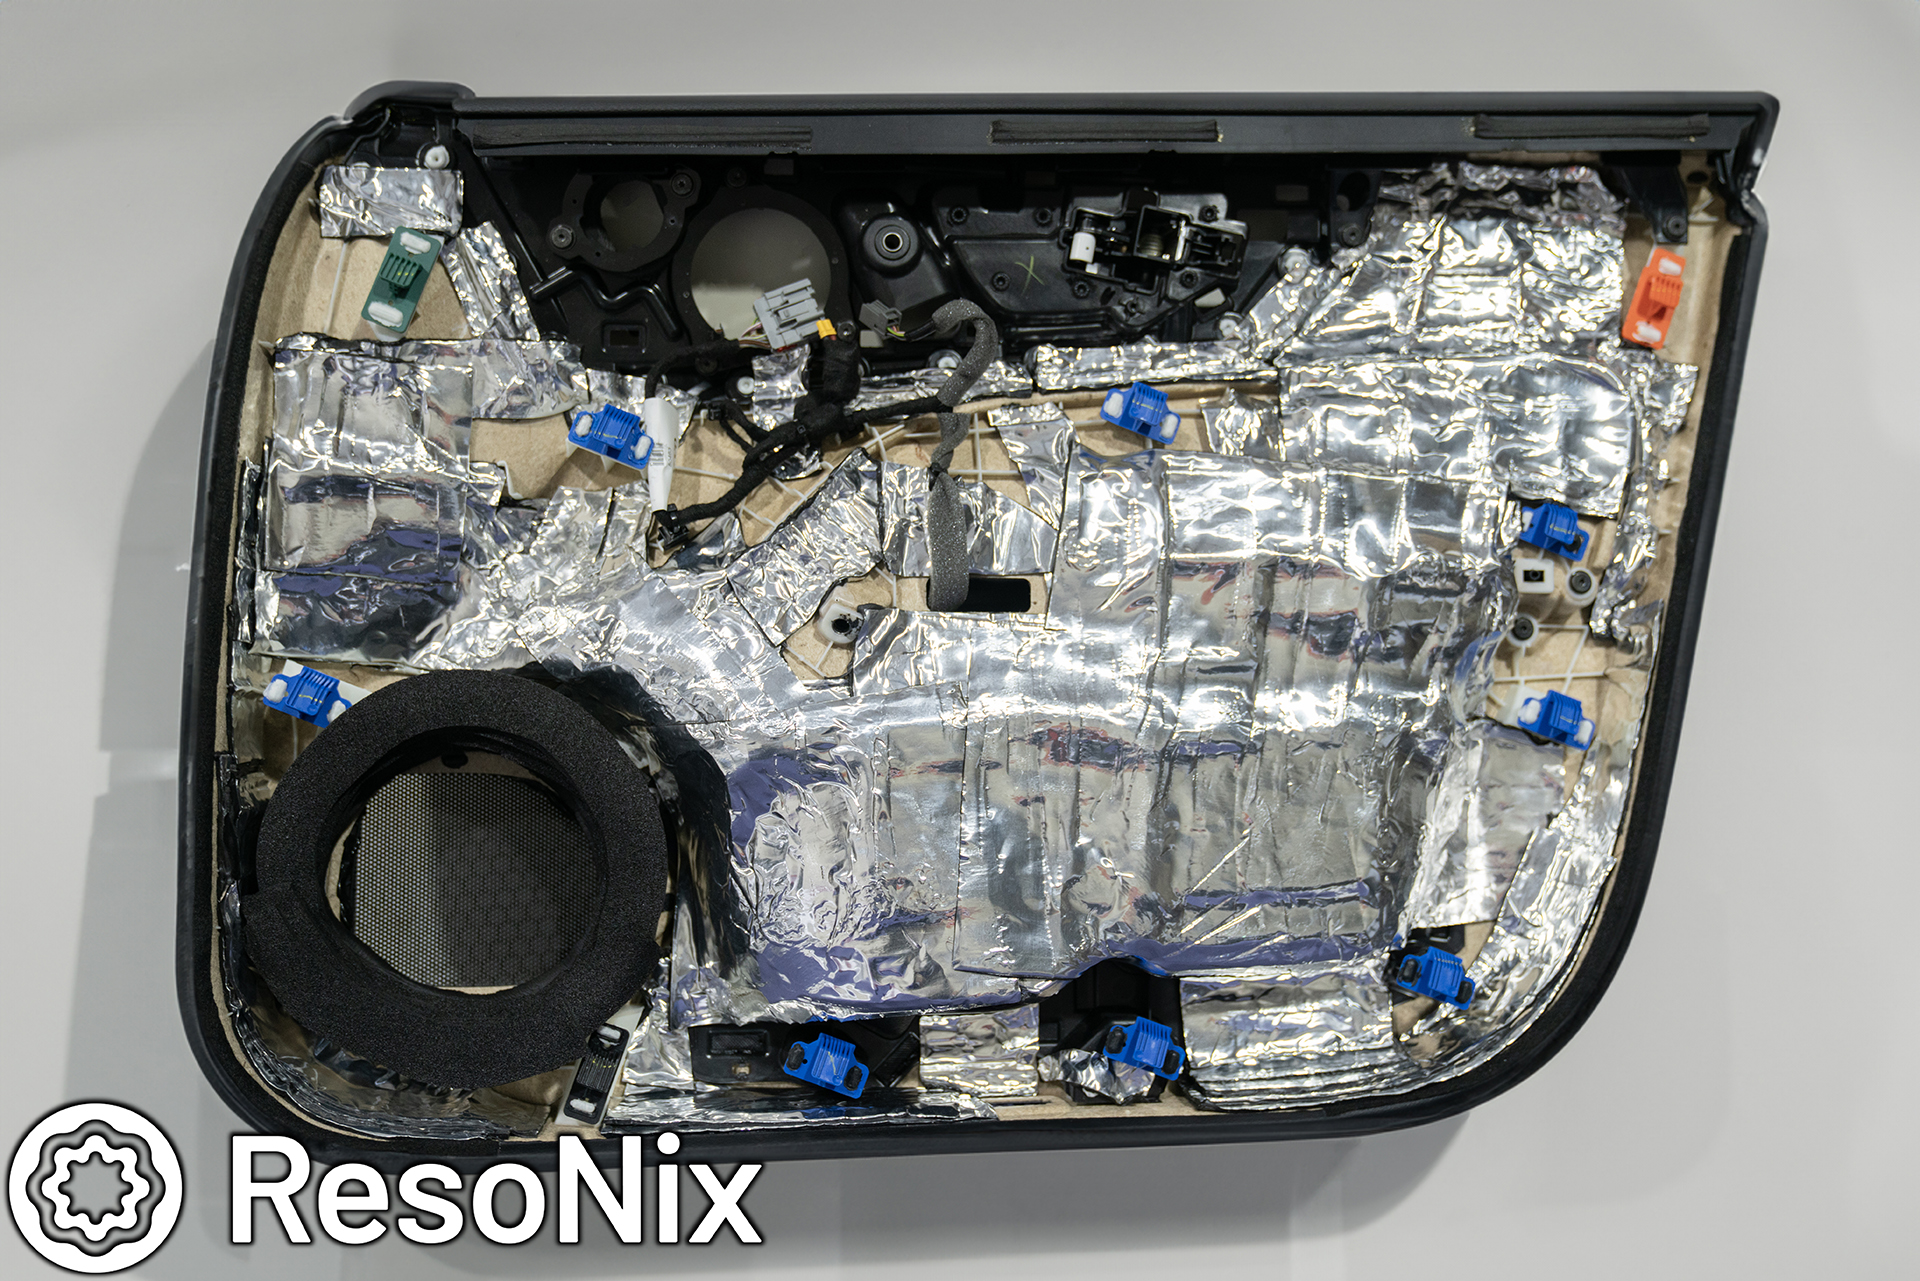
First photos we will show you is the ResoNix Sound Solutions soundproofing job. We laid down a good amount of ResoNix CLD Squares on all surfaces. Doors received nearly 100% coverage on the outer skin and door panel, while the floors and everywhere else was about 70% coverage. Why that much instead of the “25% rule of thumb”? Because frankly, its not real. Constrained Layer Damping a panel is a bit more complicated than just throwing an arbitrary number at it. You have to consider size, resonant frequency, where its being treated on the panel and where is left bare, etc.. And, I have ZERO intention of second guessing myself and doing this ever again in my car. One and done. We then did a full coverage layer of ResoNix Barrier for soundproofing. Various areas received extra CLD, CCF12 and CCF7, and even some of the samples (at the time) of our Fiber Mat, which is now available on our website, and customers are loving it. The car wasn’t only treated to lower the road noise, but was also done to enhance the sound system so all little nooks and crannies were taken care of to prevent any rattles or resonance. This is how sound deadening is done properly 🙂
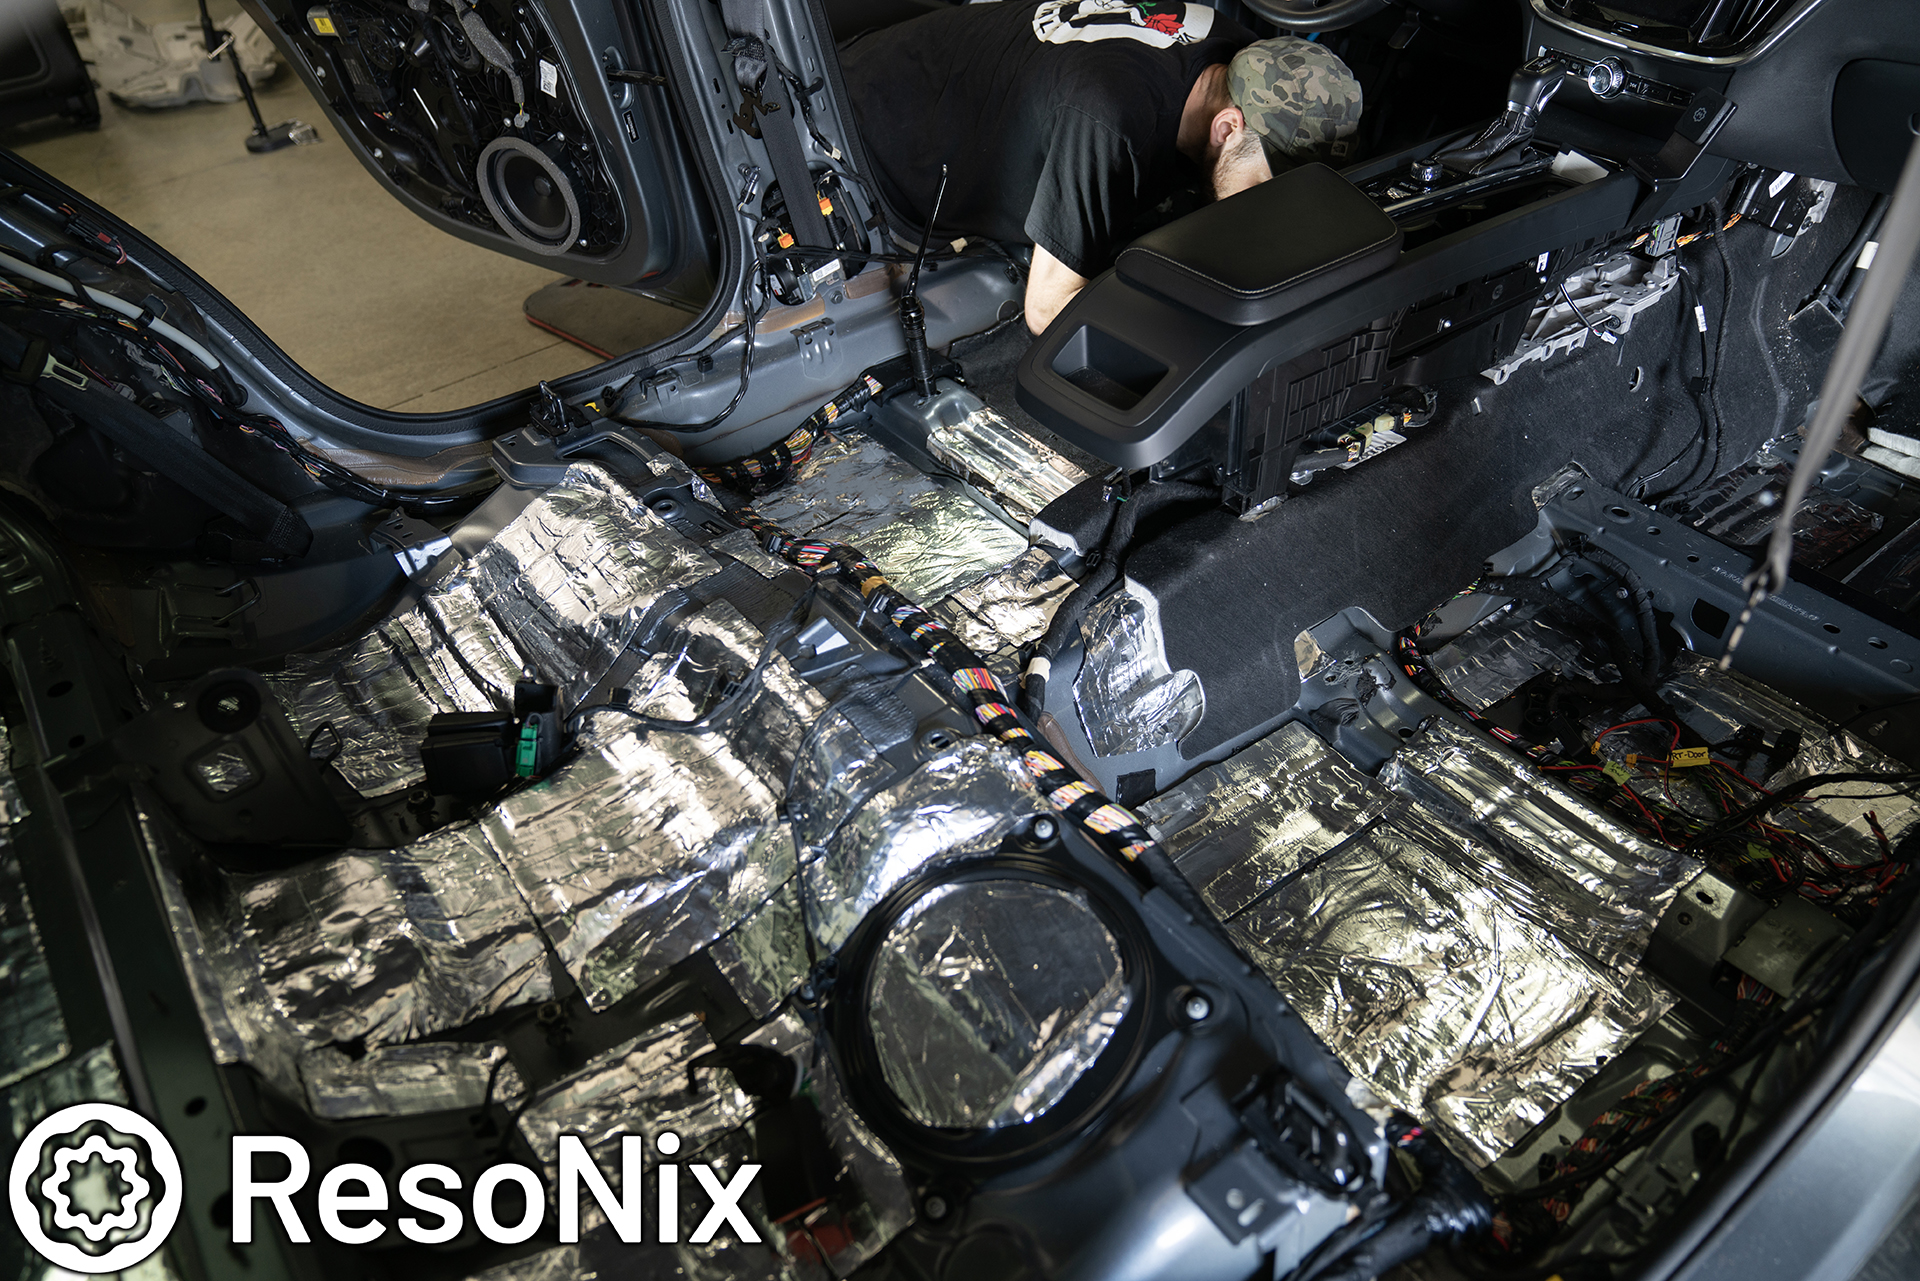
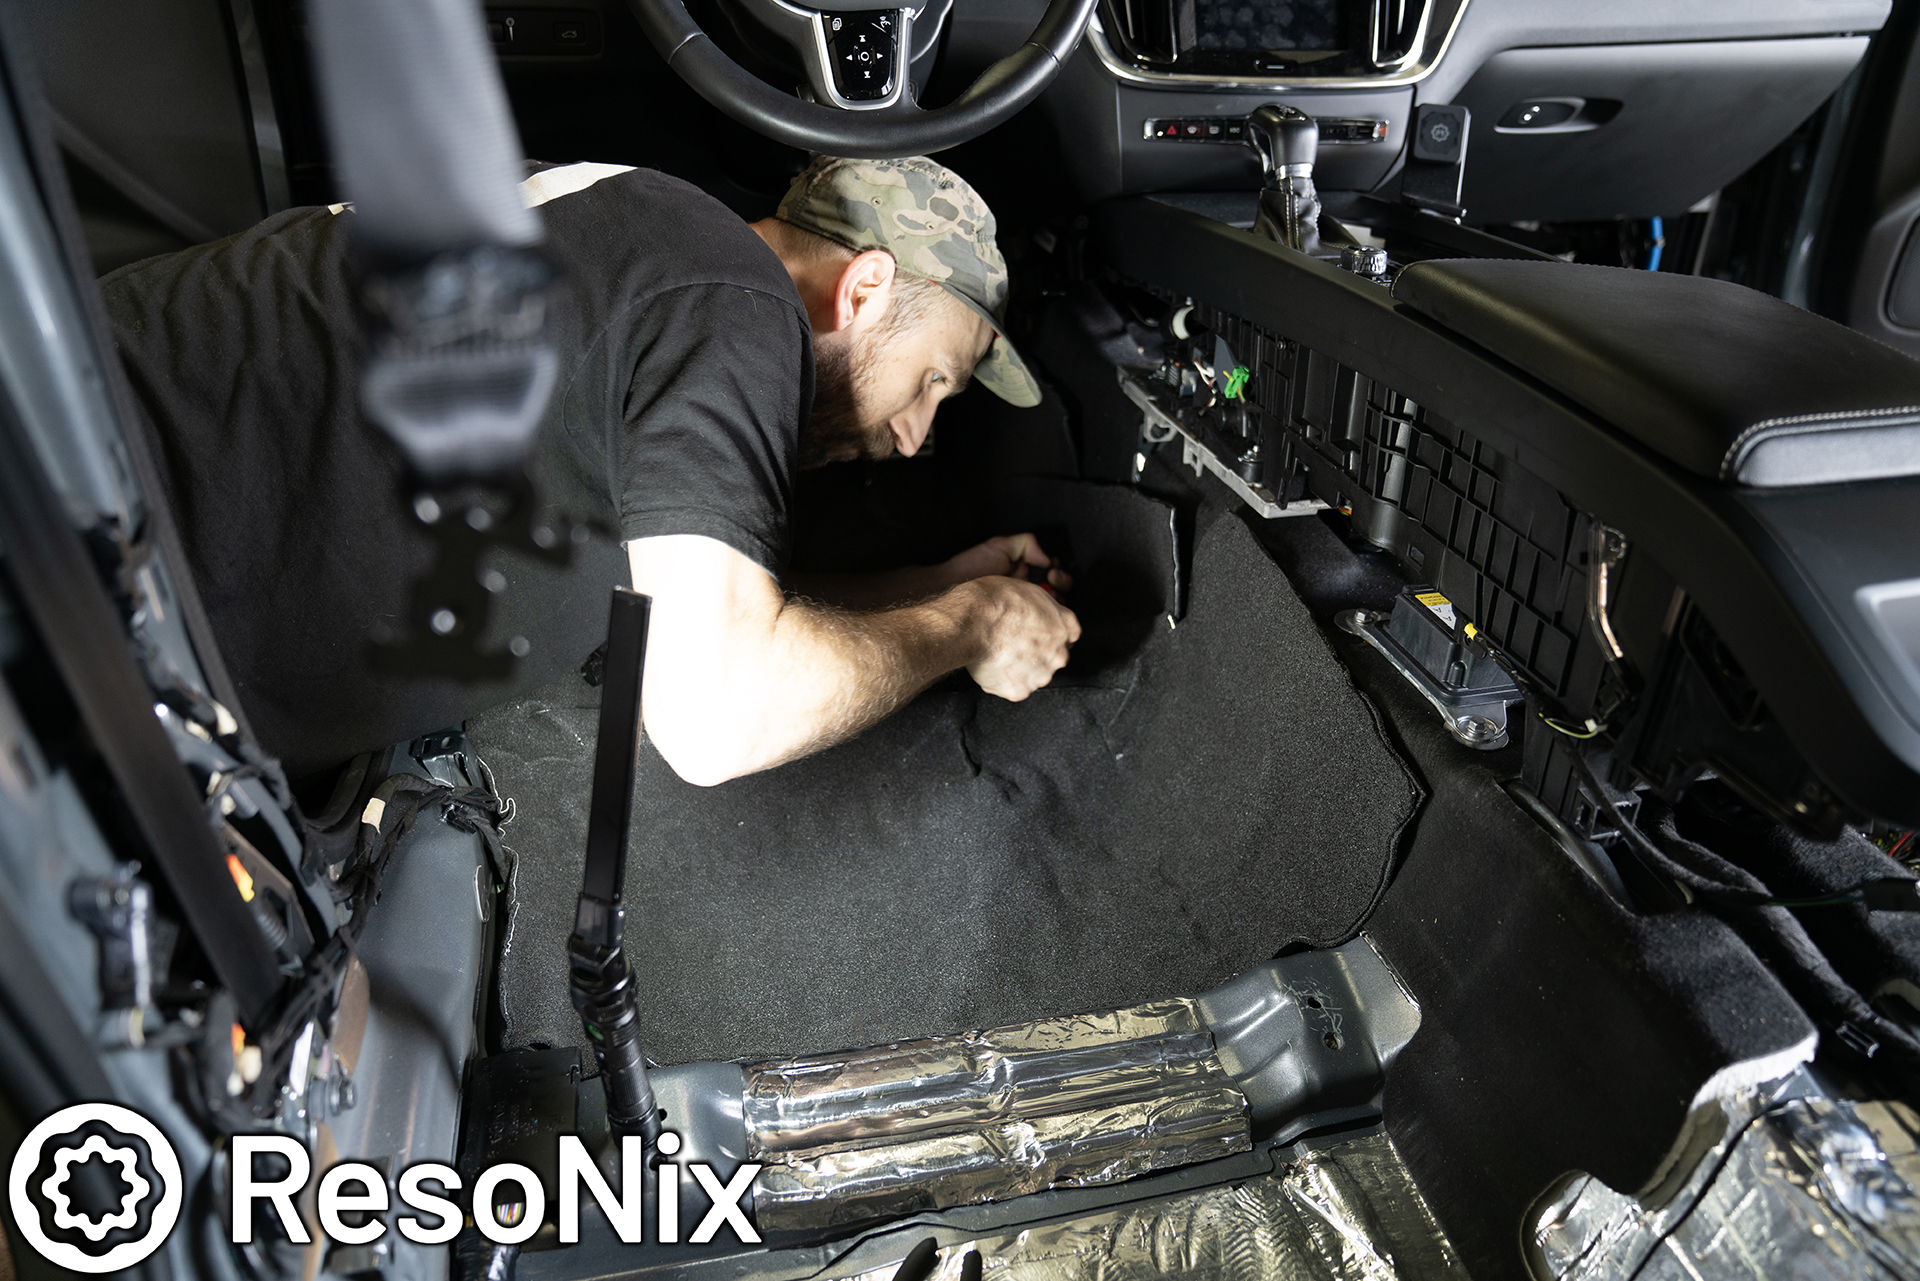
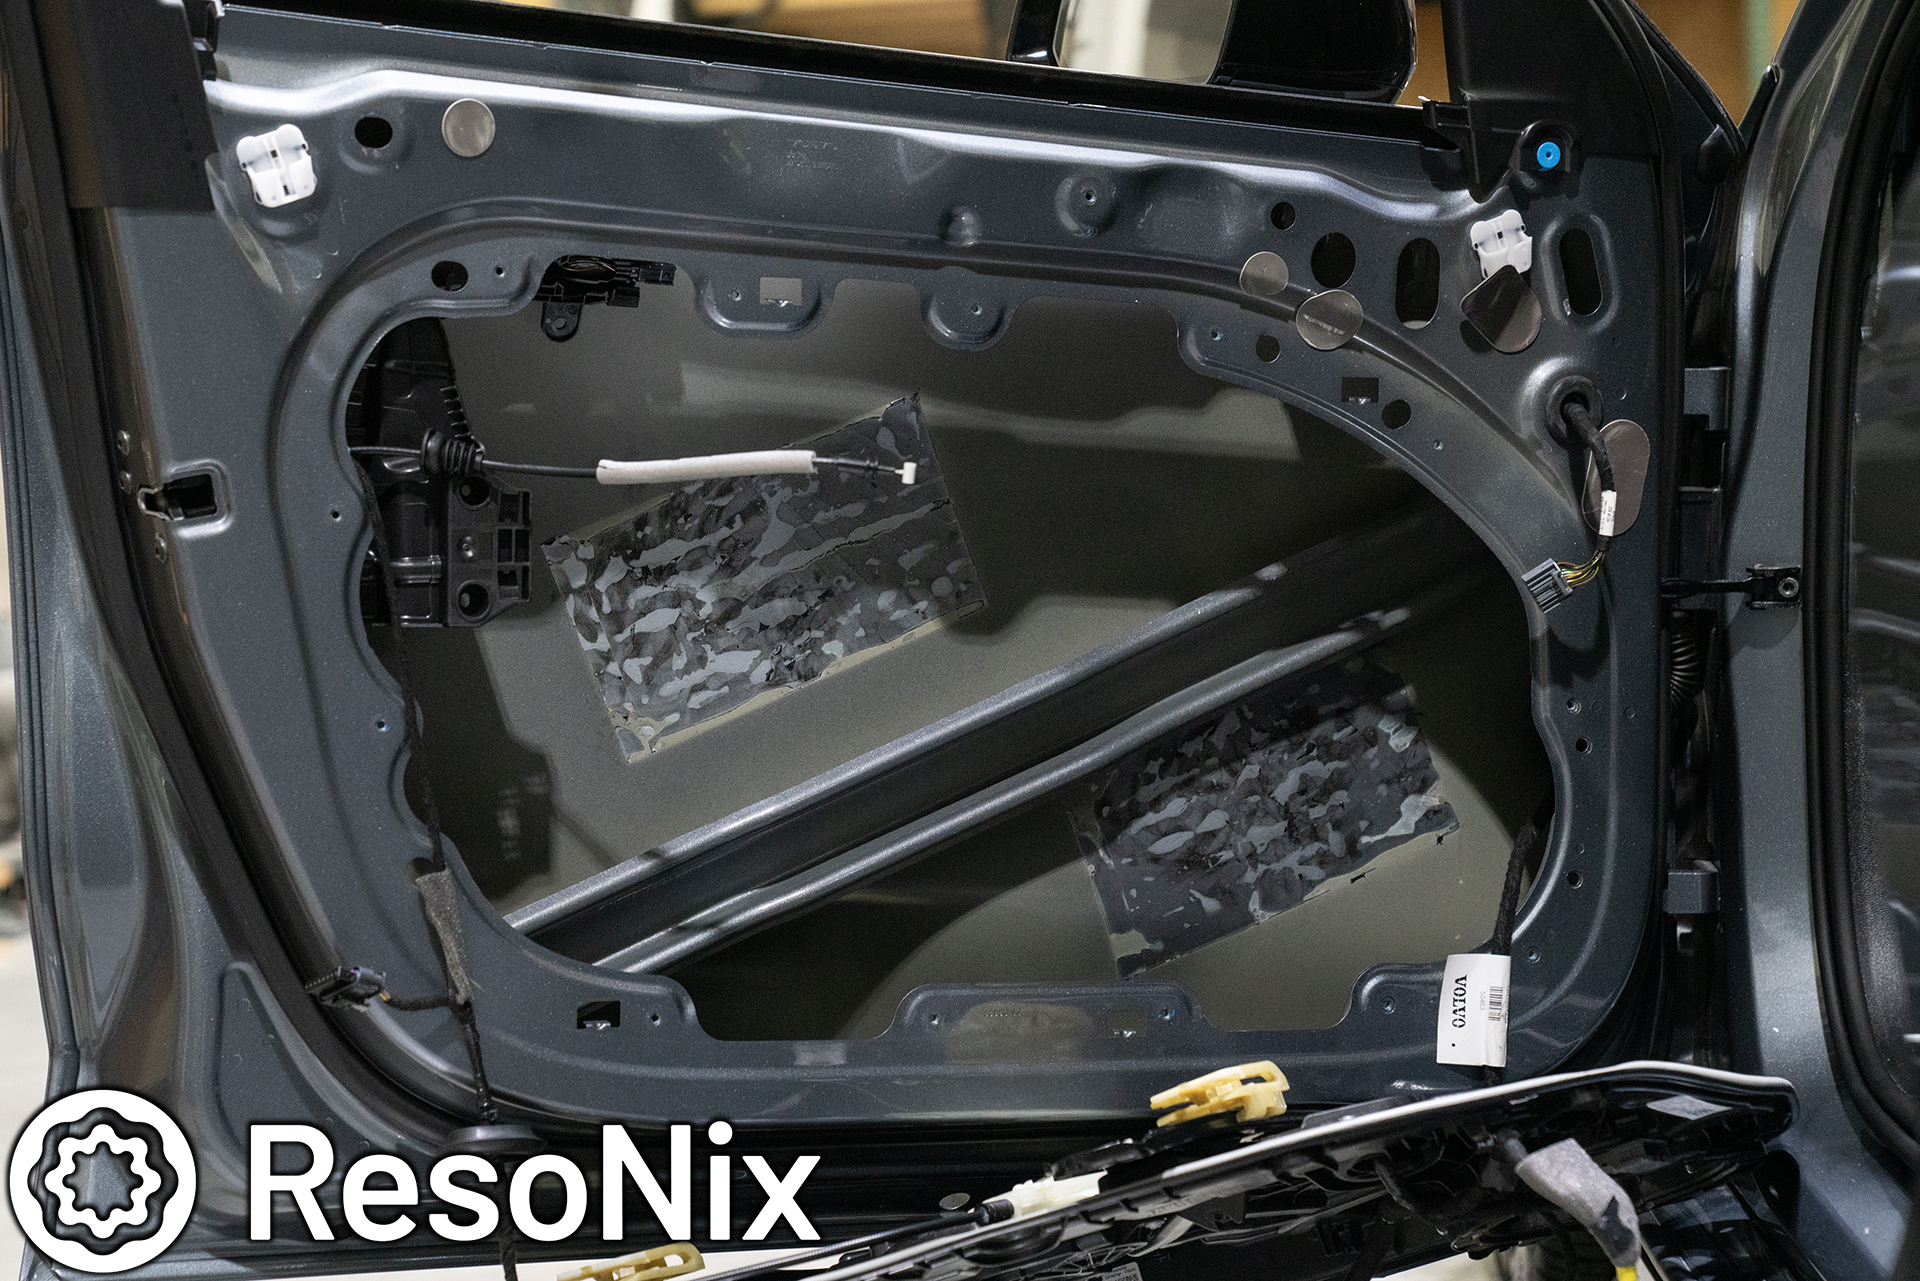
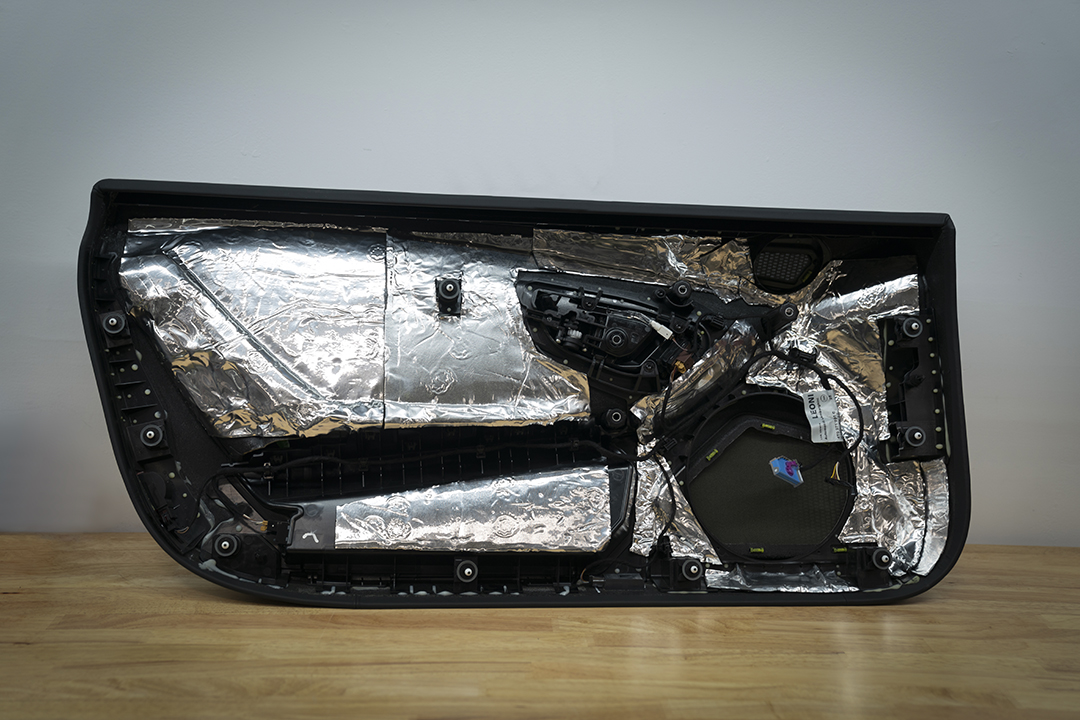
First step is removing the door panel. You can find a detailed explanation on how to remove the door panel of this car in our other Volvo S60 Installation build log. This also includes a more complete write up and explanation on sound deadening the doors.
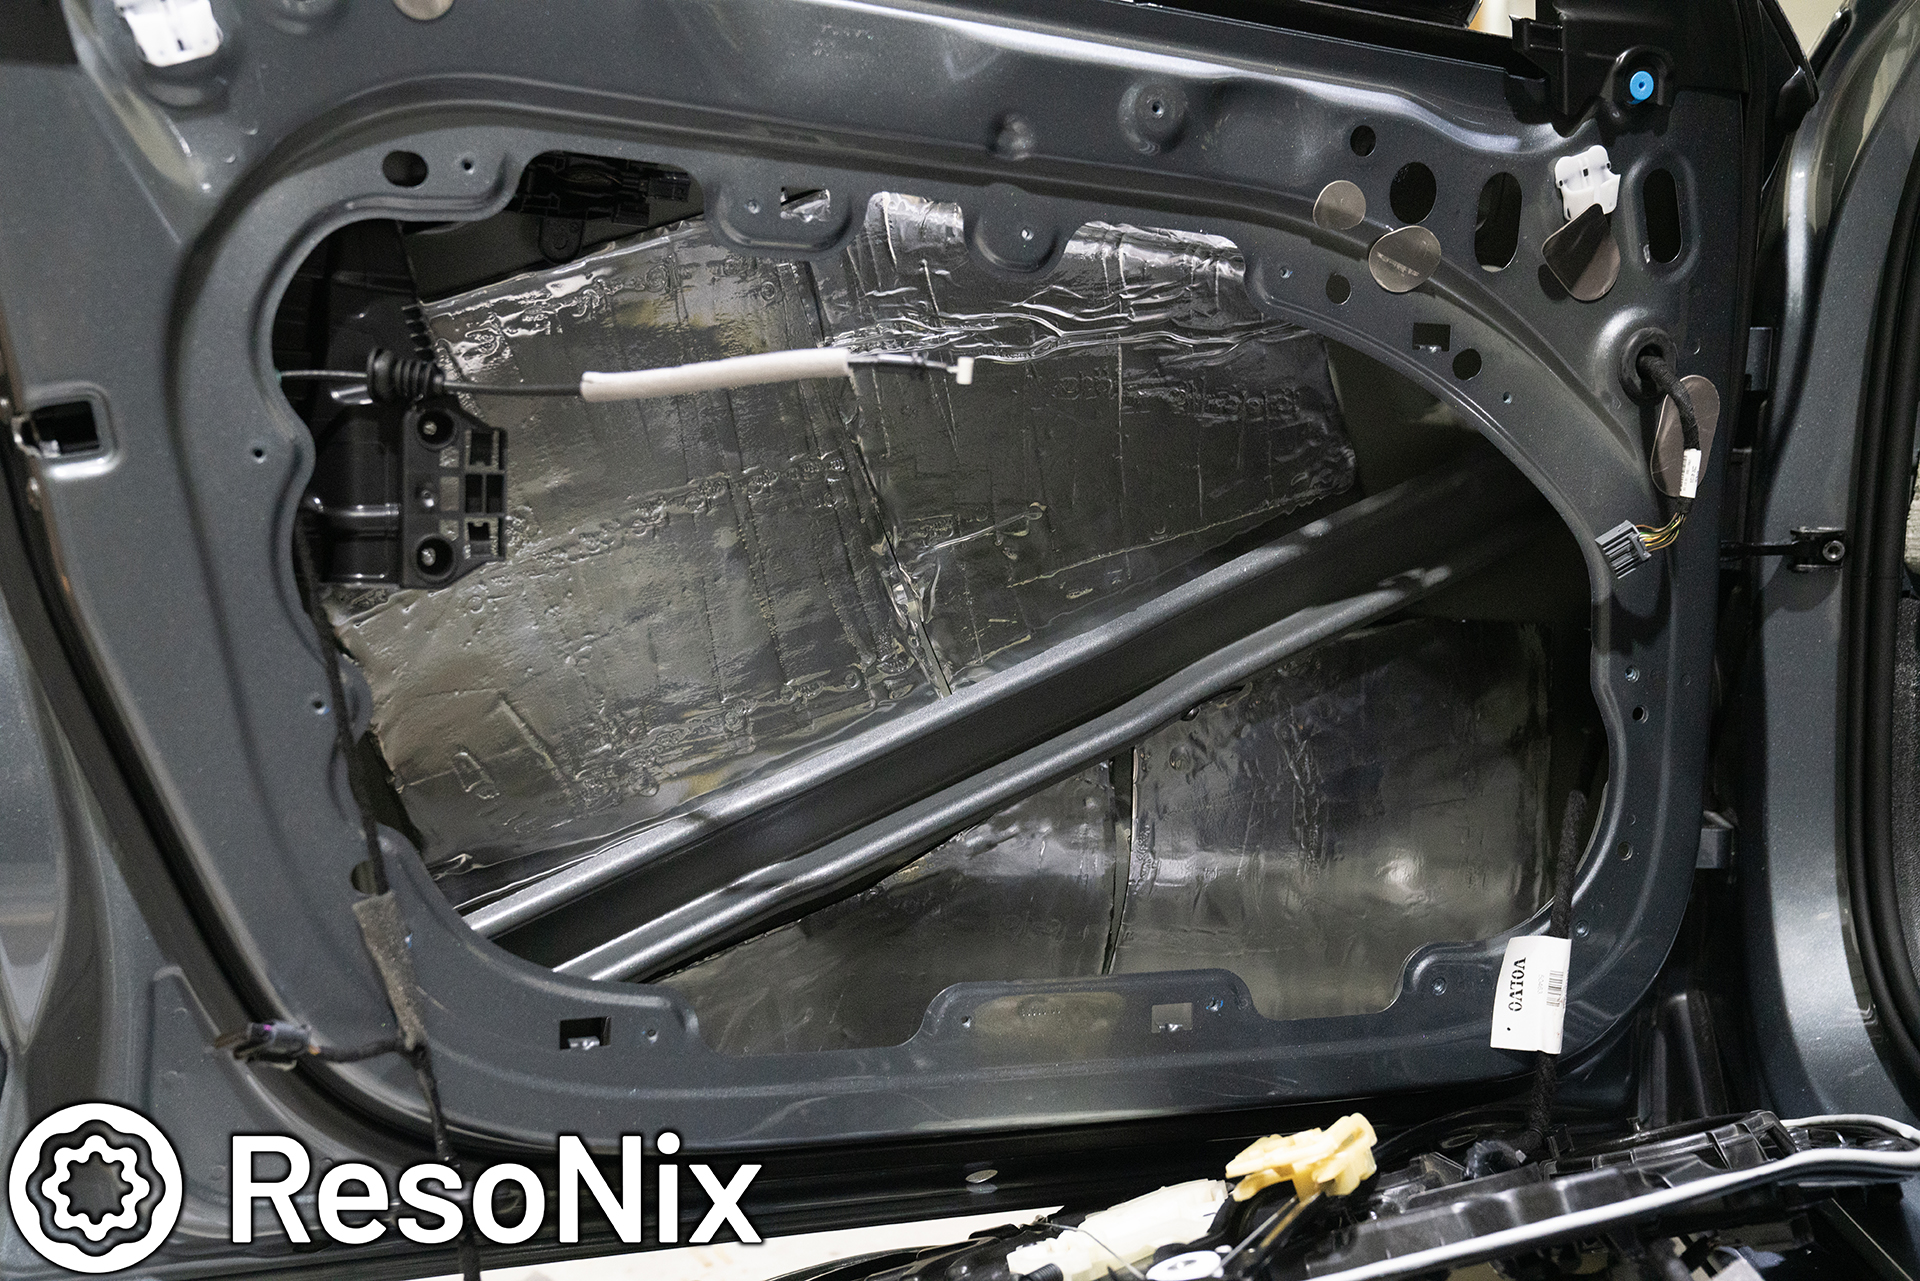
Moving on to how we do deadening for high-end audio installs such as this. Every, Single. Panel. Gets treated and gone over with a fine tooth comb to make sure that NOTHING will rattle or resonate when installed again. The photo of the door panel is actually from an older version of this install. There is a different door baffle now which required a different ring that wasn’t nearly as tall. We also used ResoNix Barrier as well as our ResoNix Fiber Mat. The holes for the OEM locations are blocked in some of these photos because nothing was installed at the time.
Once the ResoNix CLD was installed onto the outer door skin, it was topped with ResoNix Guardian (not pictured)
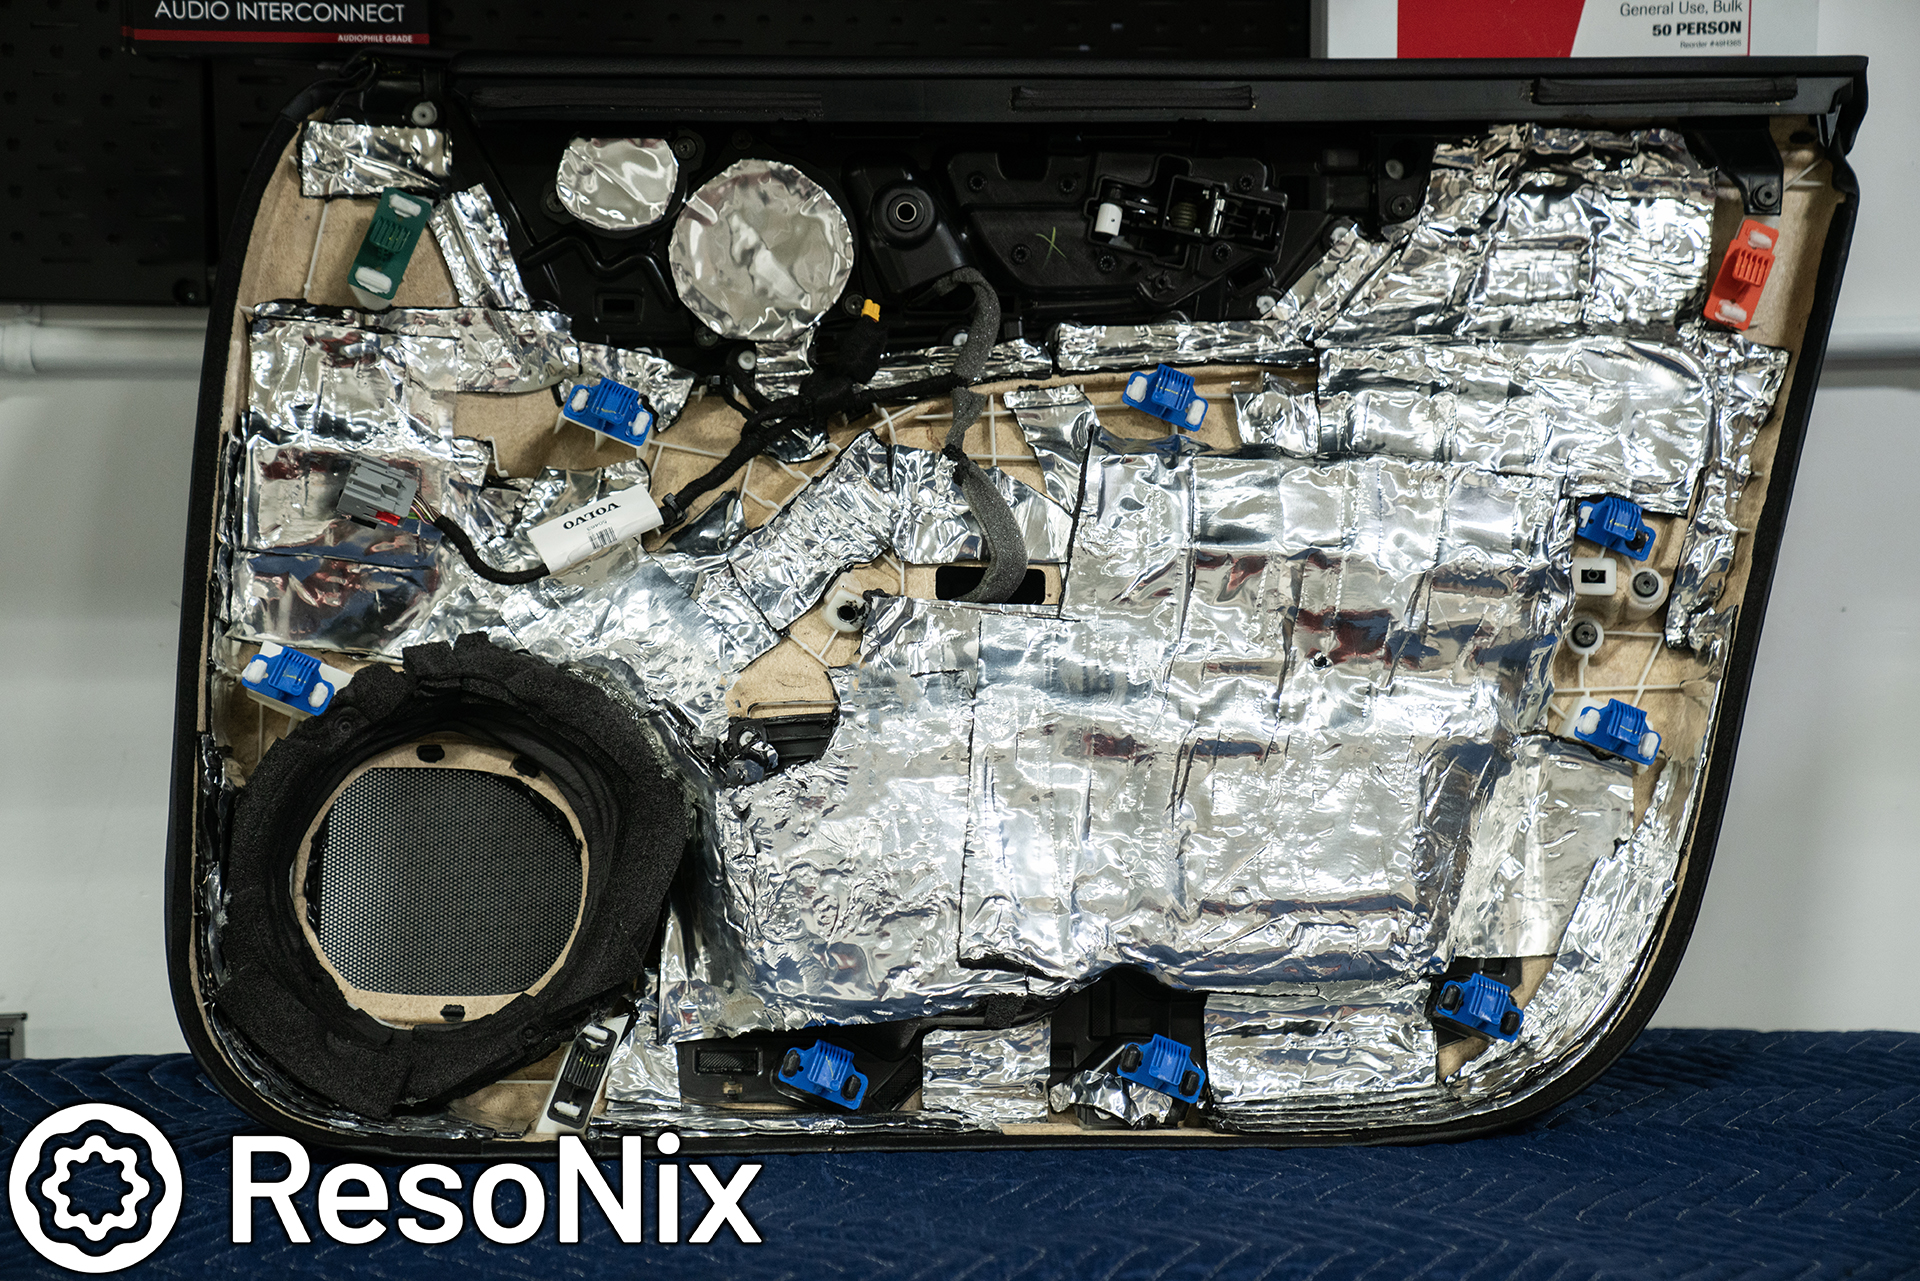
The door panel was fully treated with ResoNix CLD Squares, and then topped with ResoNix Fiber Mat 25 (not shown). Not a single rattle from these doors.
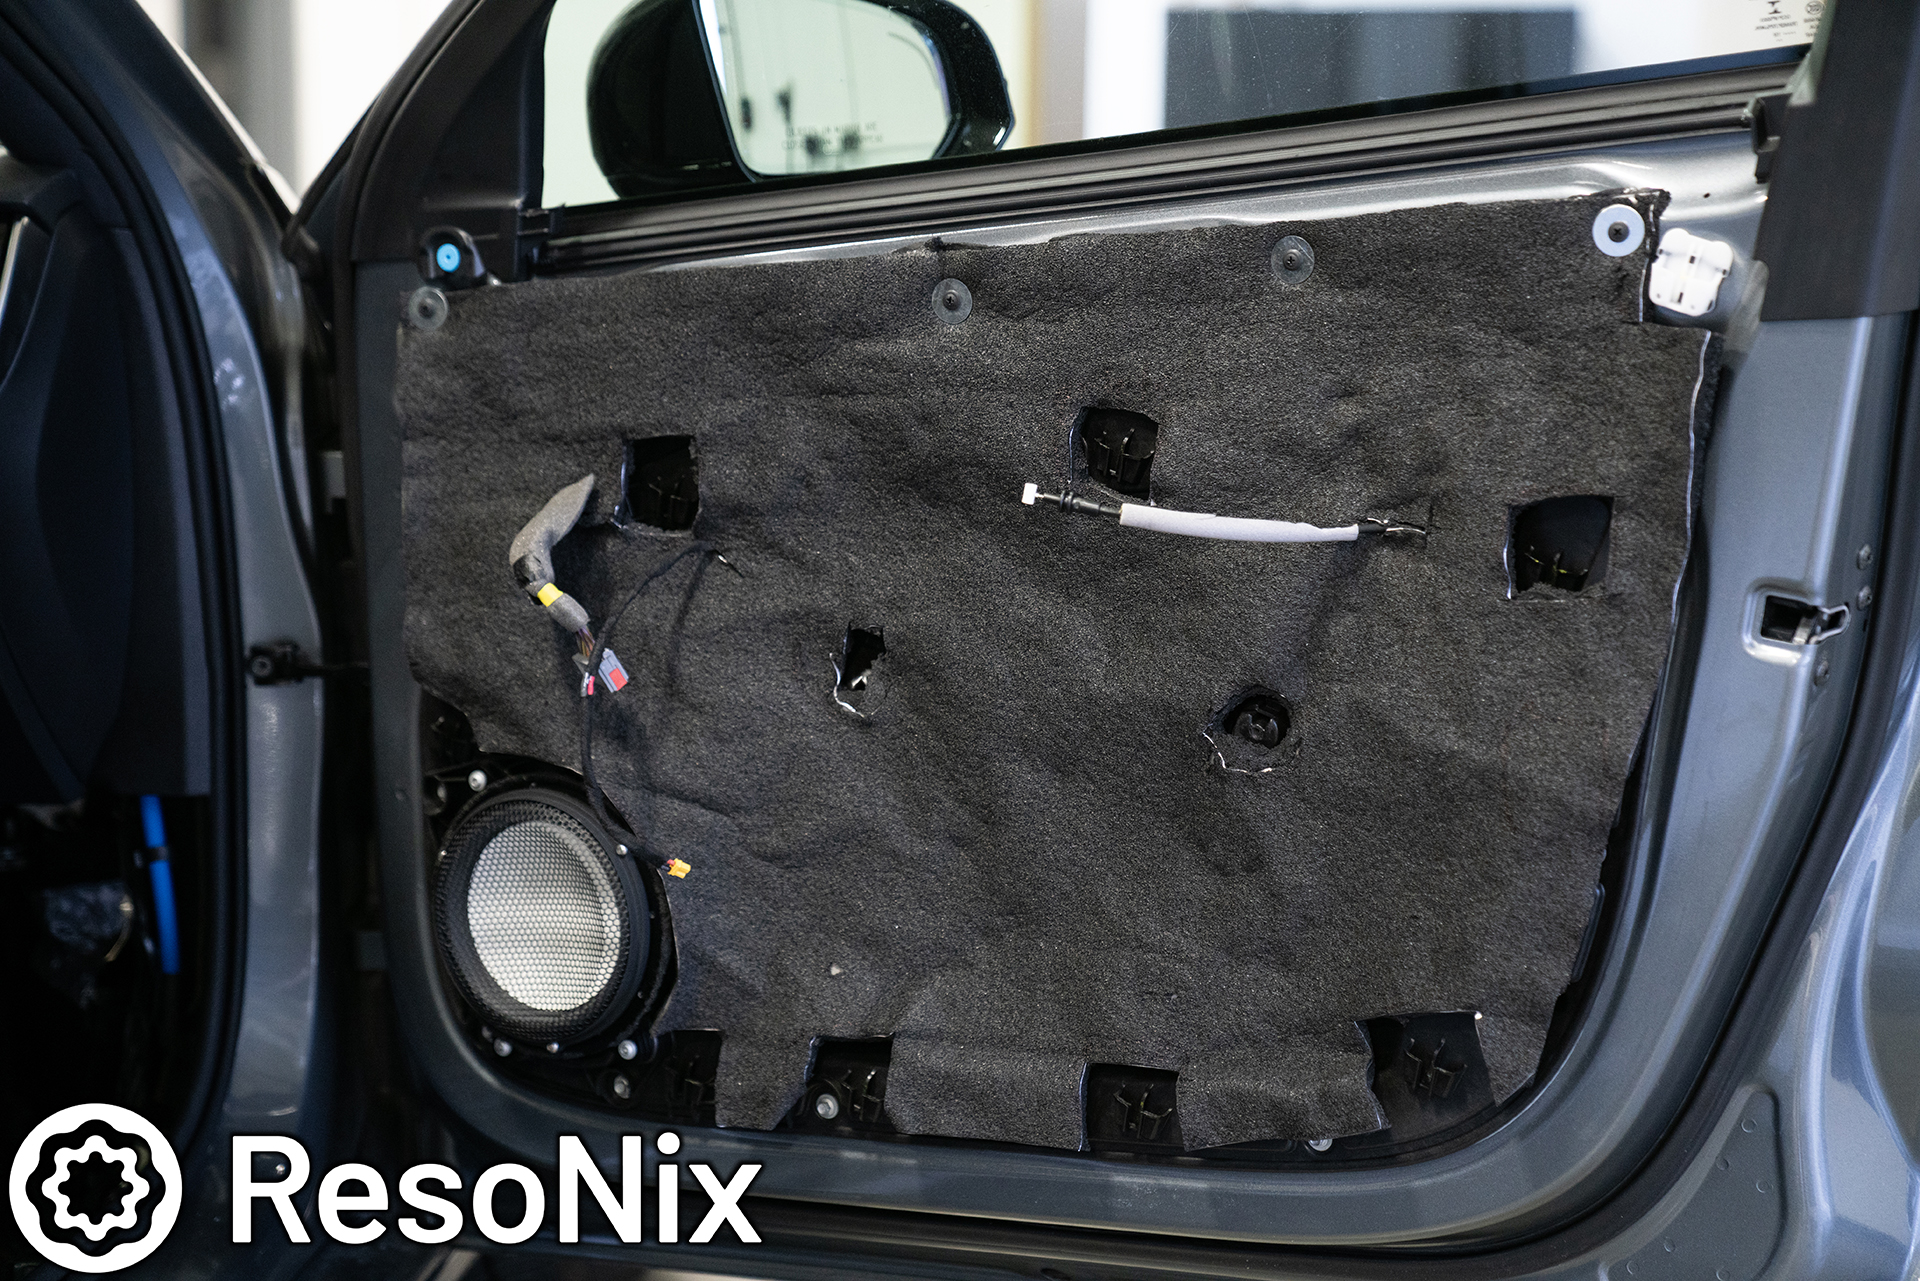
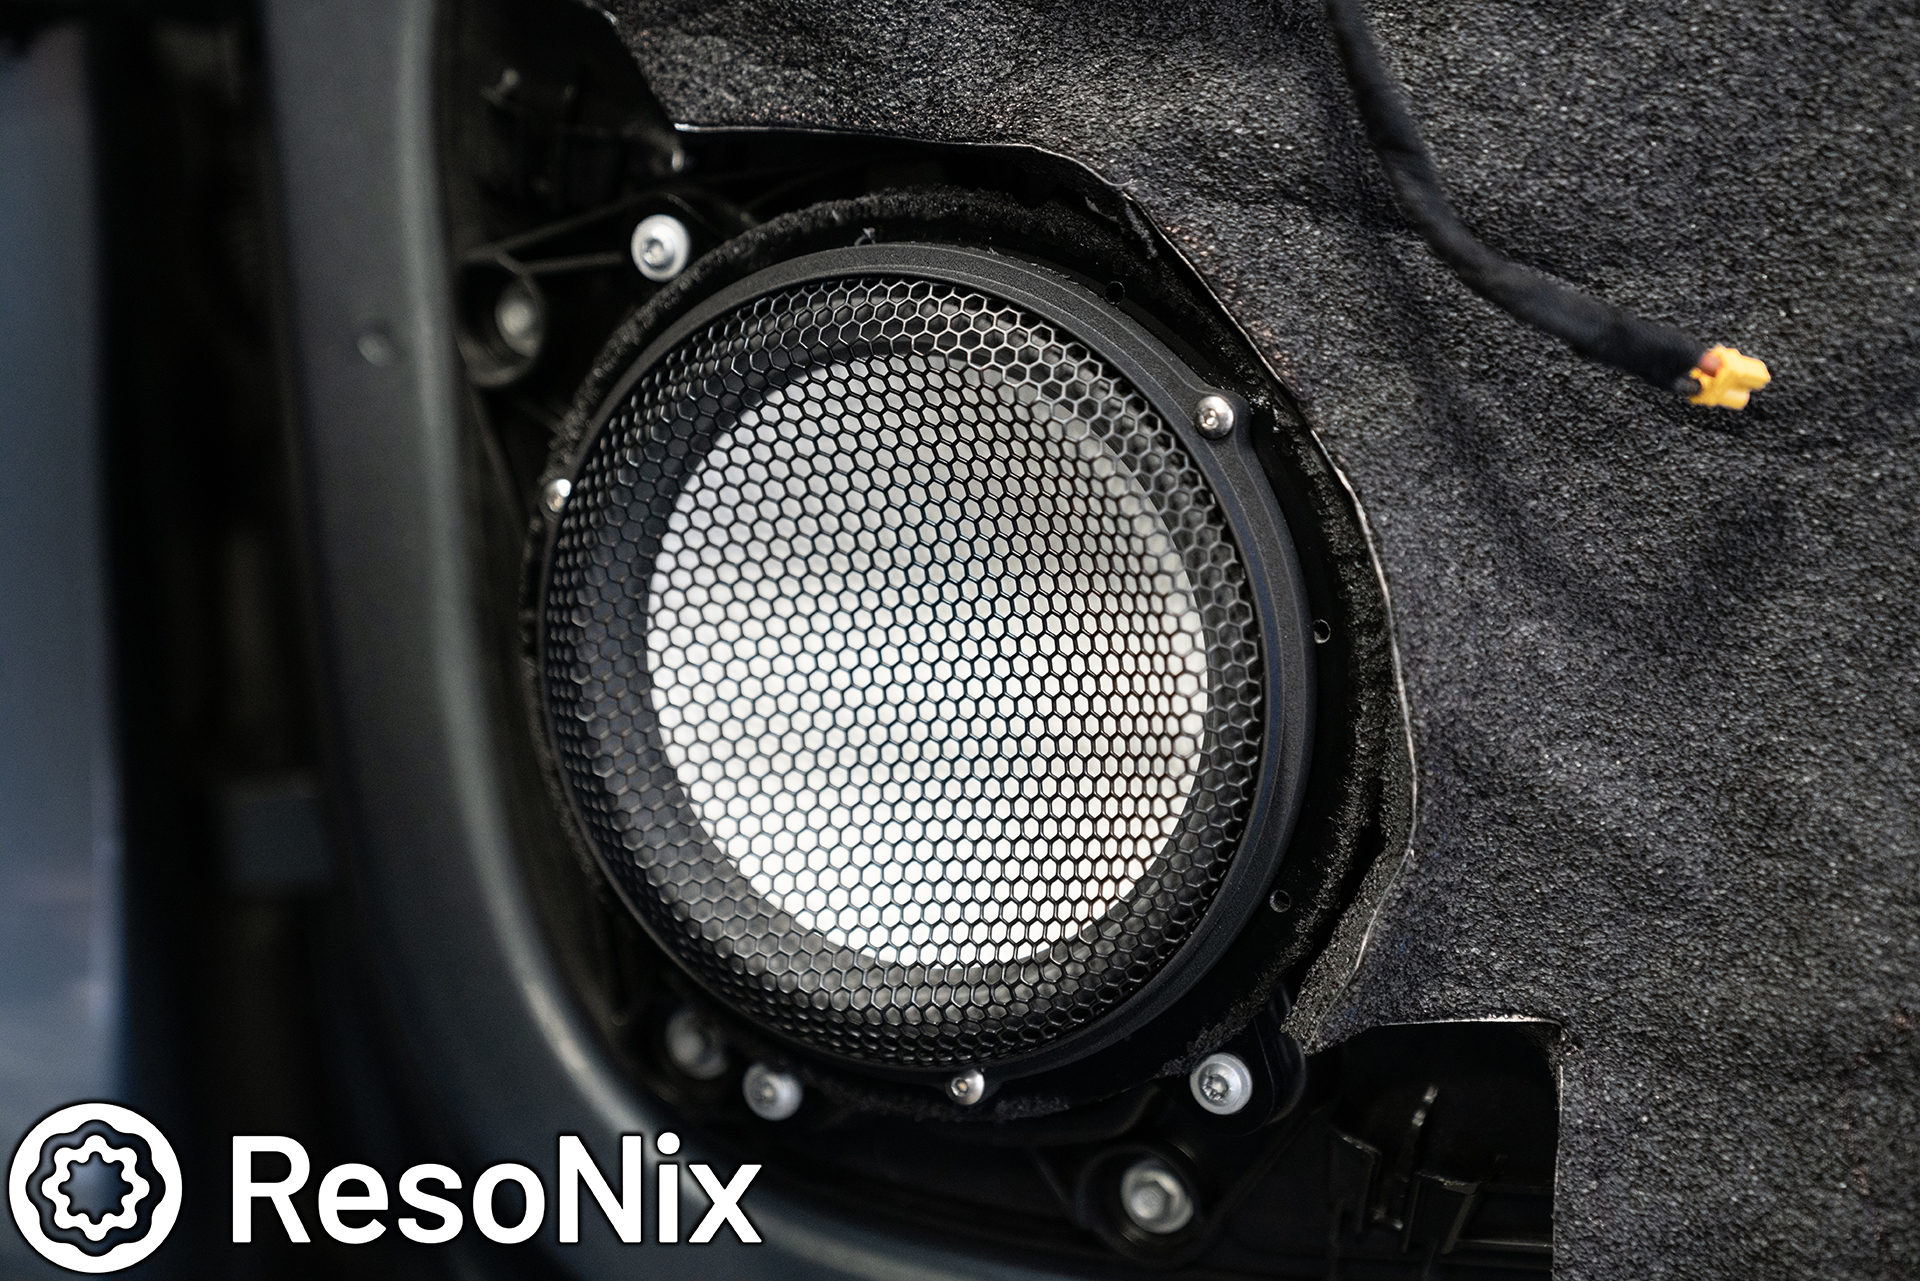
Being the North American distributor of your long-time favorite speakers is nice. Here is the Accuton Automotive 6.5″ midbass speaker installed into the OEM door location with a full layer of ResoNix Barrier over the inner door skin.
ResoNix Barrier with an extra layer of CCF7 on the back, and Fiber Mat installed onto the door panel, along with the Accuton Automotive C165 Midbass drivers. They are mounted to Acrylic Baffles that mimic the OEM speaker shape and use the OEM mounting hardware and OEM mounting locations.
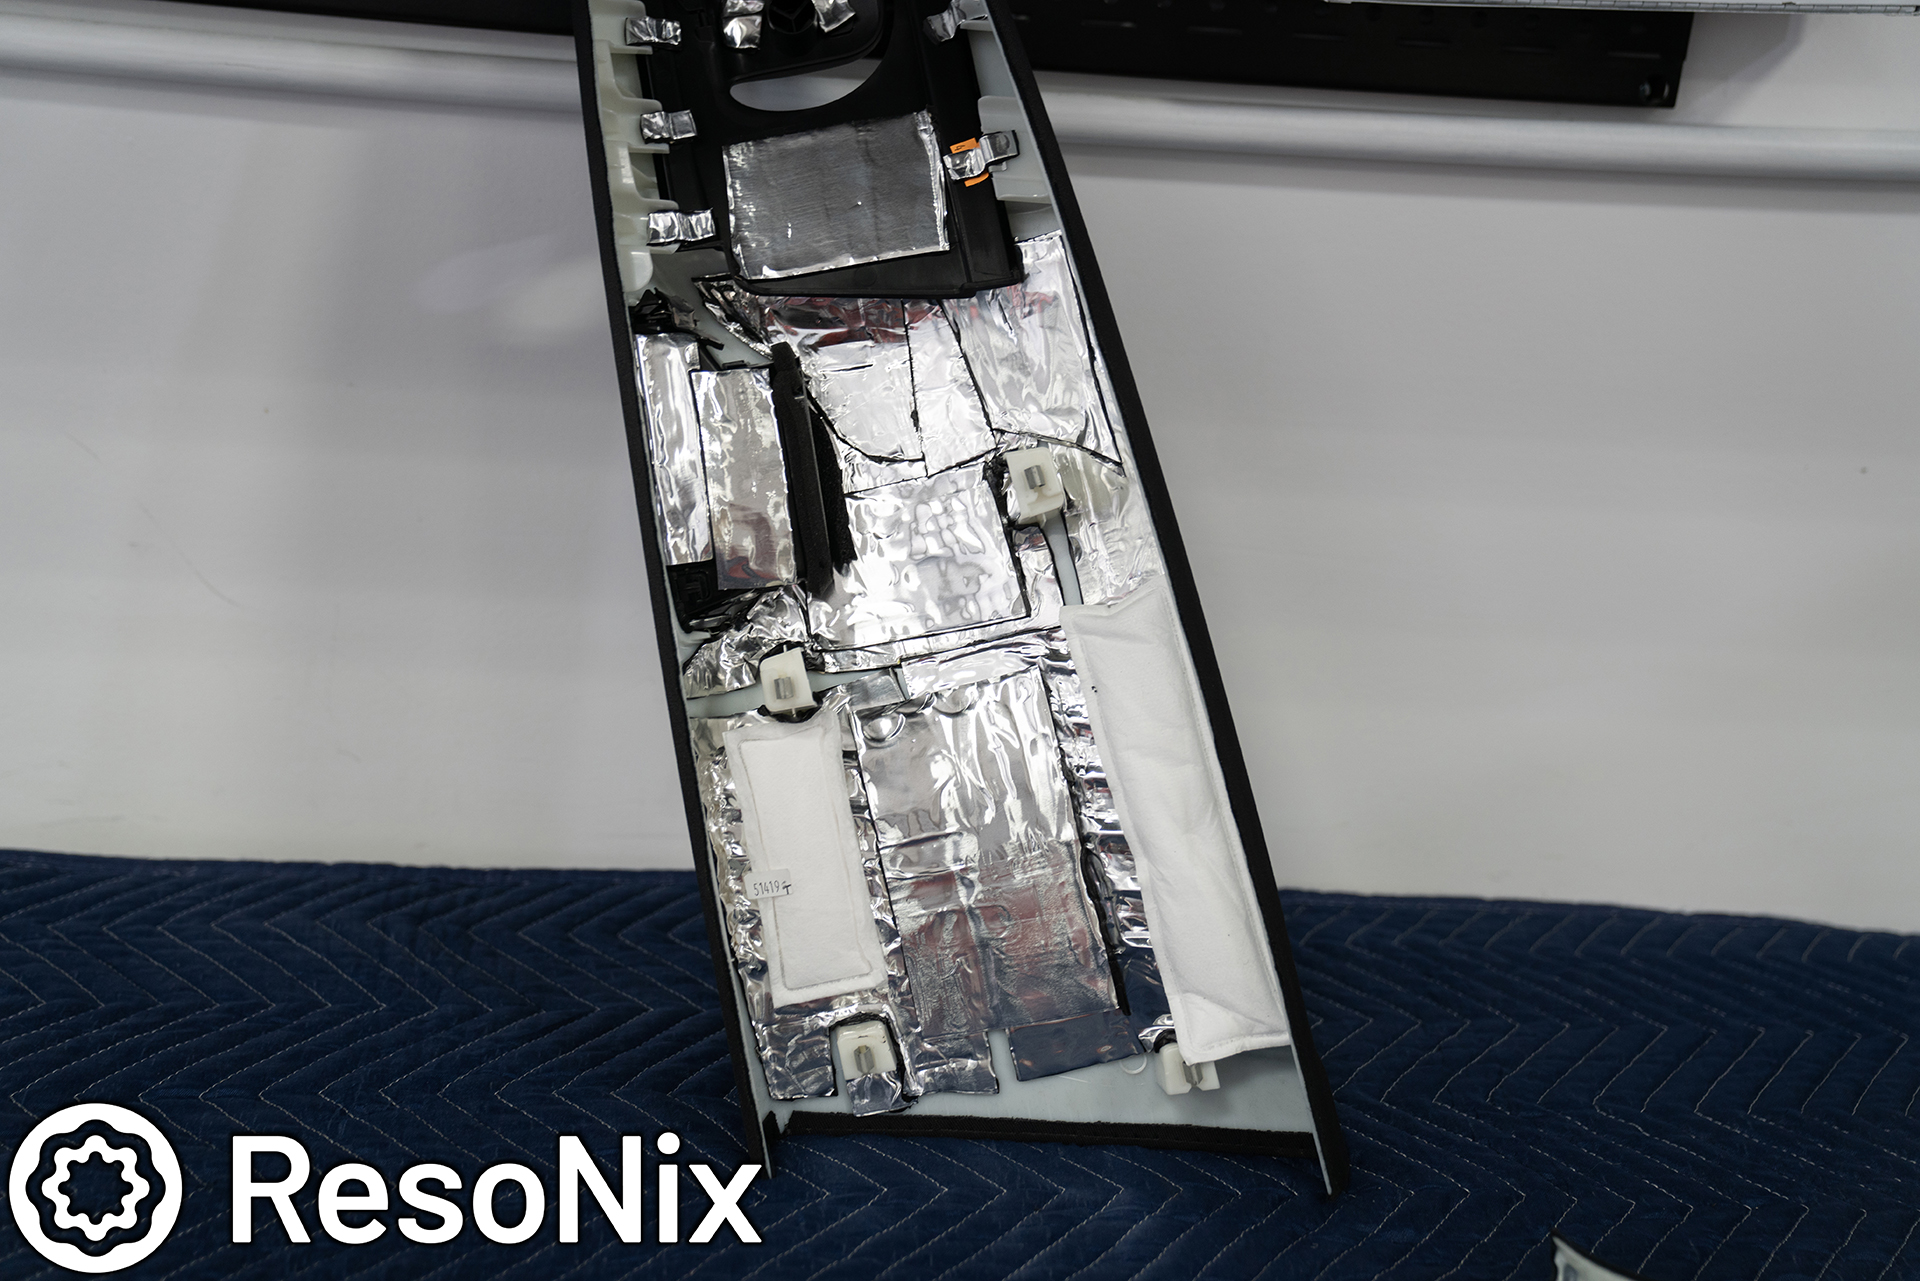
Various panels were also treated for the sake of sound system performance, as well as regular driving noise reduction. This is the rear driver side sill panel that partially sits under the rear seats. The B-Pillar. Overboard? Maybe to you. But I prefer not to have rattles right next to my ears 🙂
Various panels were also treated. This is the rear driver side sill panel that partially sits under the rear seats.
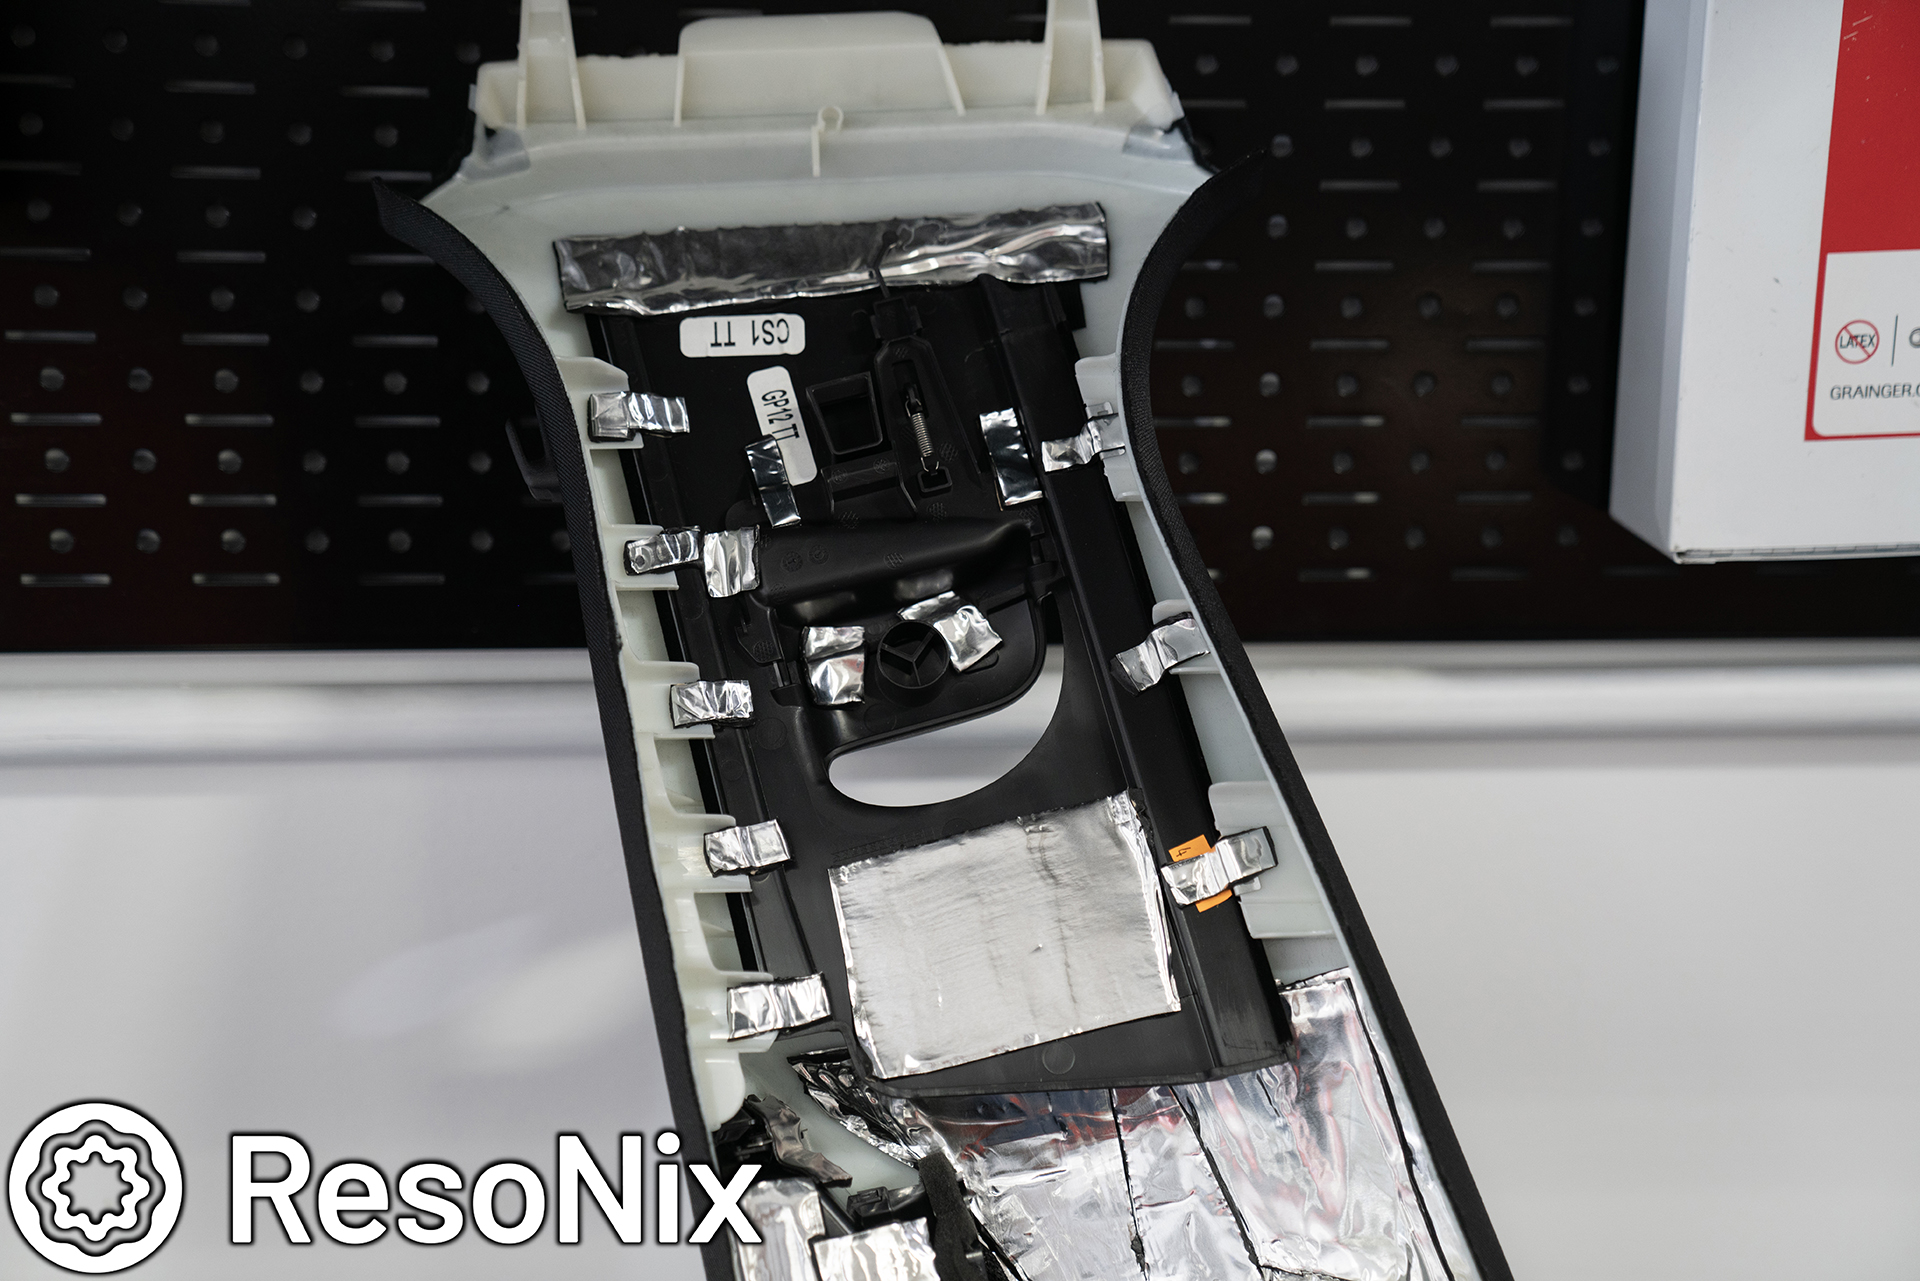
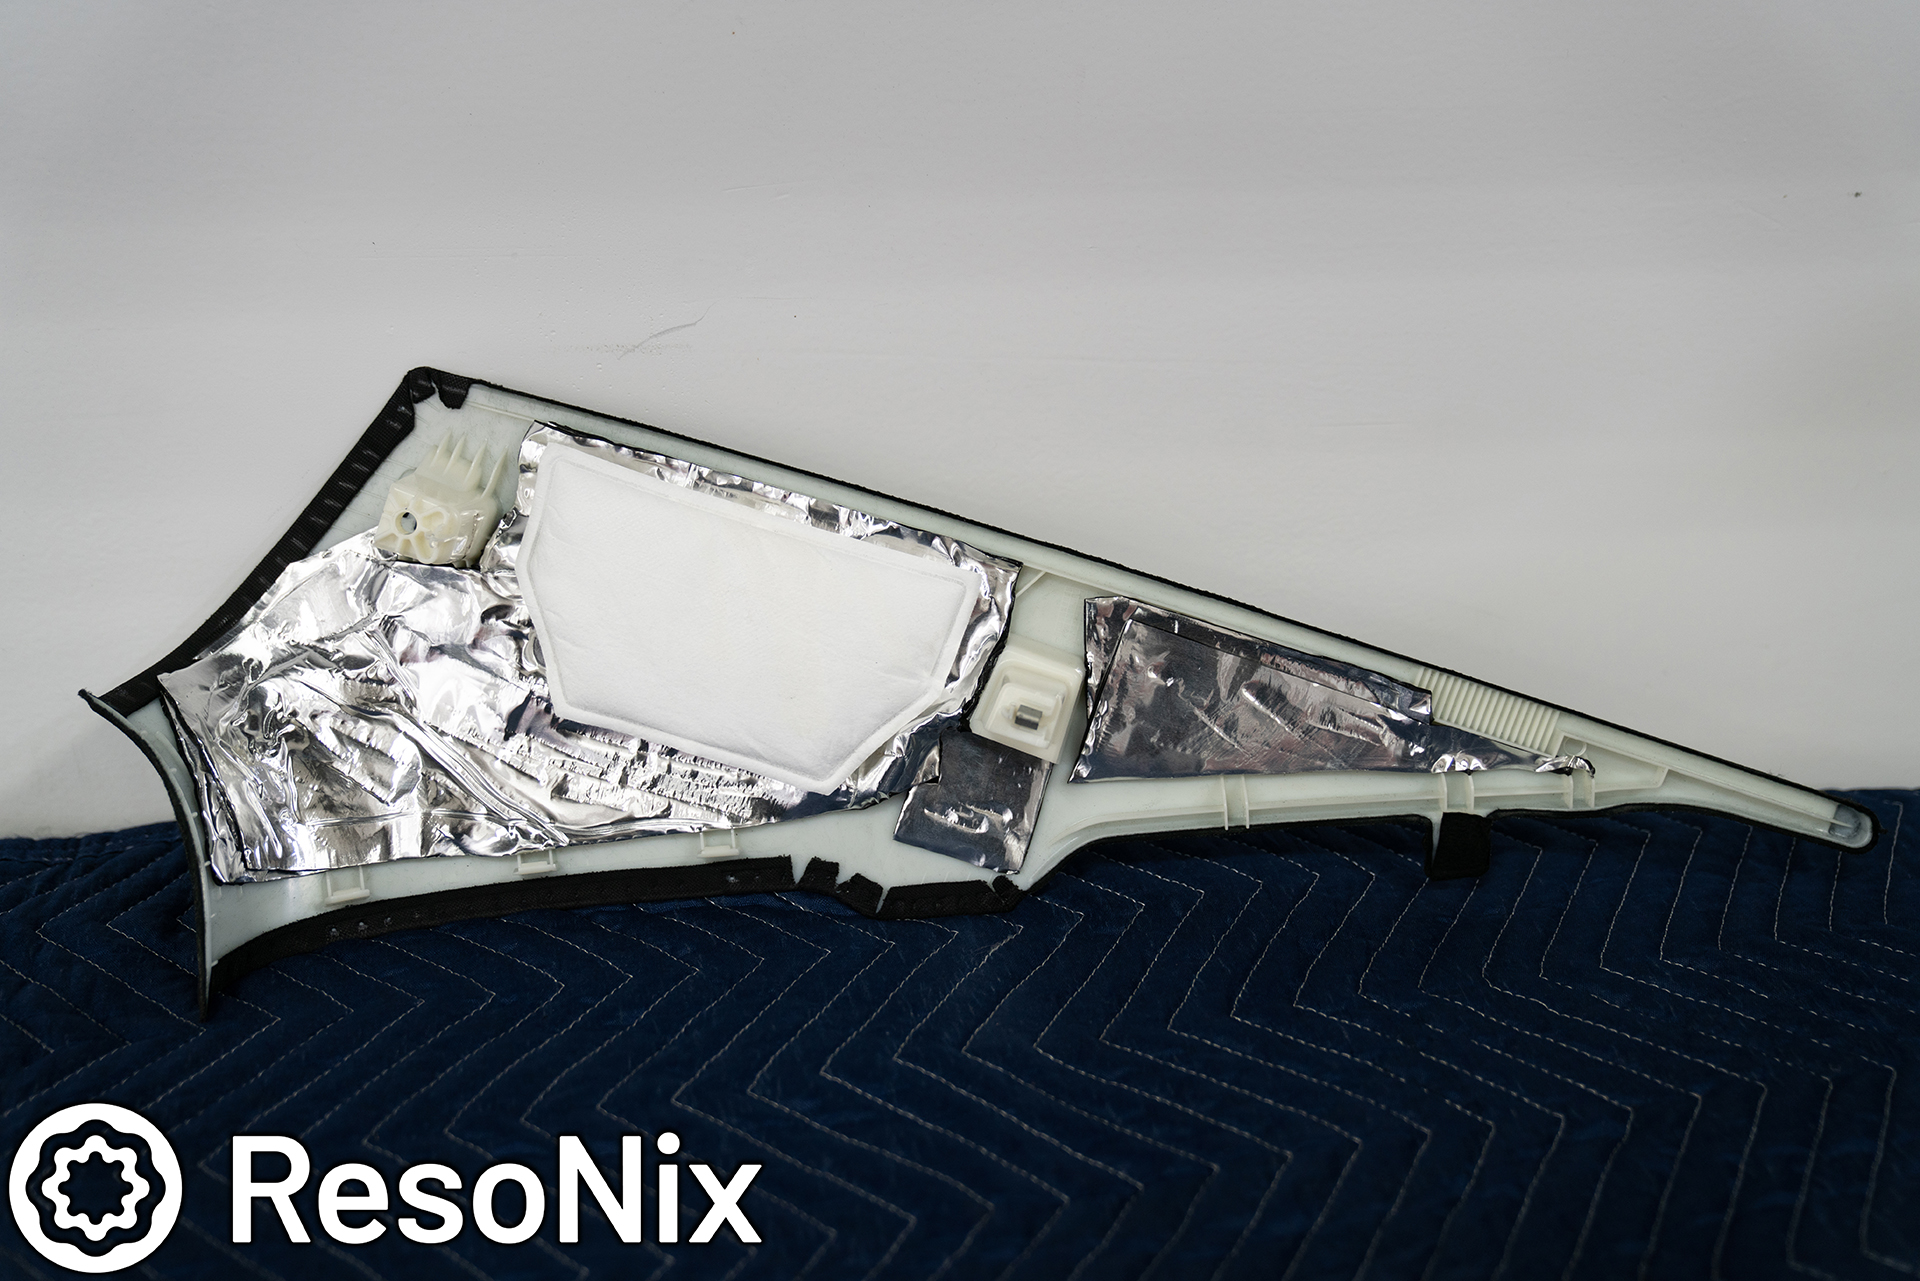
The C pillars. What you cannot see is the small pieces that make sure the clips cannot rattle.
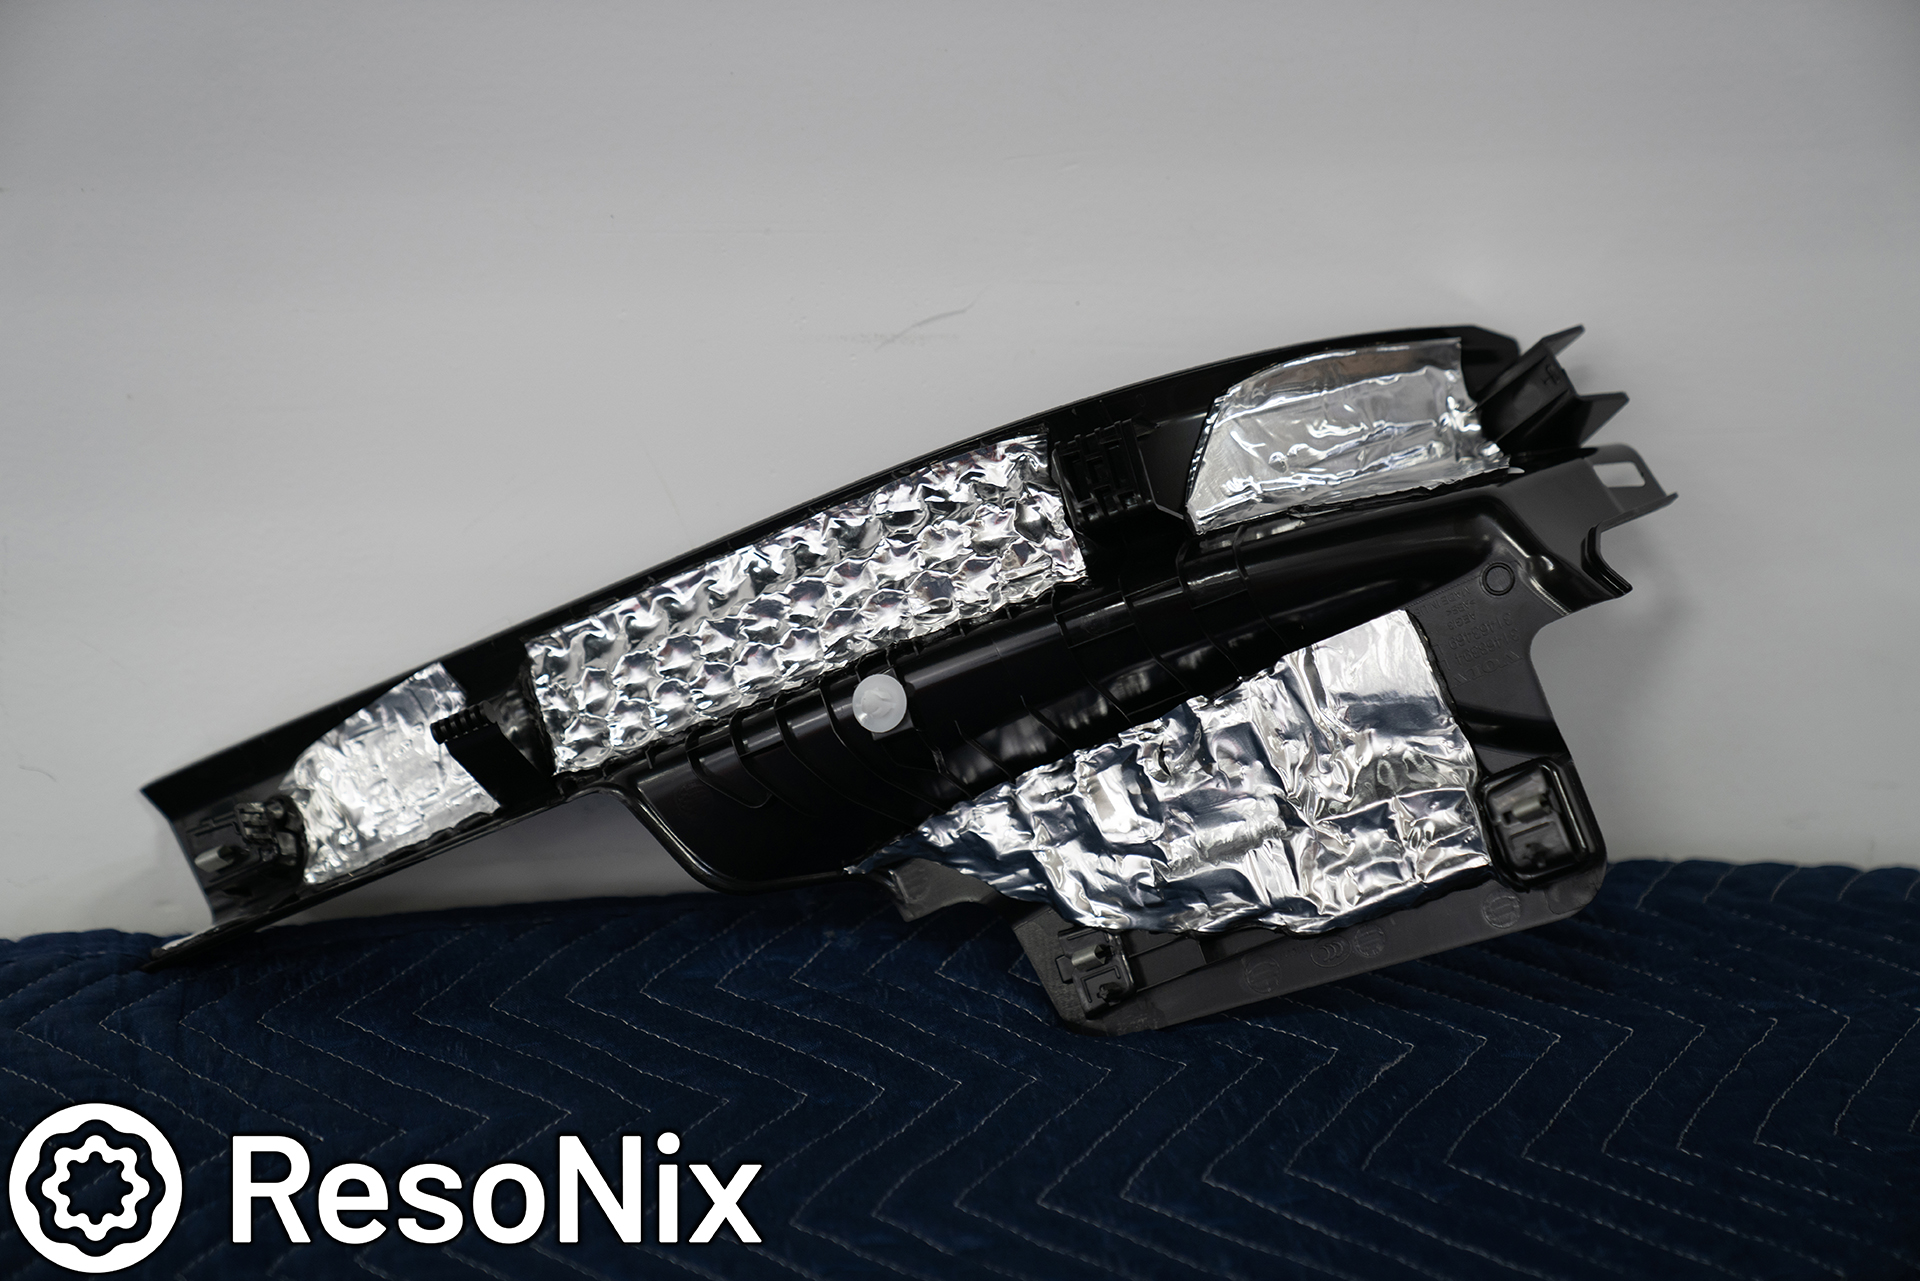
Every single plastic trim panel in the vehicle was treated with ResoNix CLD Squares to reduce resonance, but they were also treated with CCF Decoupler 7S and/or ResoNix Fiber Mat to reduce panel on panel reattles. This may have been the biggest improvement that I made in any iteration of this system over the years. Reducing the distortion caused by resonance and the distractions that are rattles allowed the system to be what it is truly capable of. The soundstage is pinpoint, high, wide, deep, there is no noticeable distortion even at extreme volumes.. its great.
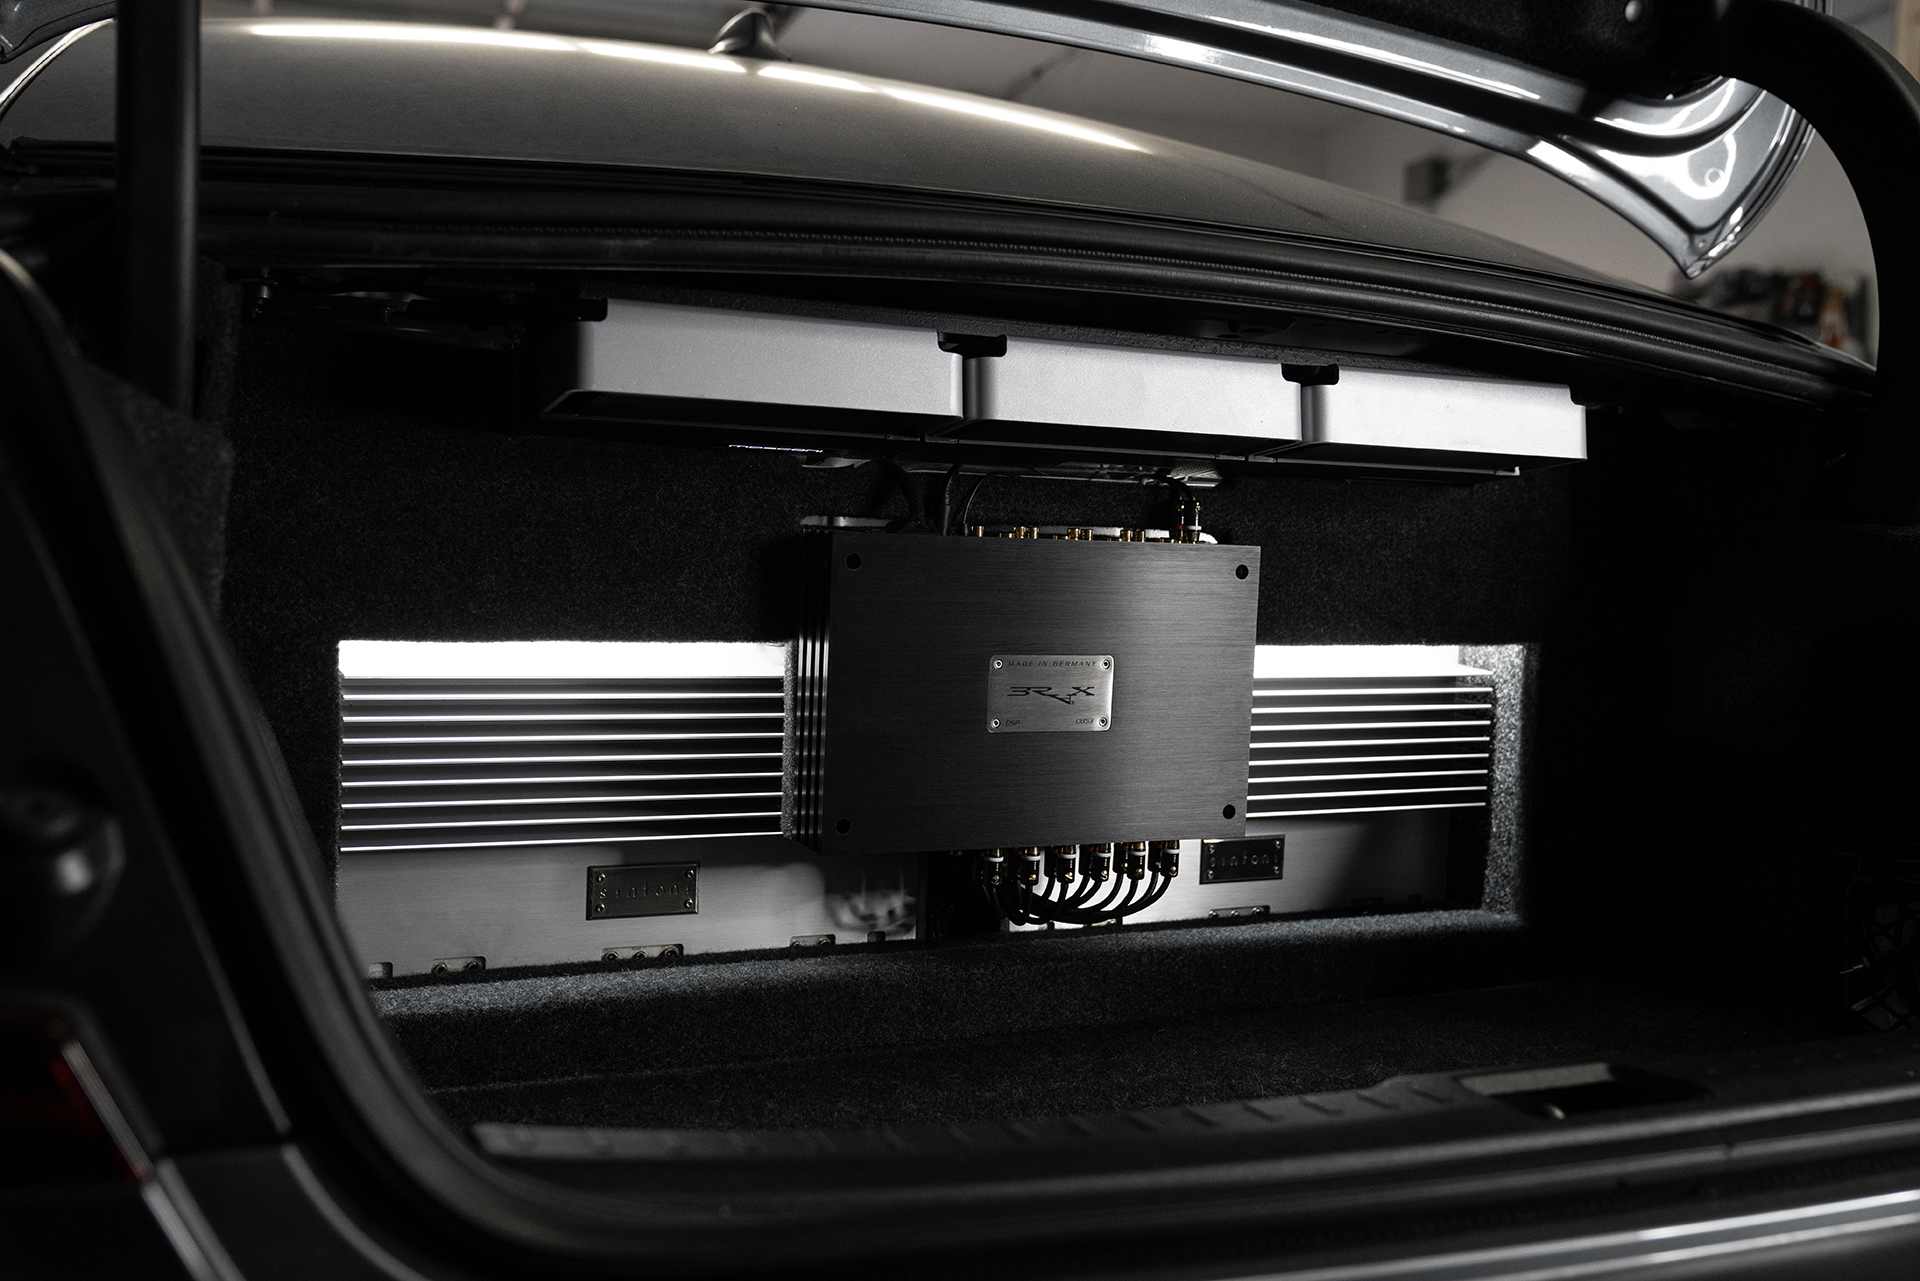
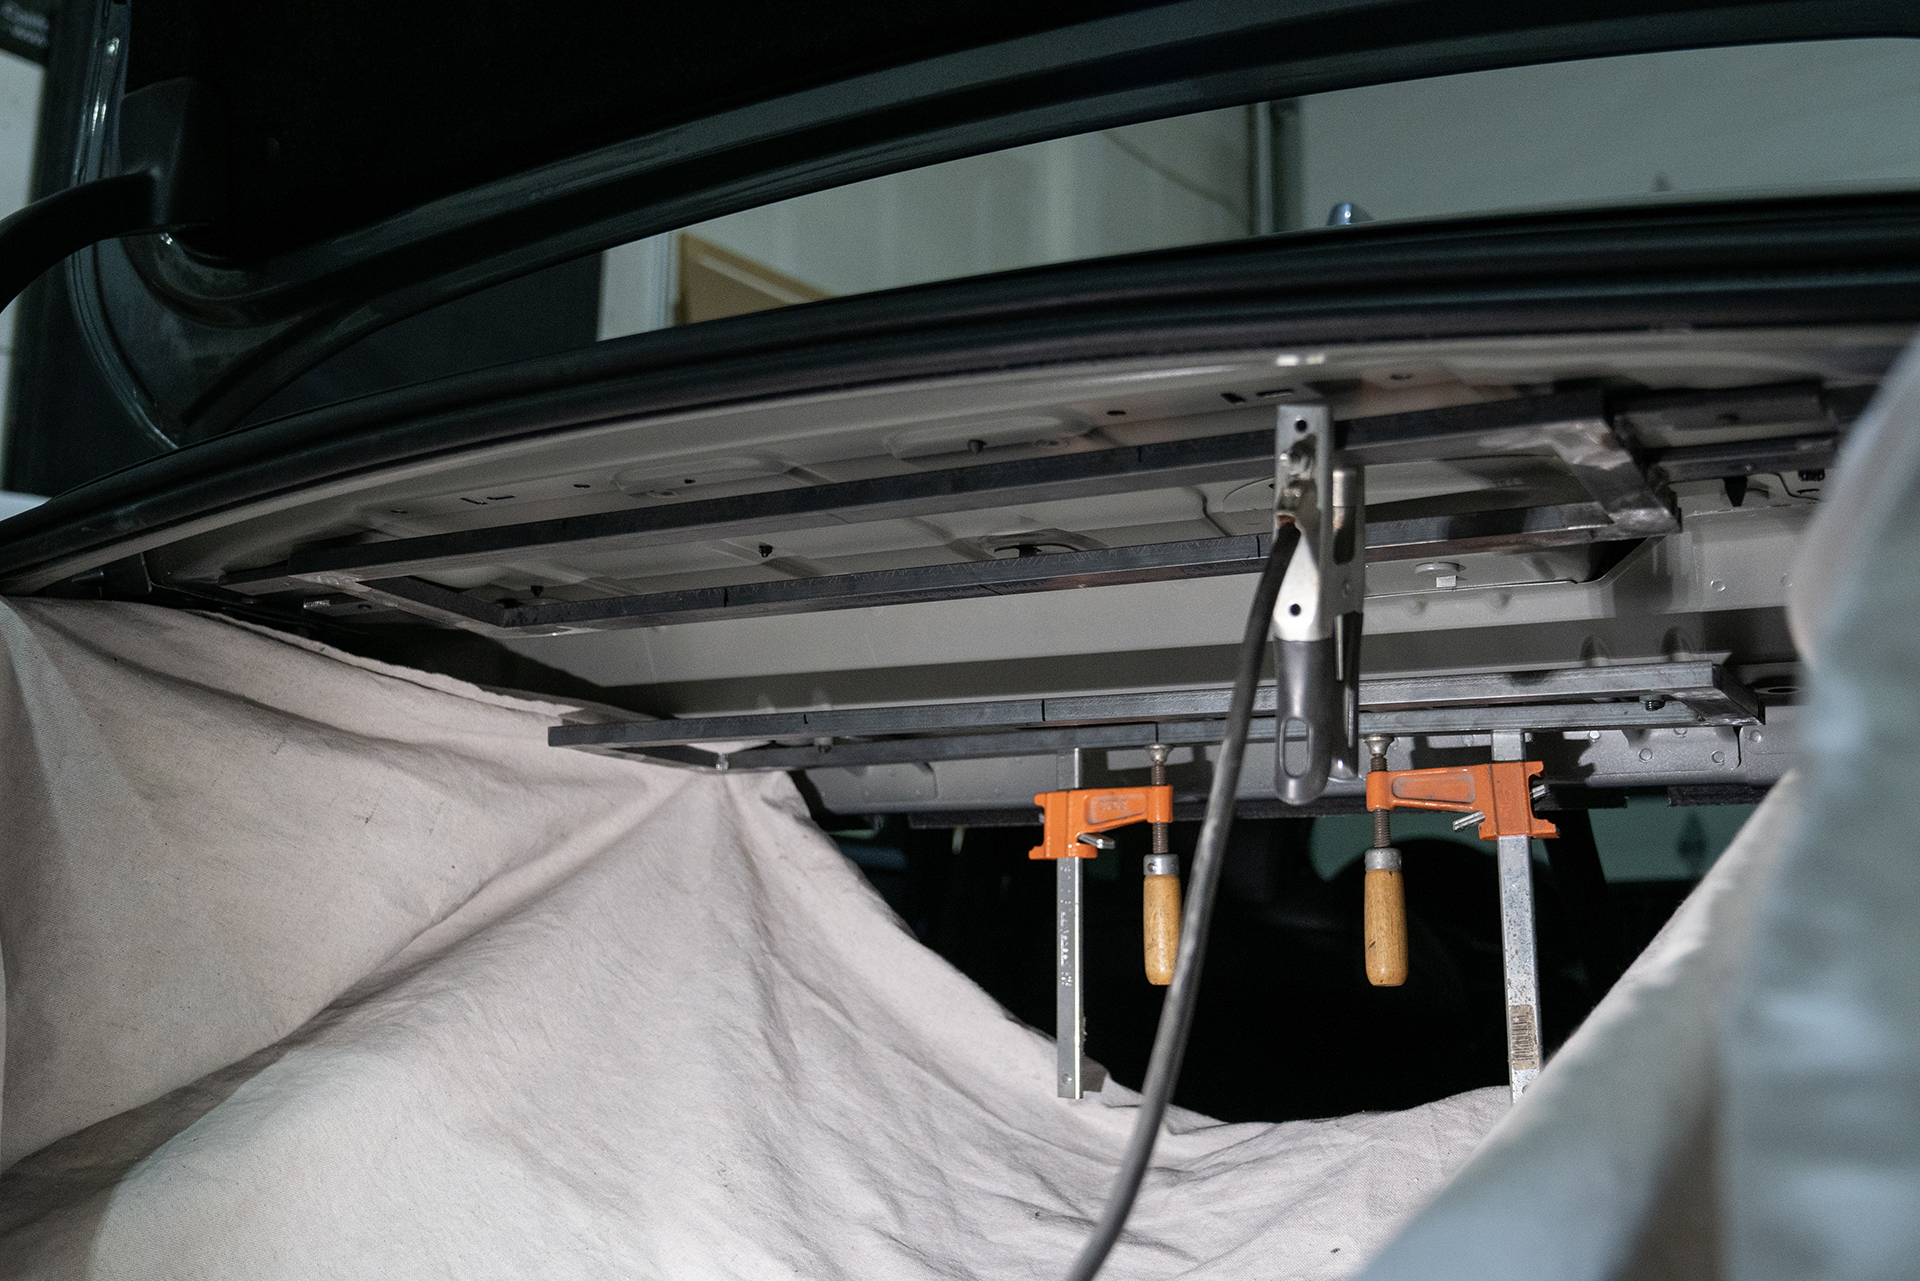
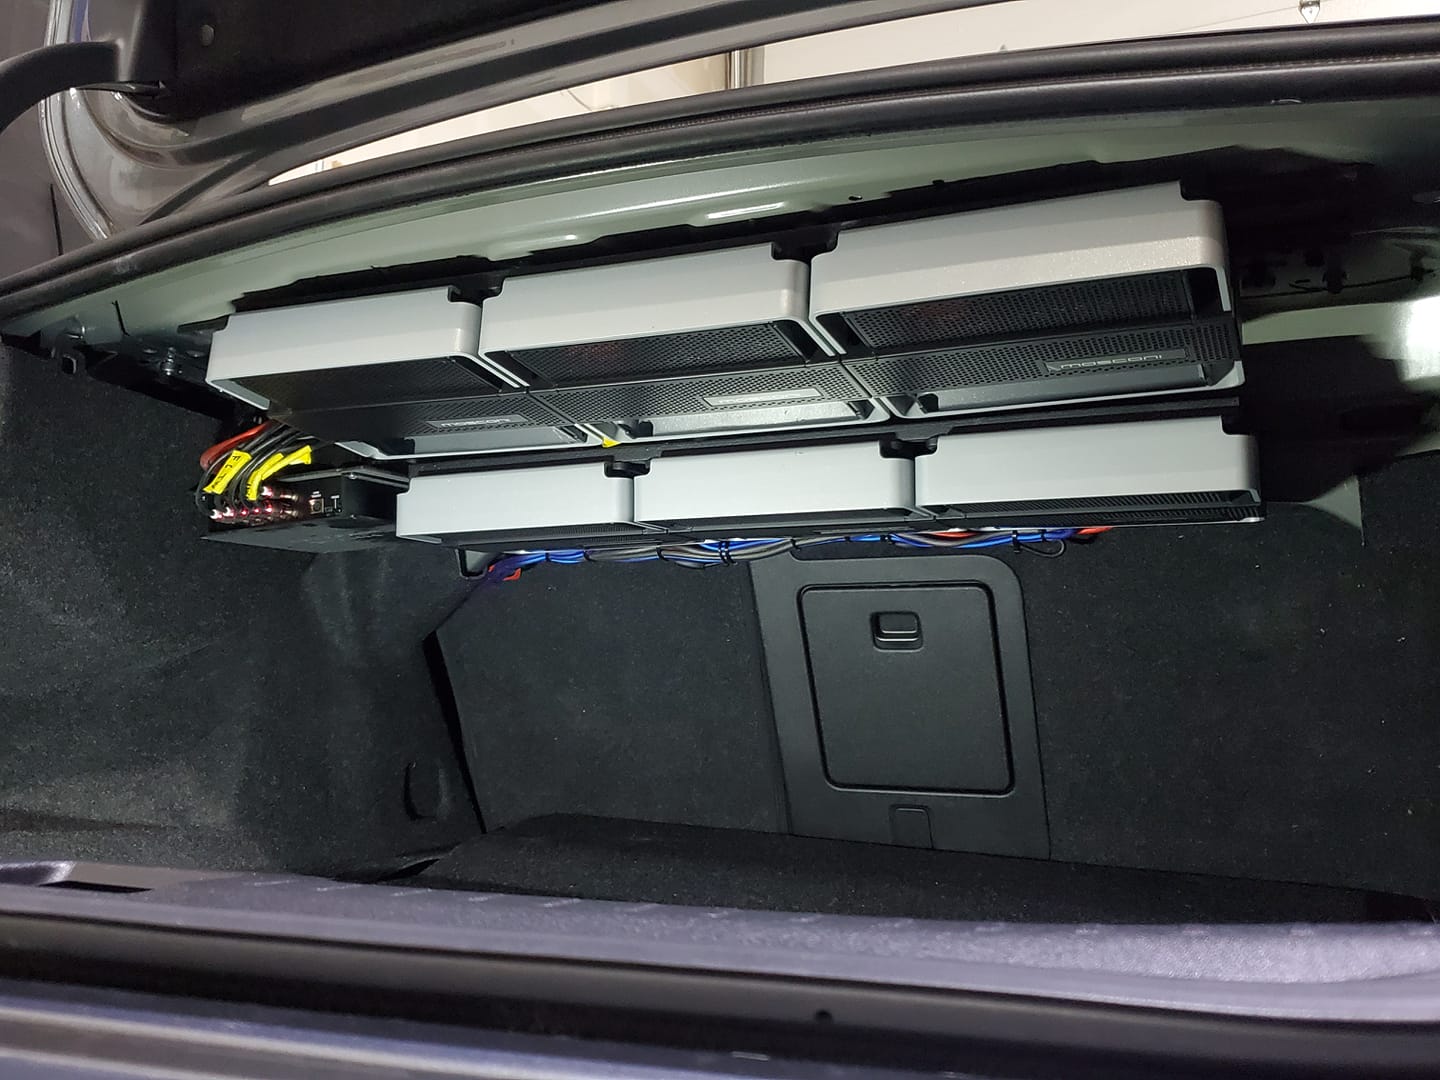
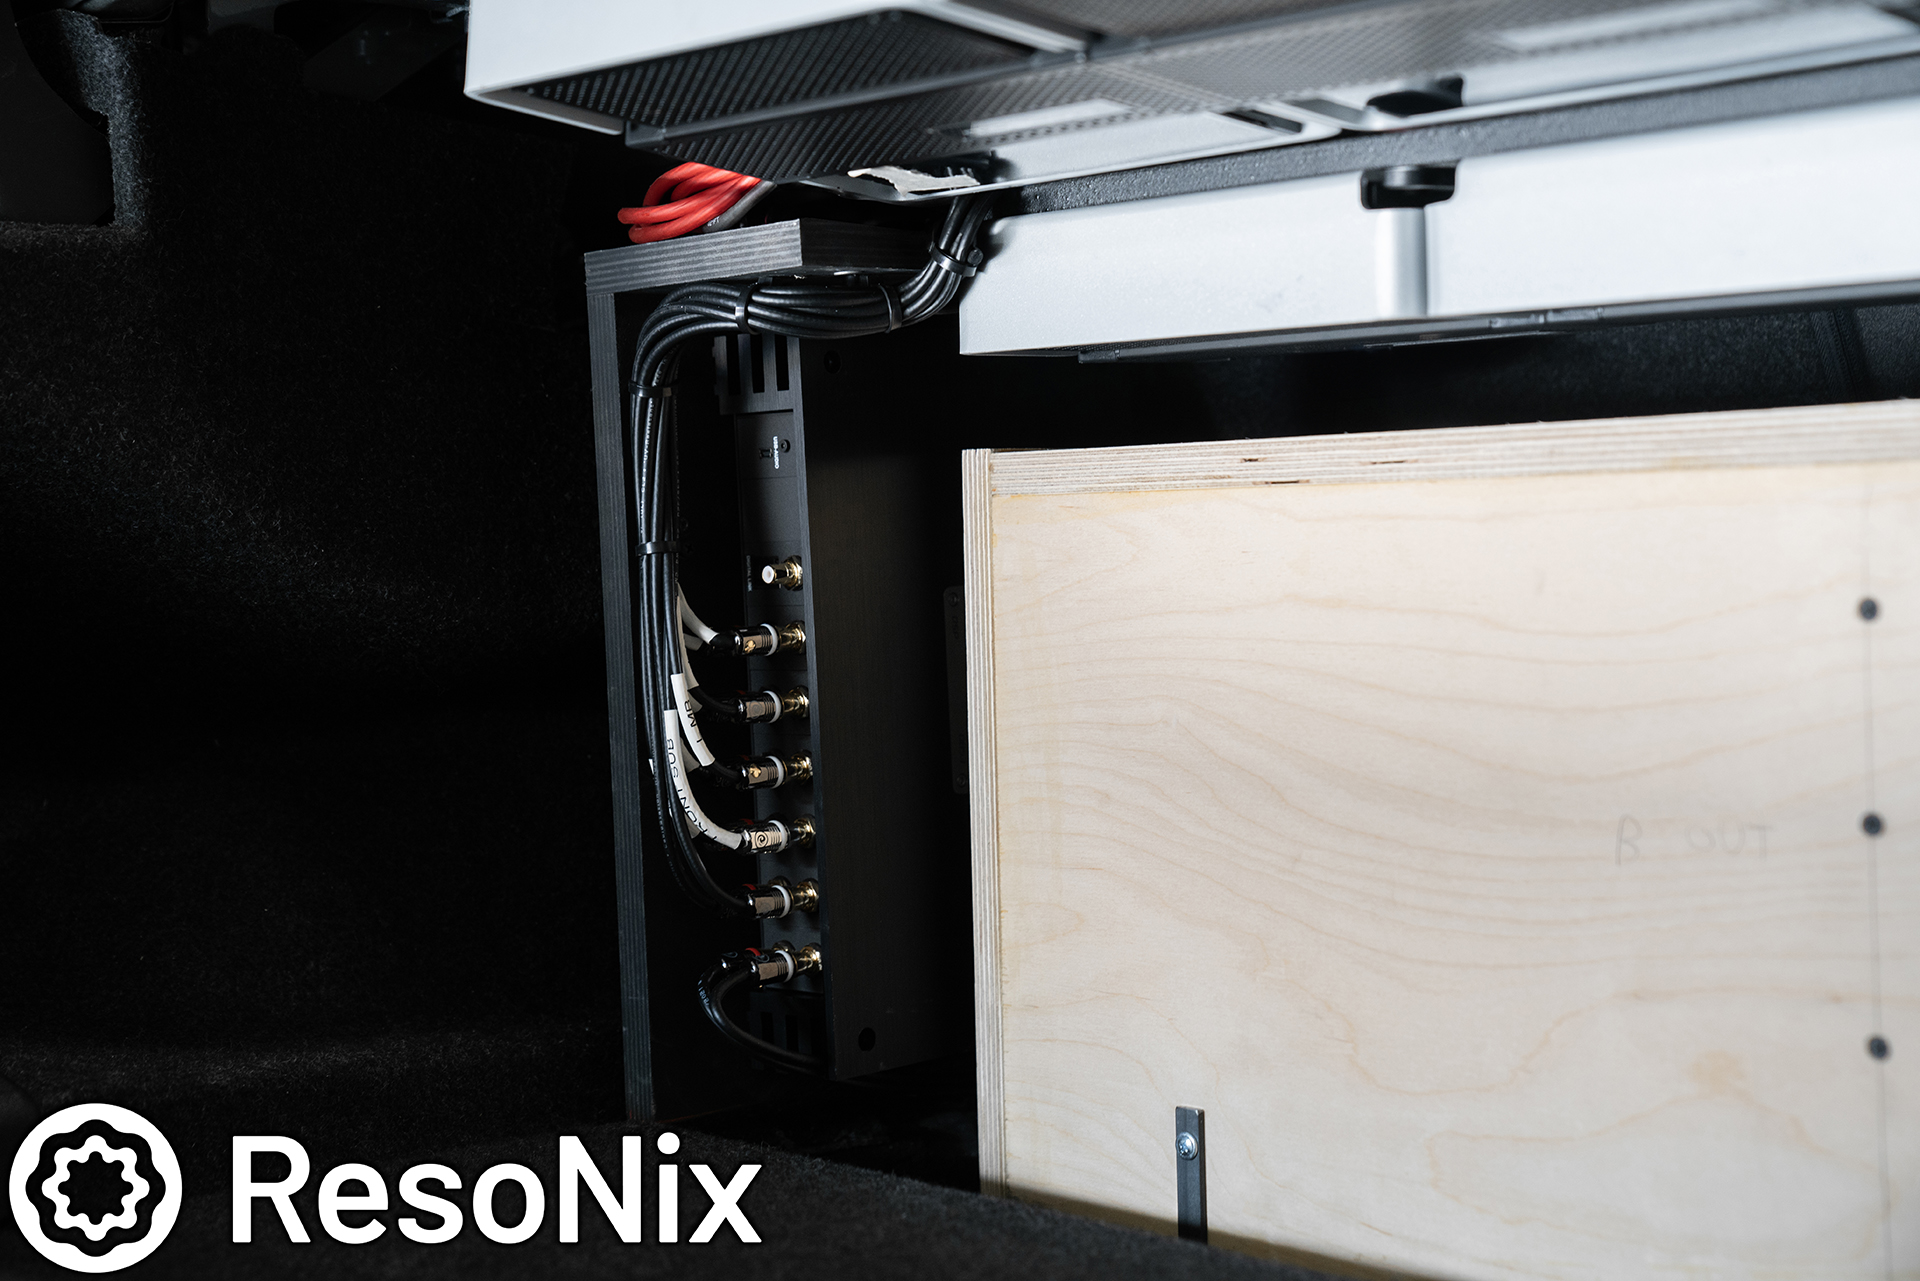
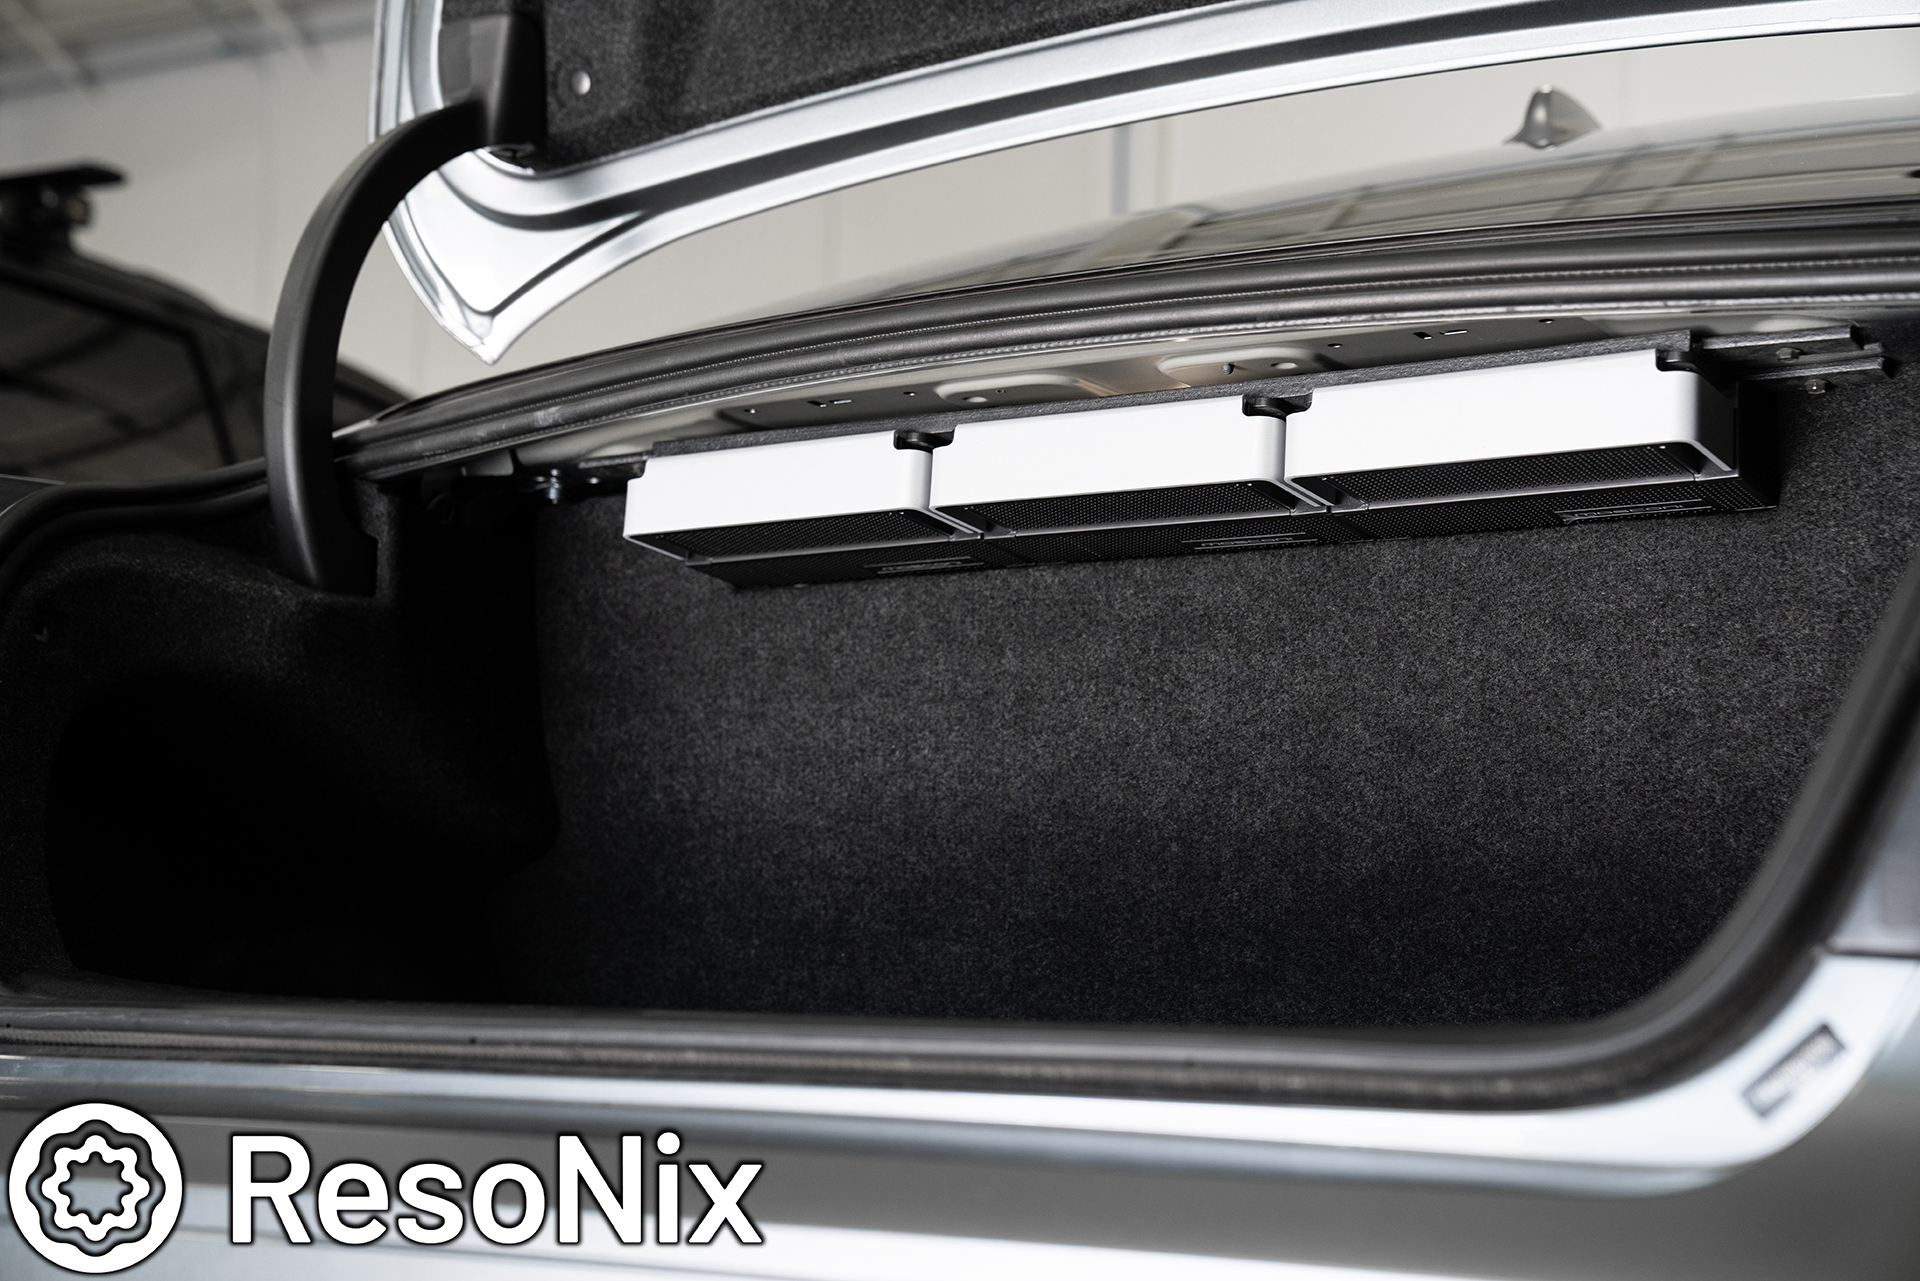
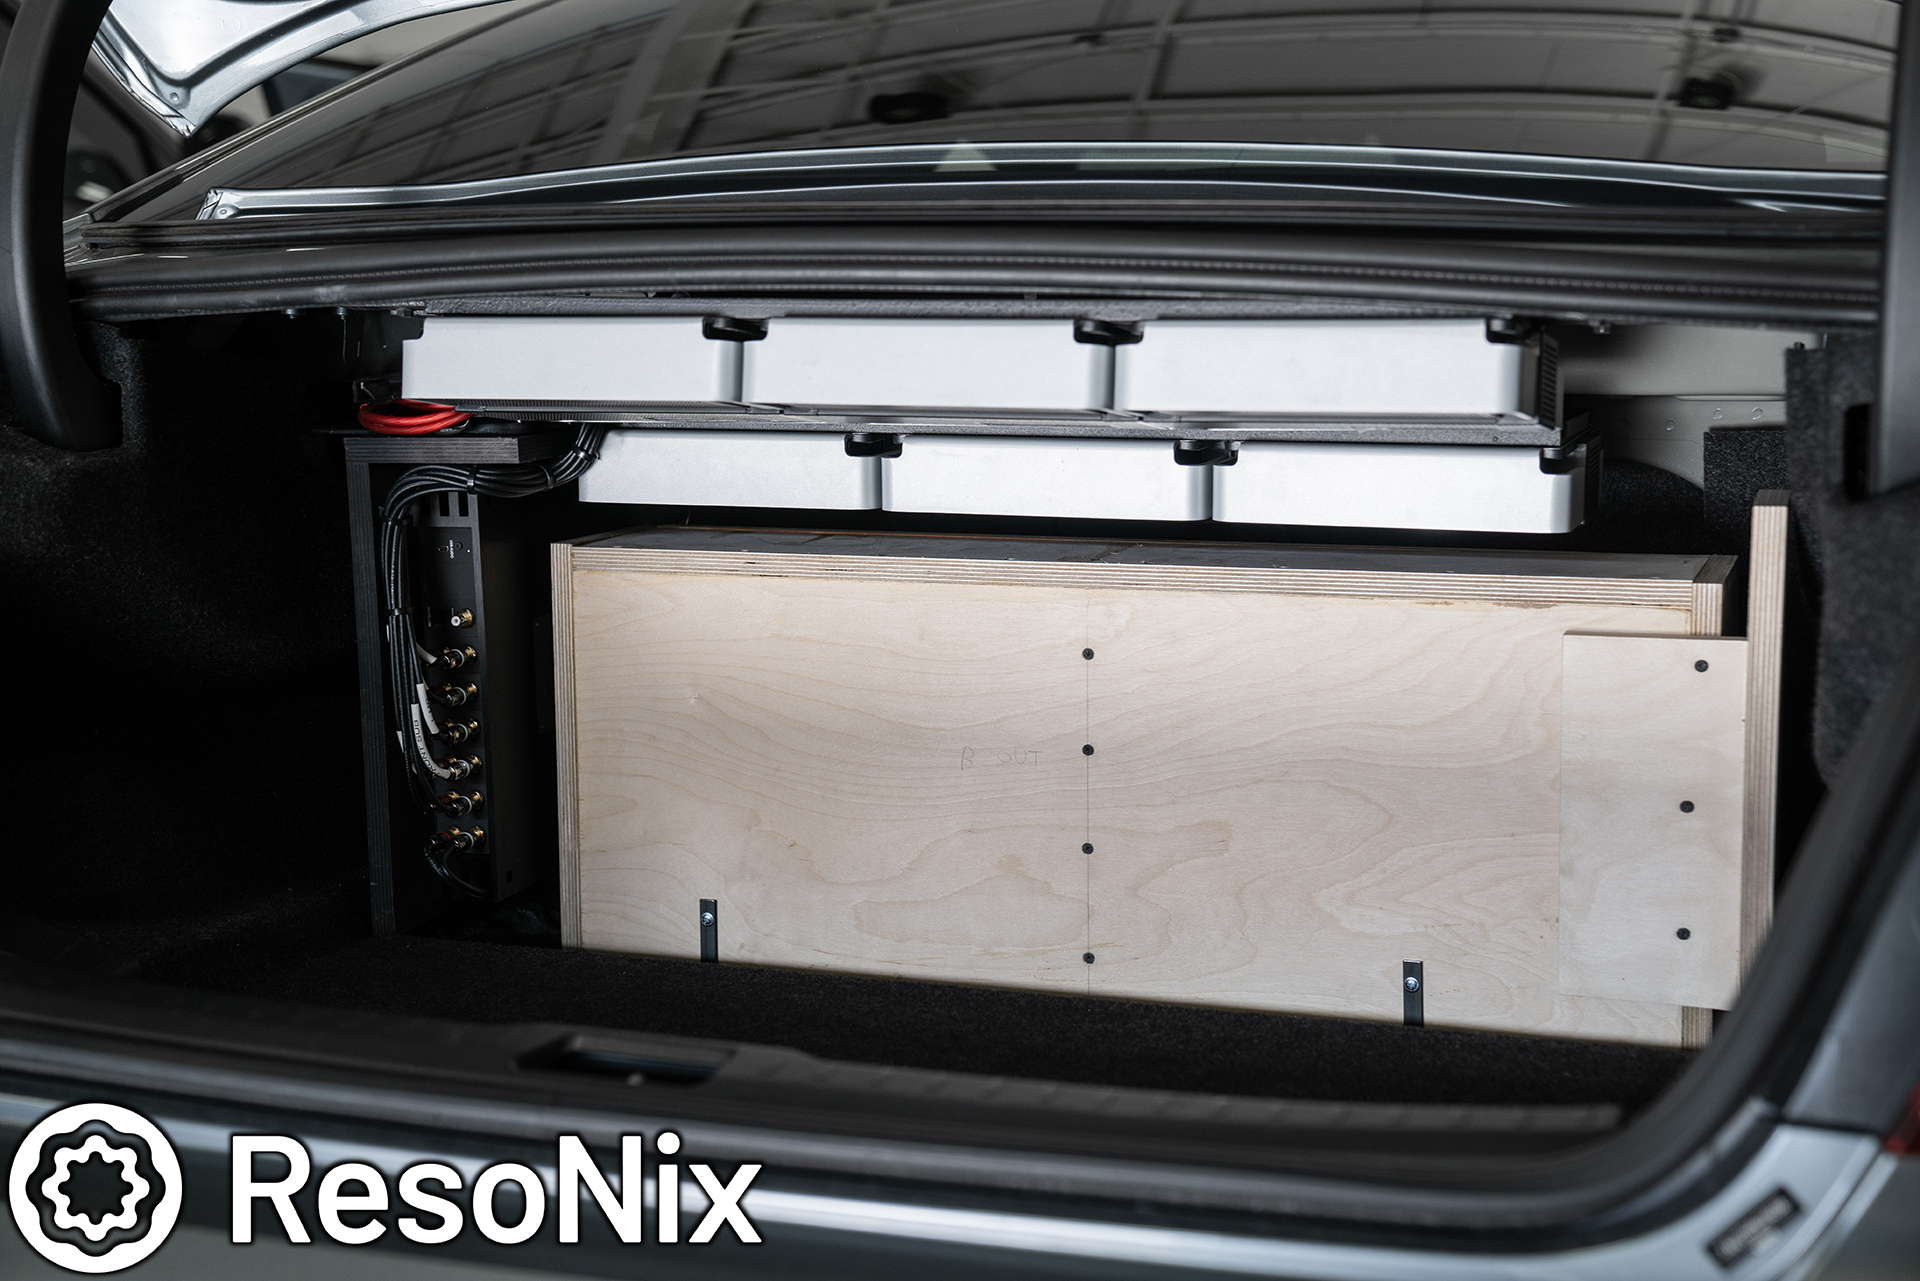
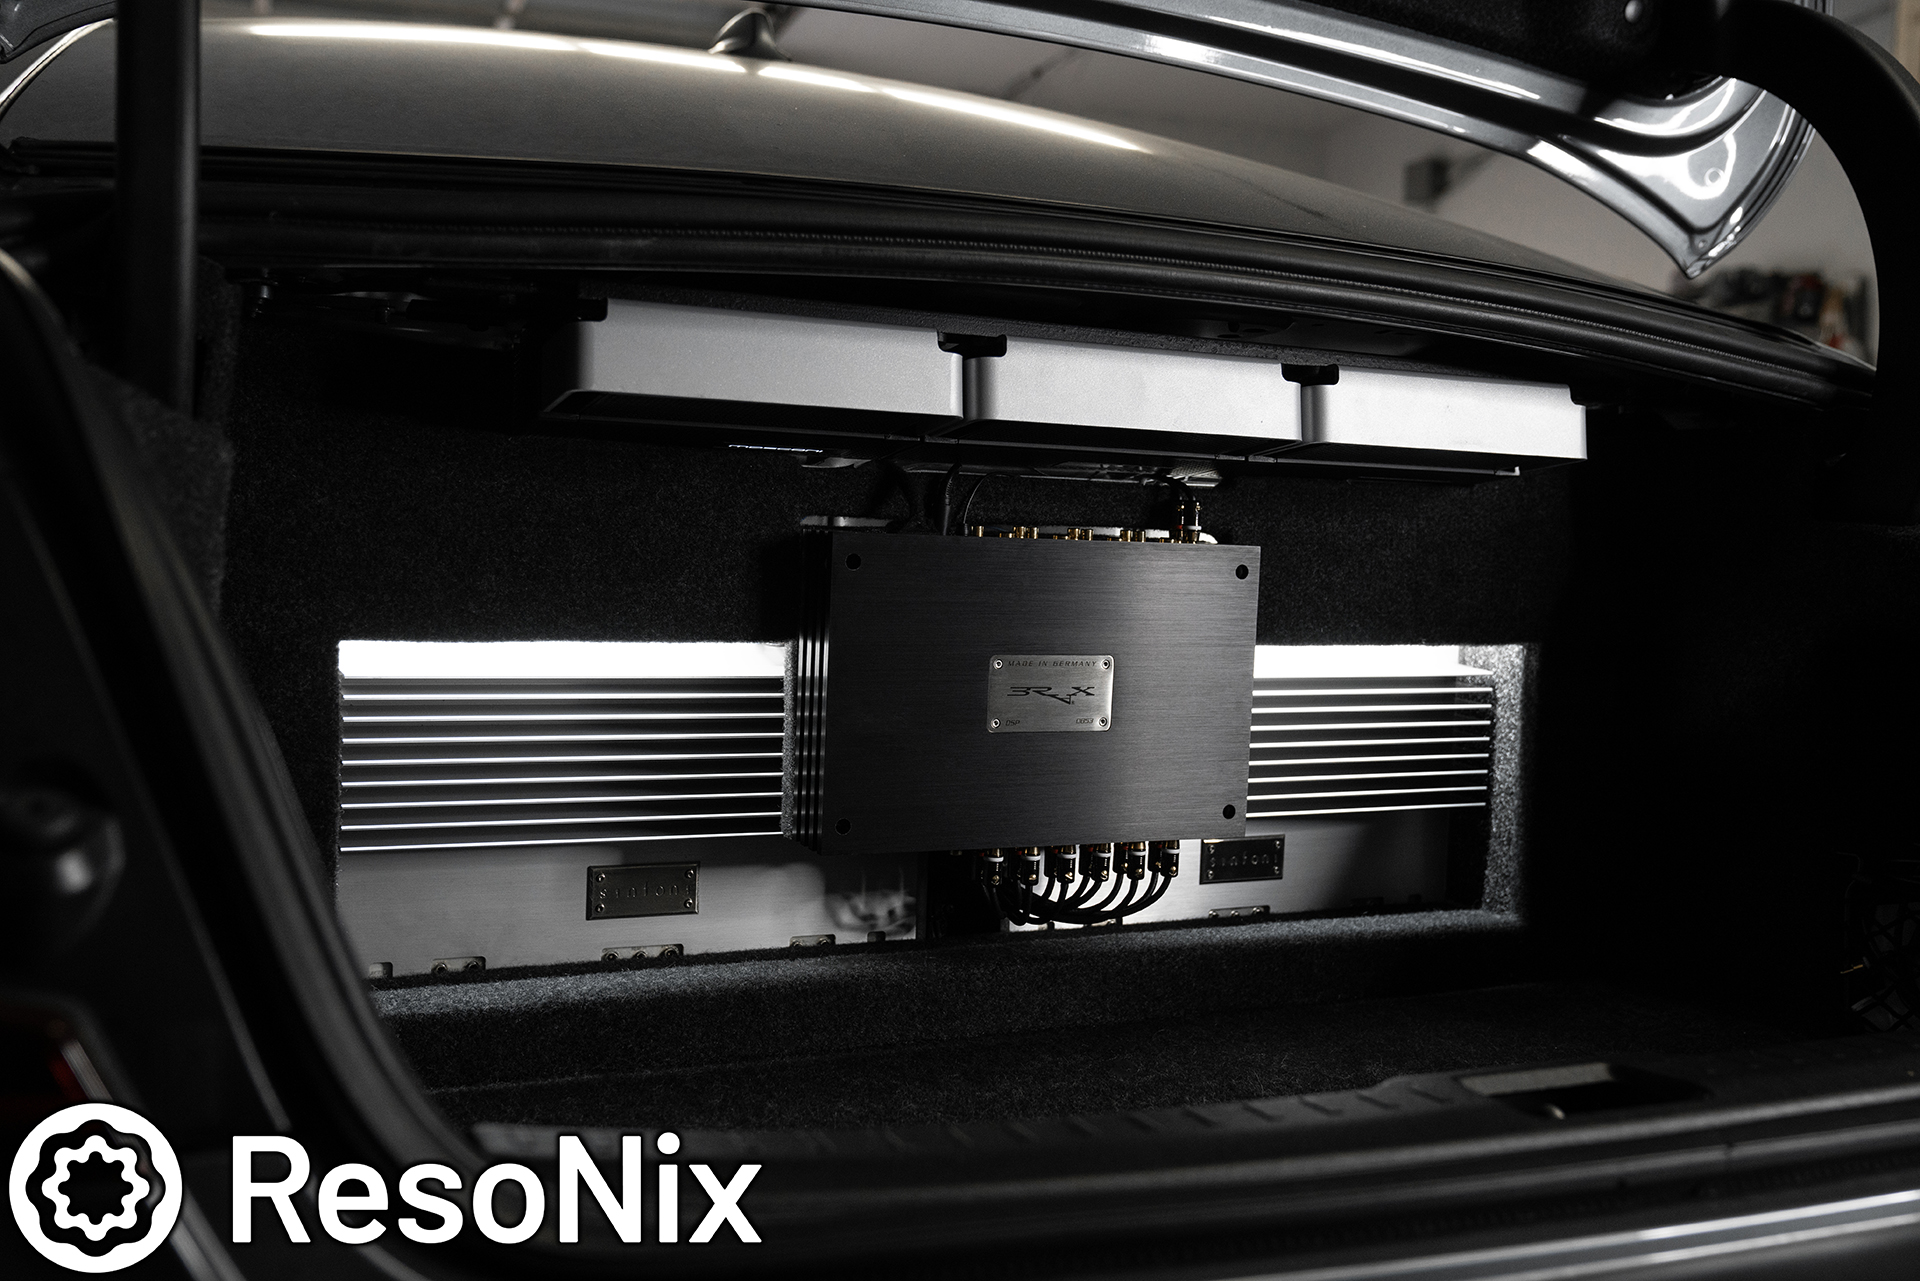
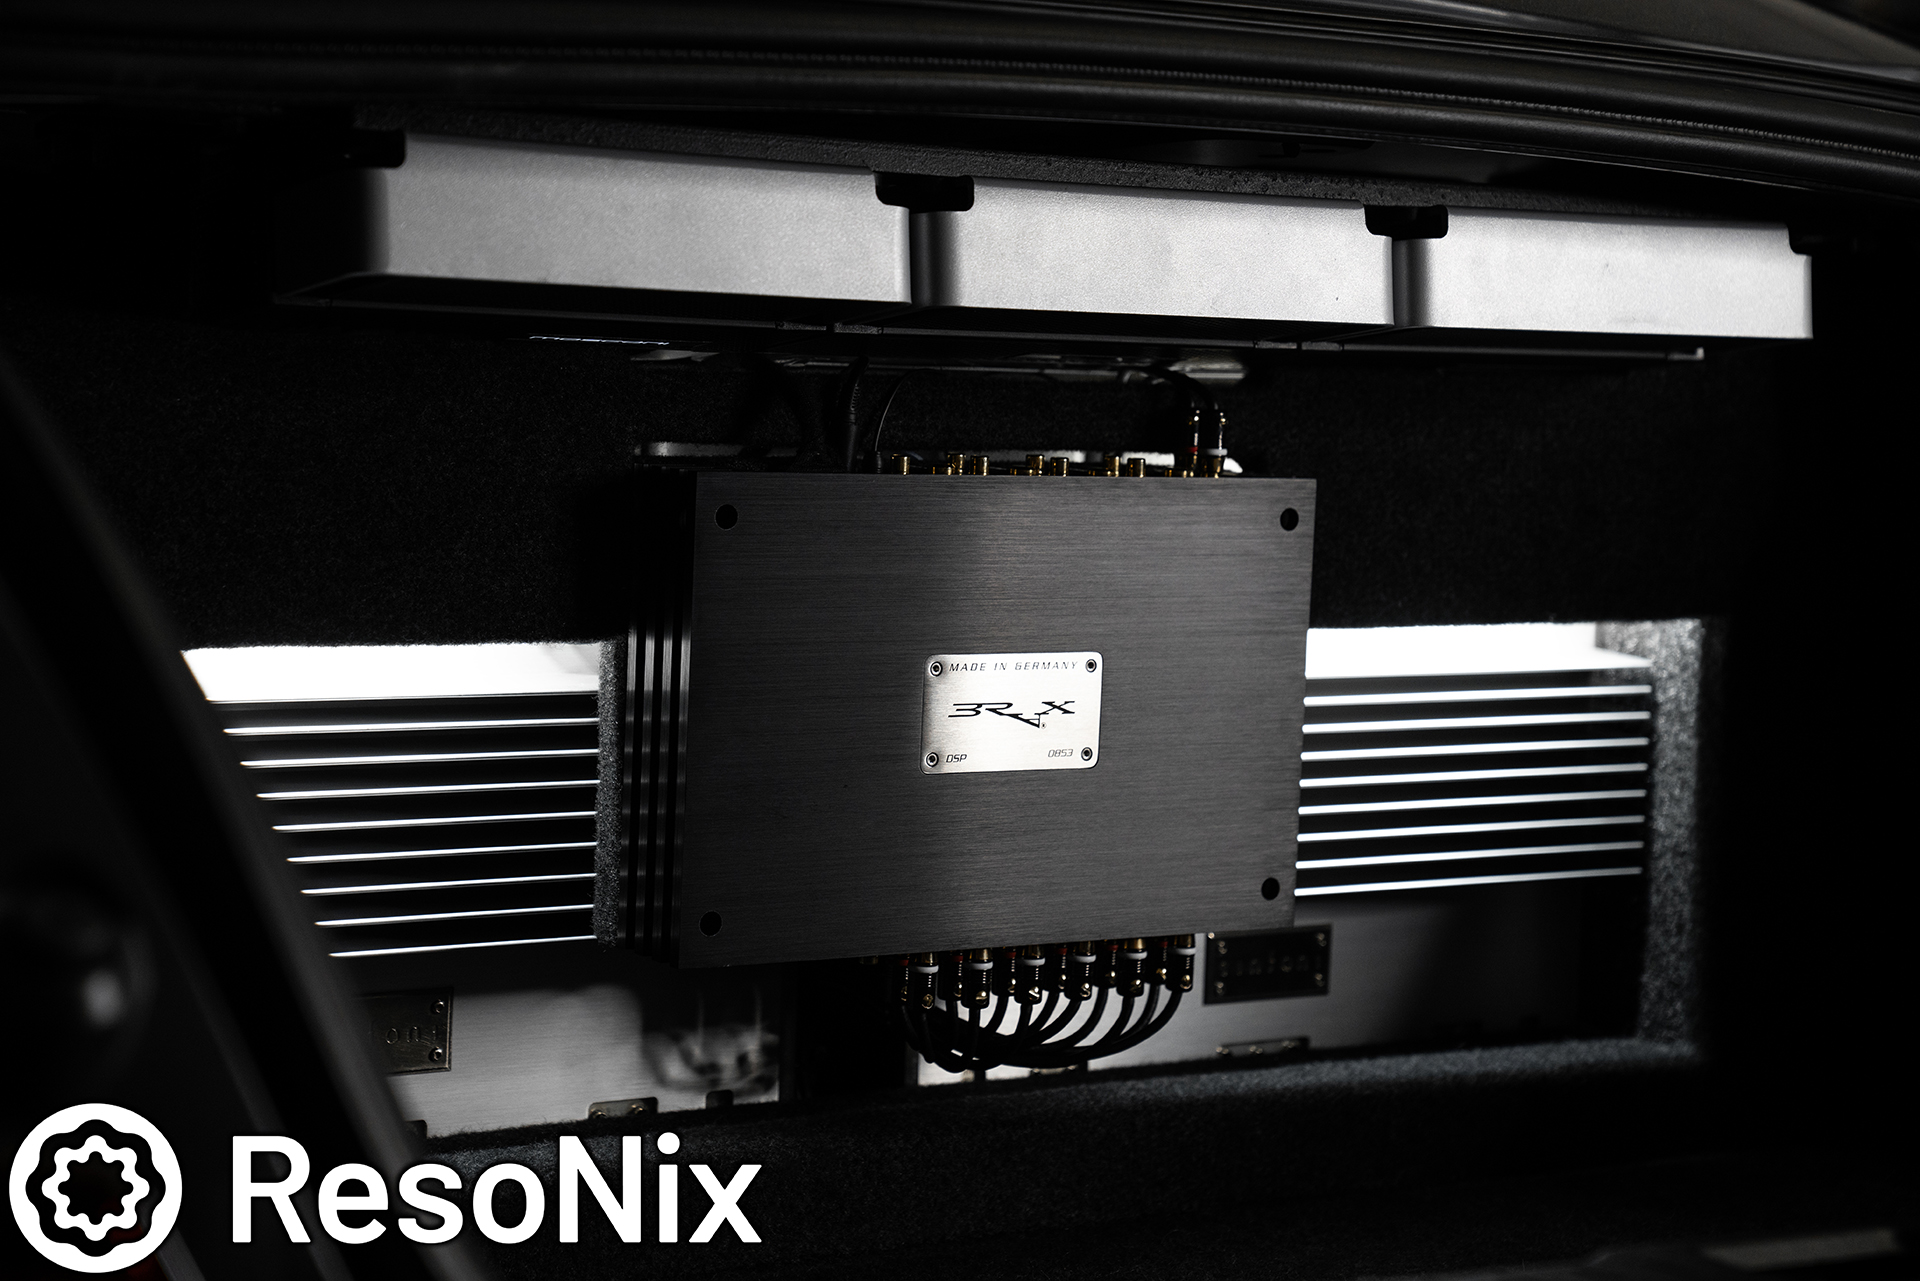
The amplifier rack for the rear deck houses 6 Mosconi Pro amplifiers. Three of the mono’s, and 3 of the 4-channels. The point here was to create something that can house these amplifiers but keep them nearly completely out of the way. This assembly is constructed out of steel square stock, and bolts to OEM mounting locations located on the rear deck. This whole assembly can be removed easily and quickly, and is easily servicable.
This is the old setup that featured the Helix DSP Ultra. It now features the Brax DSP (shown below).
Everything installed, this is how the trunk appeared before my most recent upgrade/iteration.

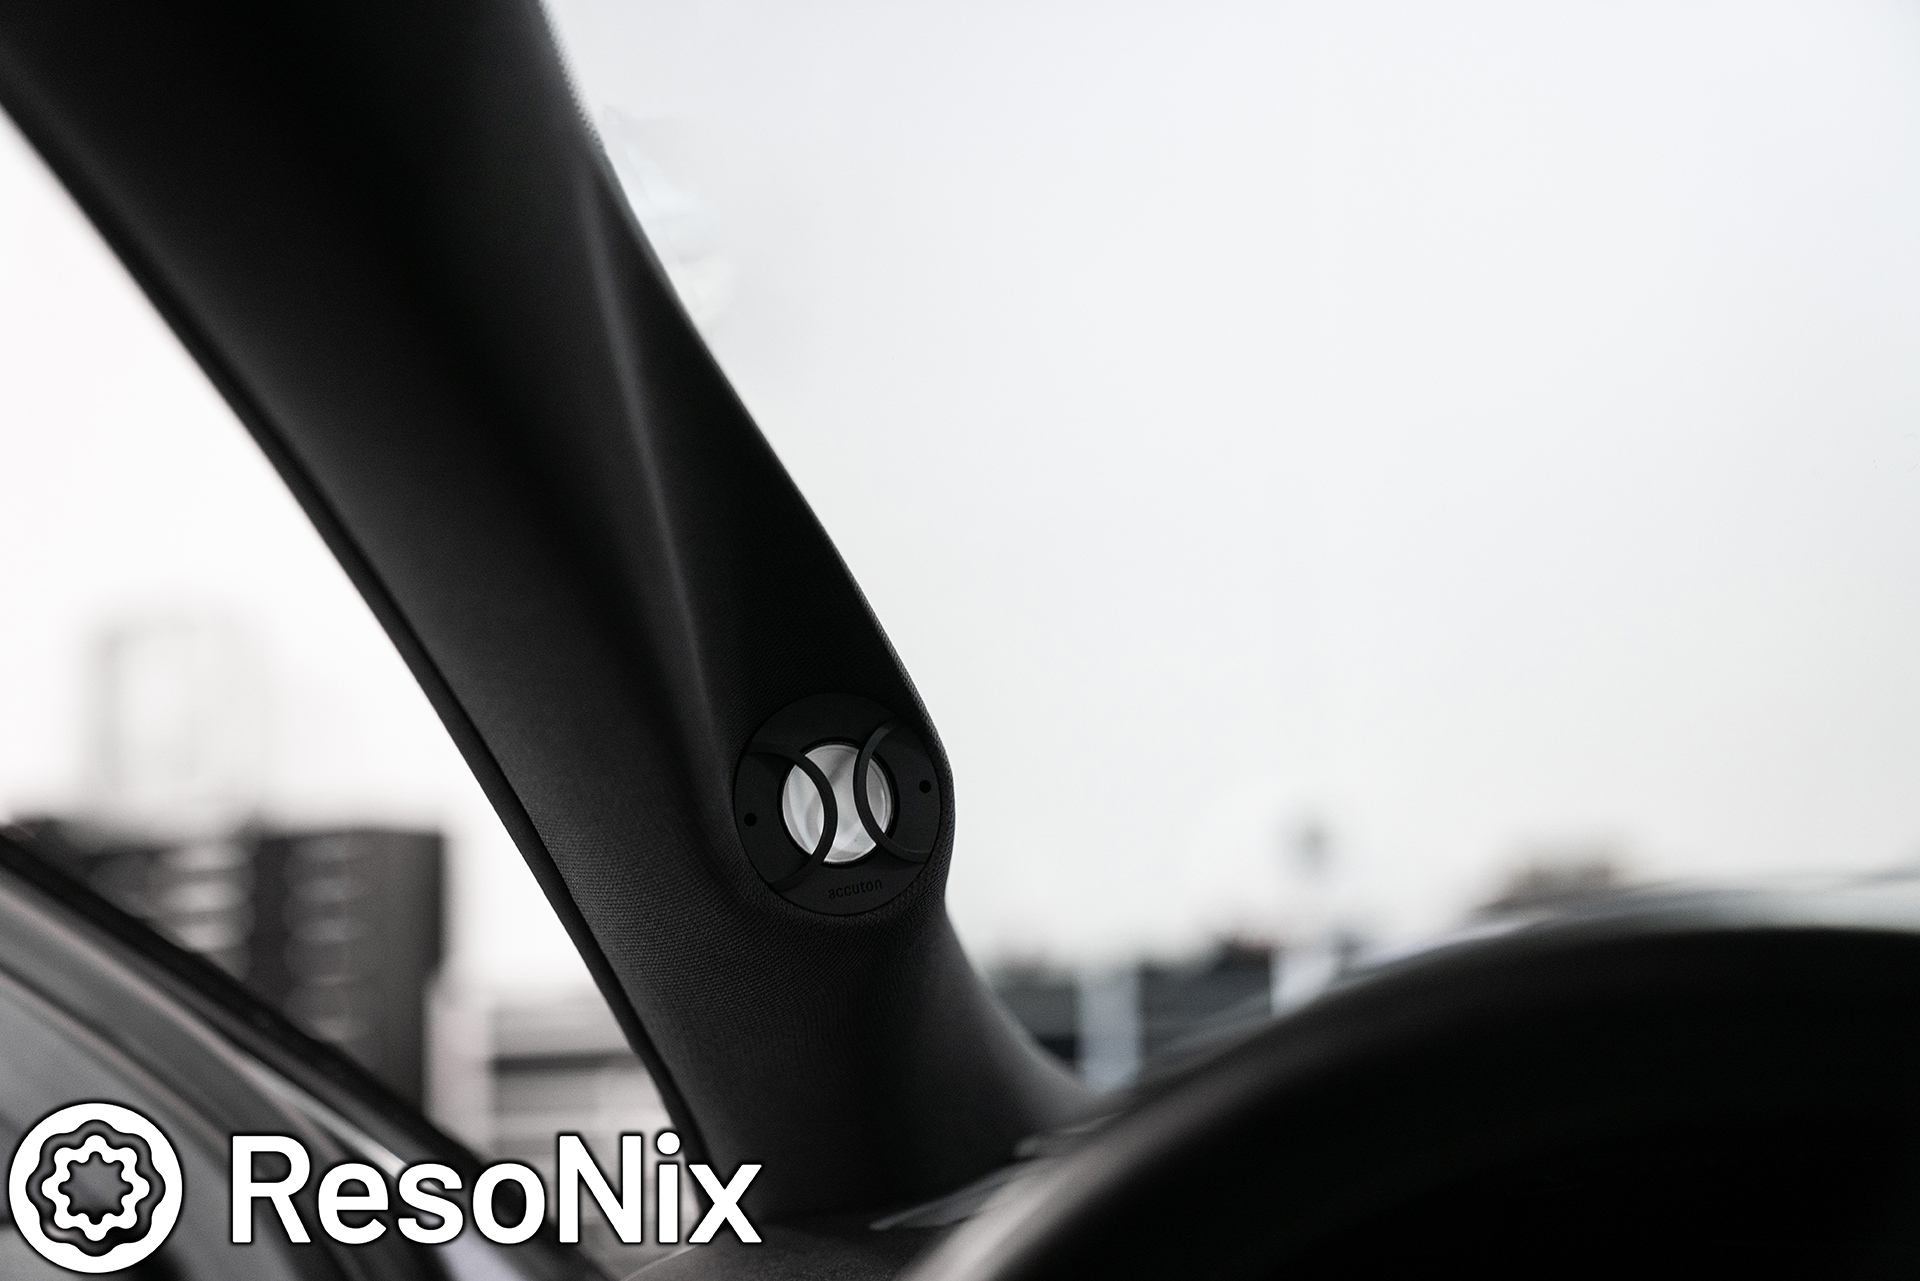
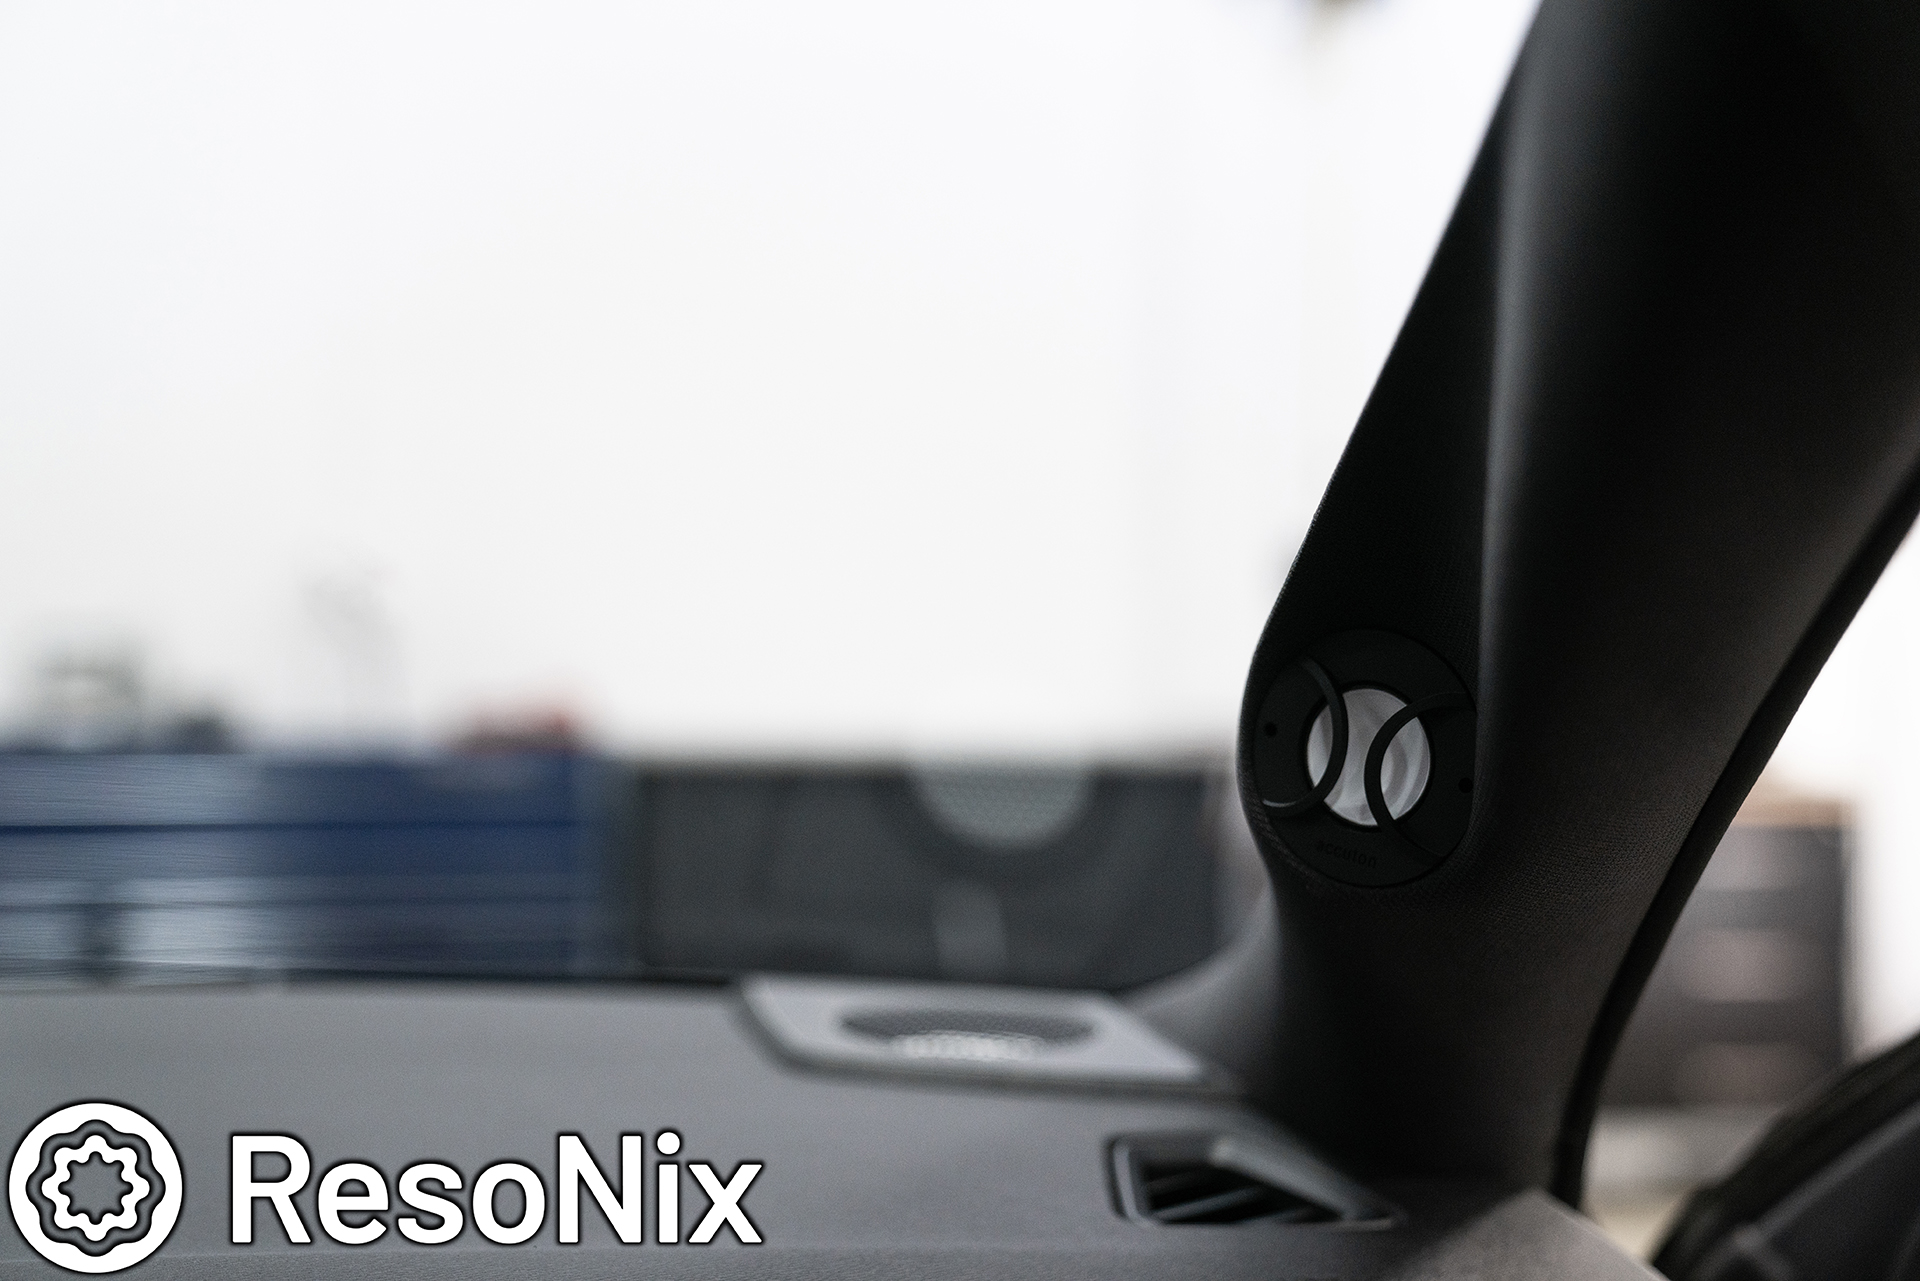
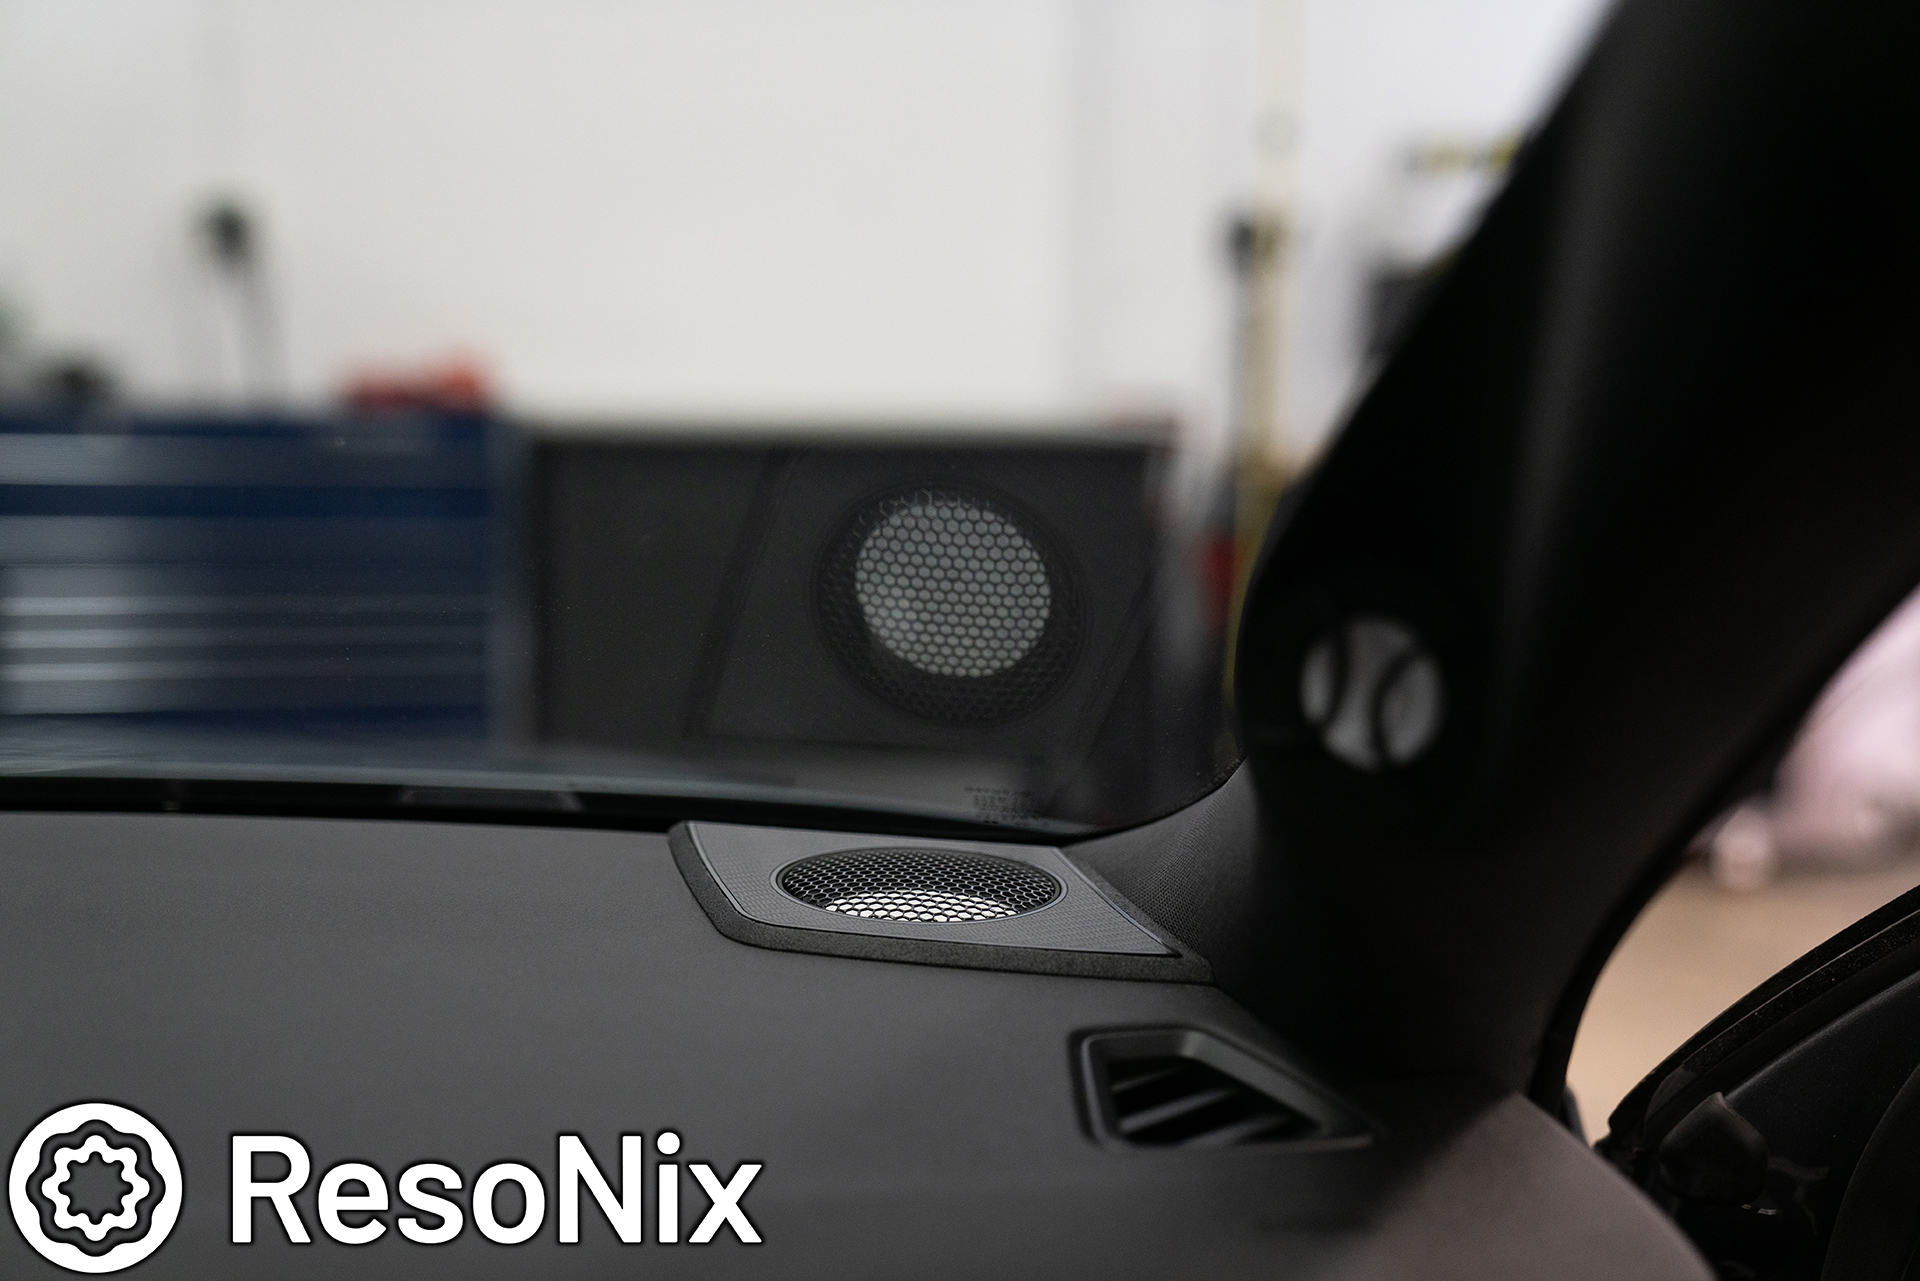
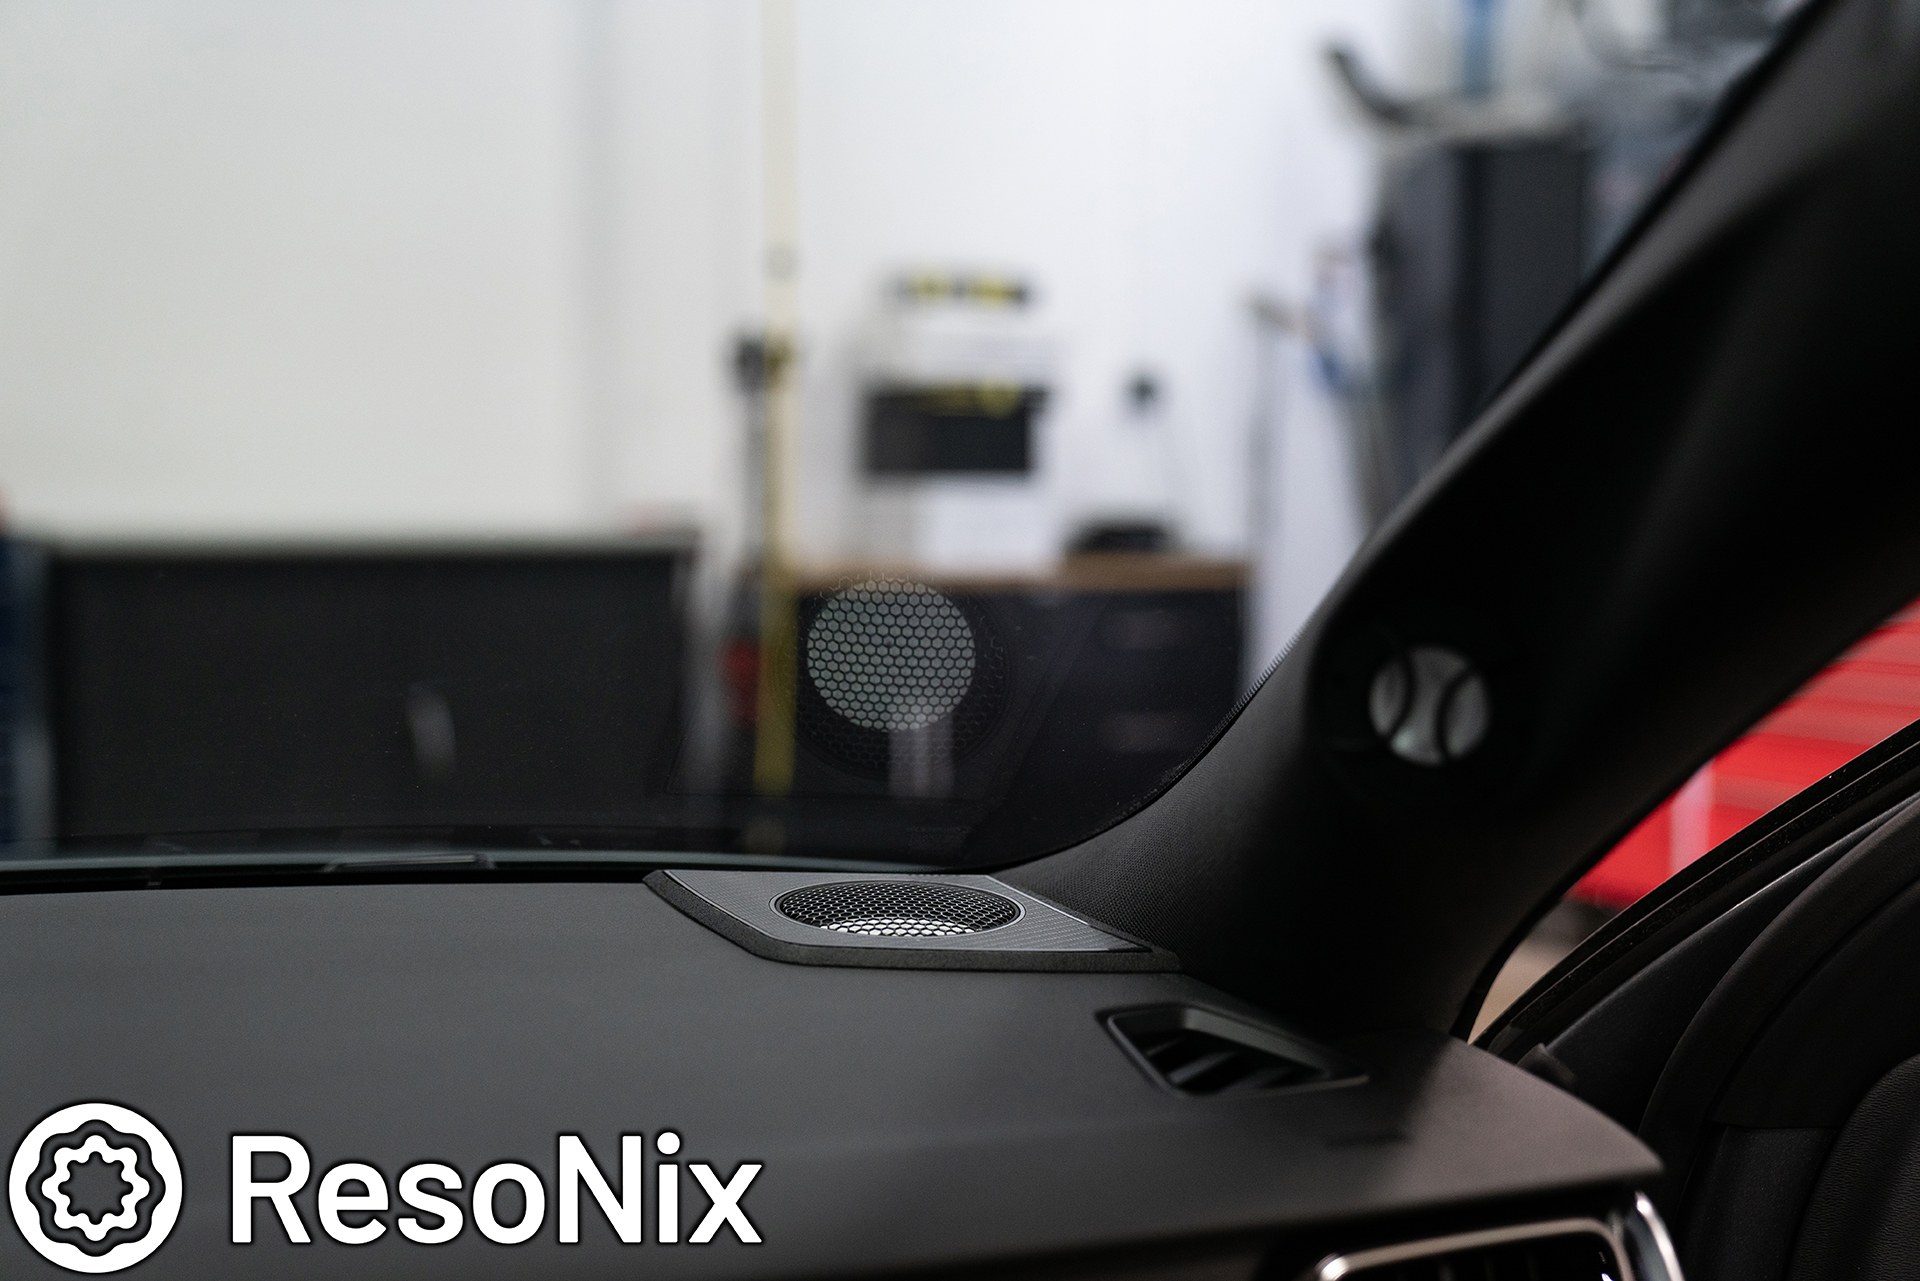
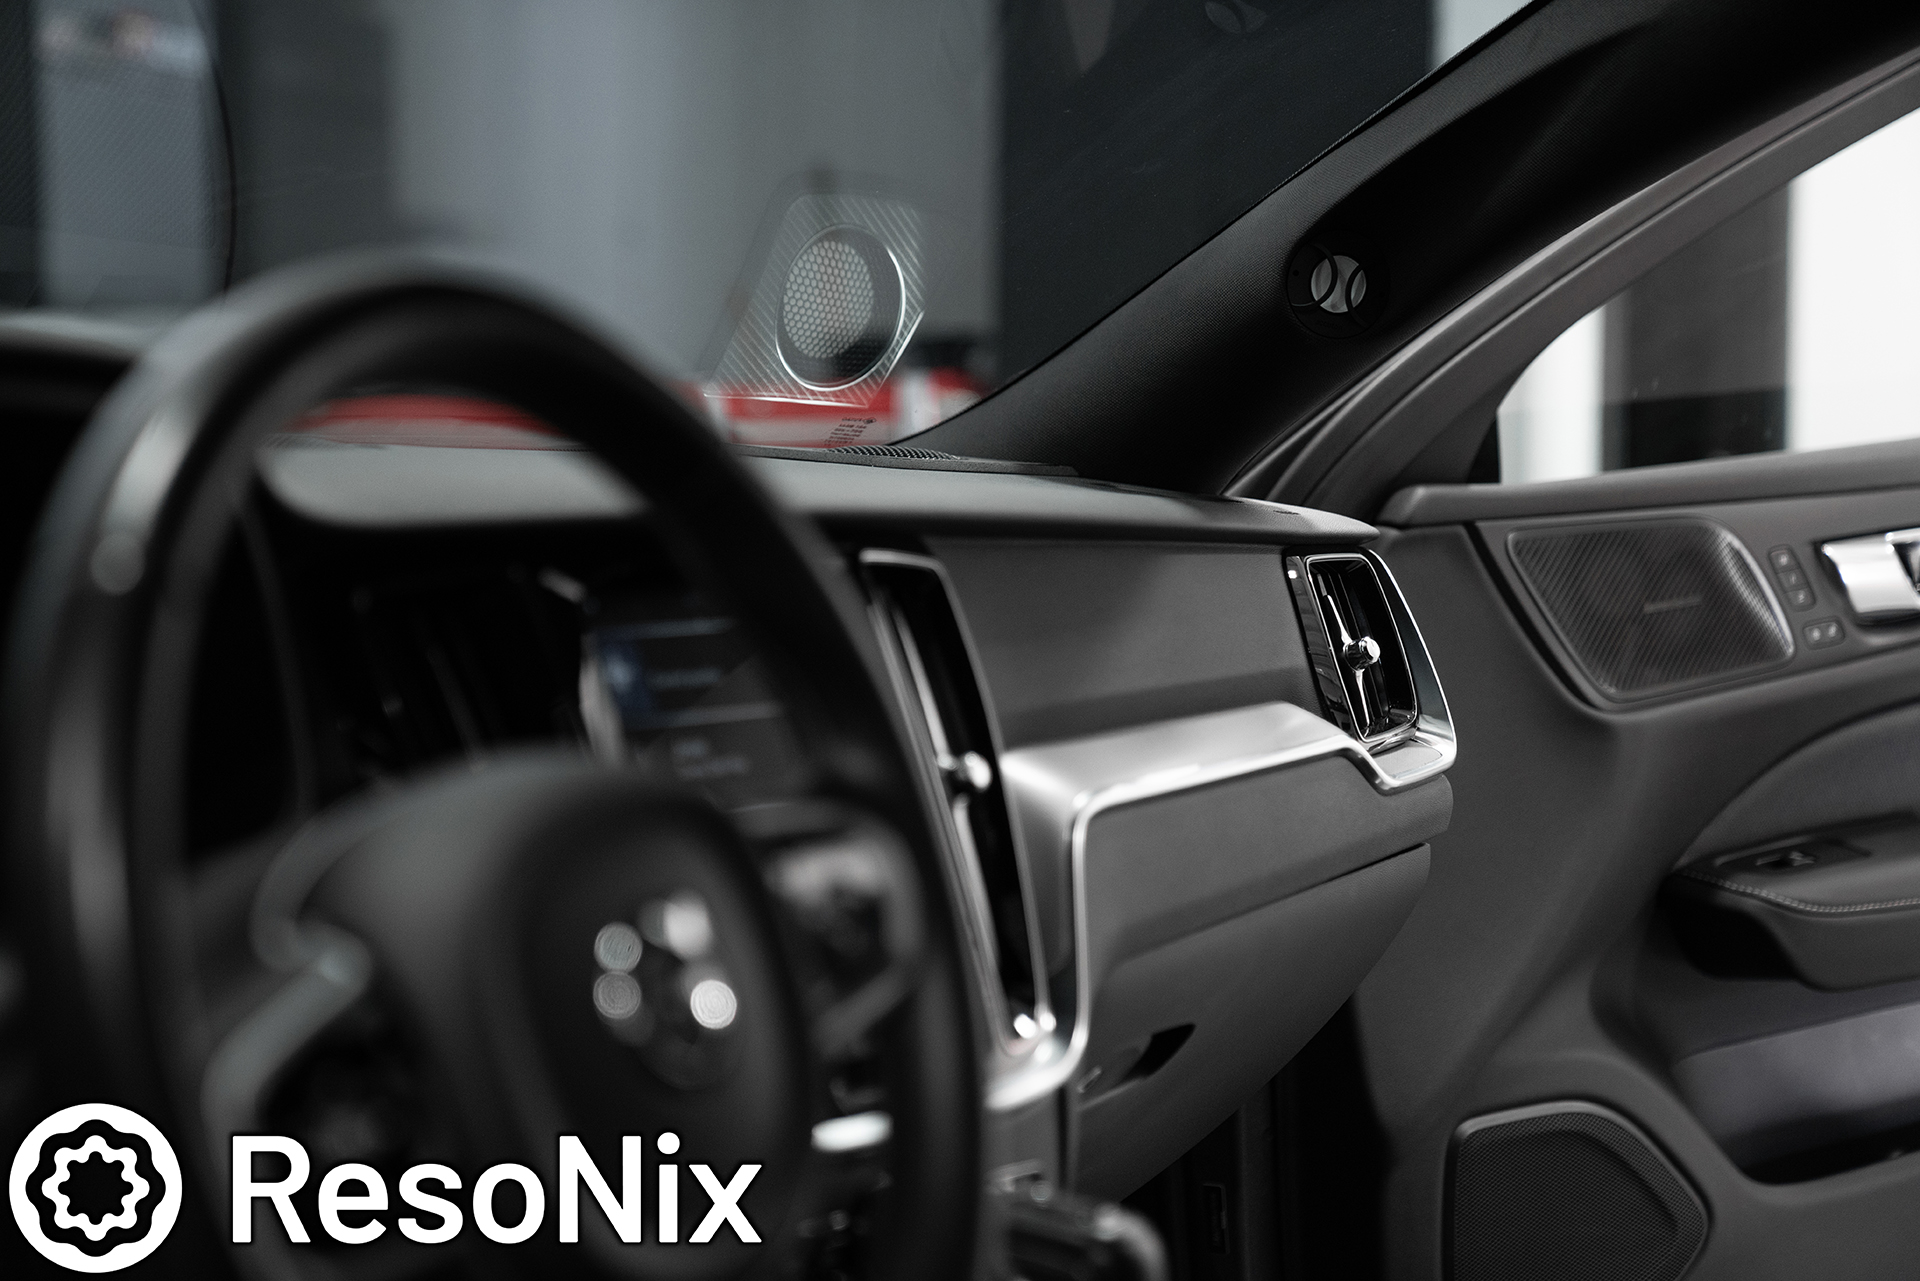
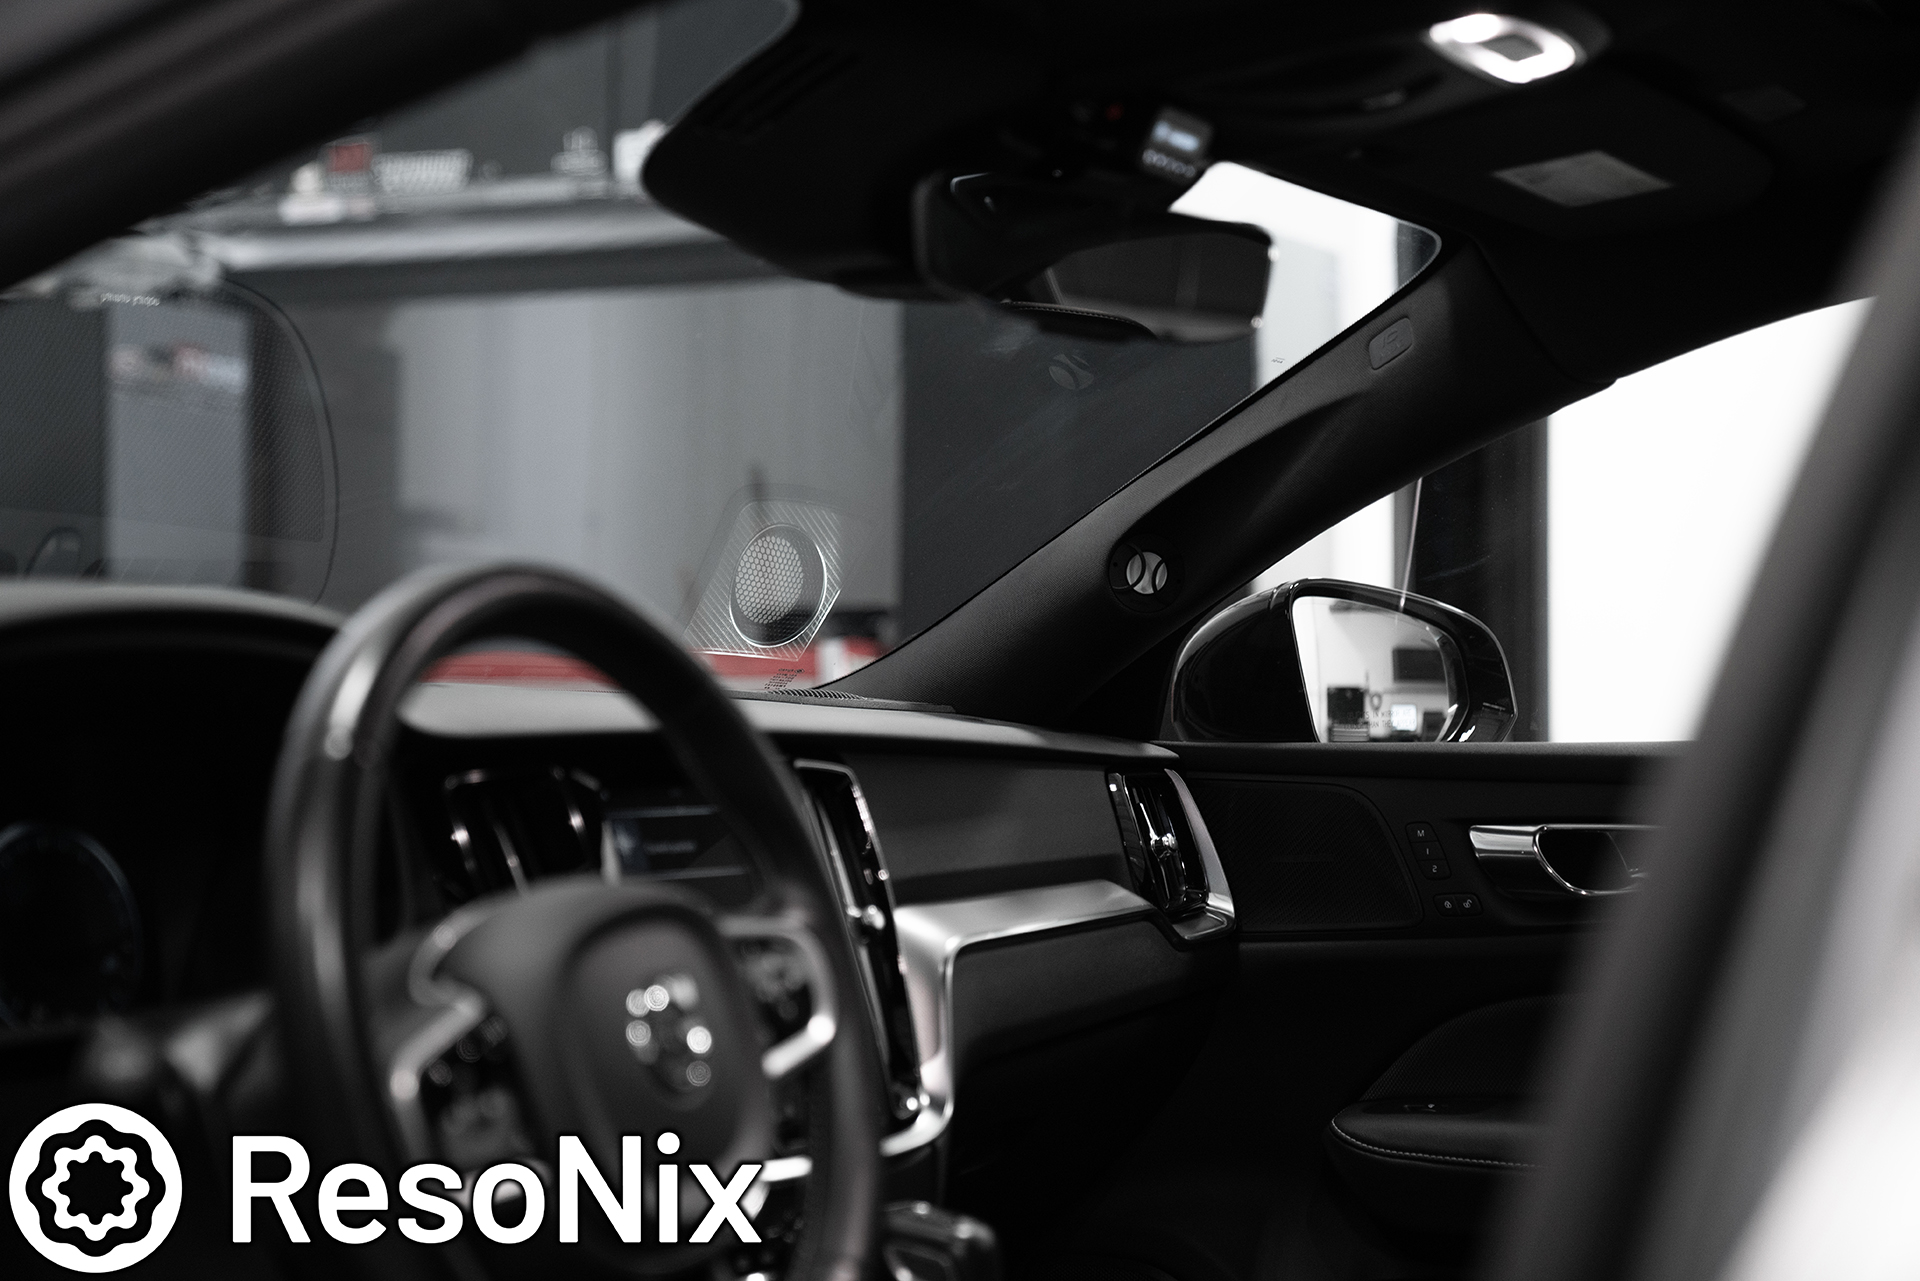
Accuton Automotive C30AM Ceramic tweeter. The best line of speakers on the car audio market. The tweeters were installed into the A-pillars and is the only part of this install that doesn’t seem 100% OEM. I was okay with this to gain a better frequency response by placing them on axis. The C100 Ceramic midrange drivers are installed into the dashboard corners. The dash was modified to accept this, yet still appears OEM. Ideally, I would angle them a bit as the rake of the windshield is a bit much relative to the angle of the dash top.
The A-Pillars house the Accuton Automotive C30AM tweeter, which was aimed in between the front seat head rests, and then finished in an OEM-matching fabric.
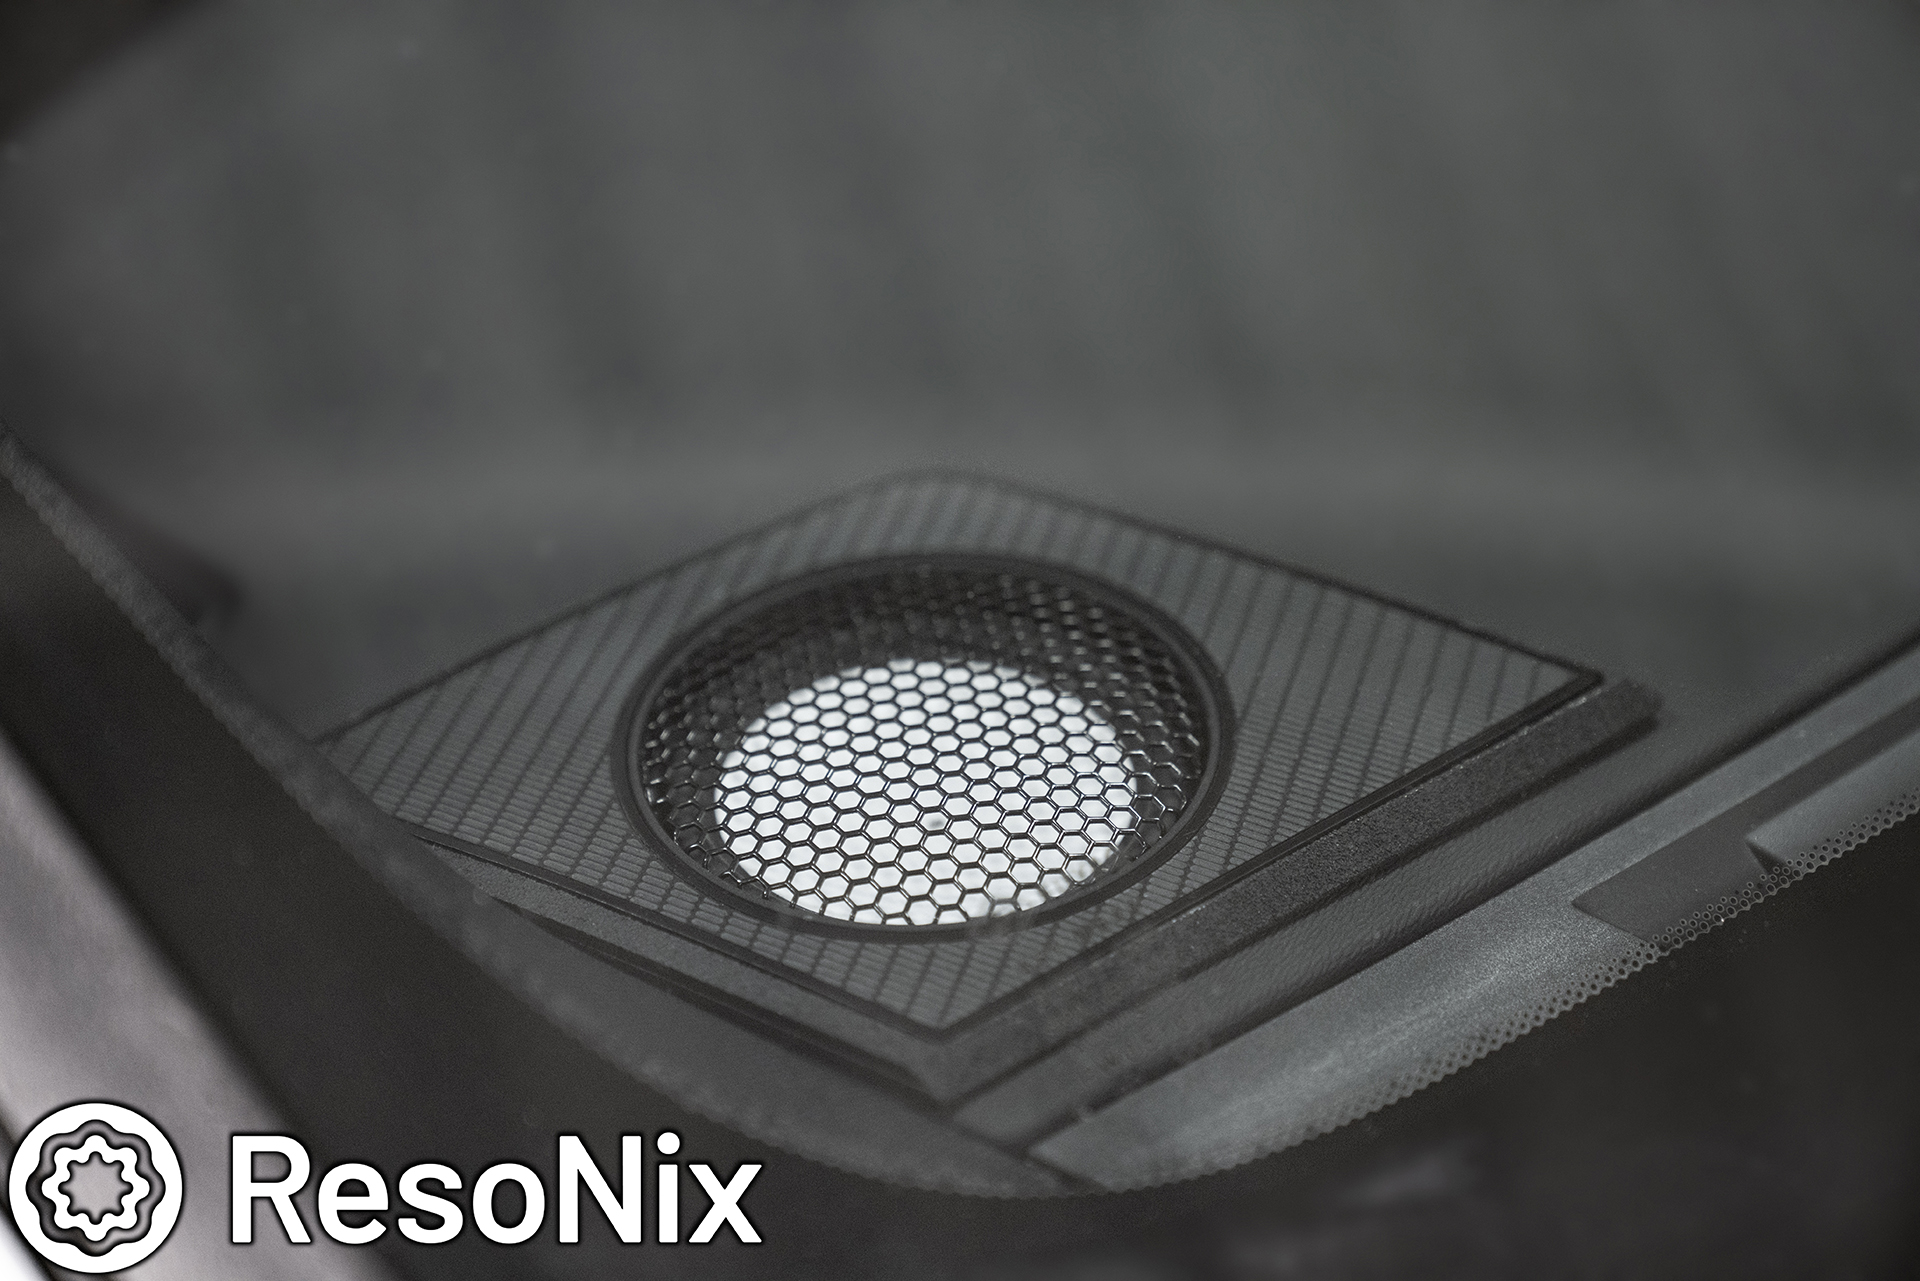
The Accuton Automotive C100AM midranges were installed into the dash corners. There is not a speaker location here originally. I ended up cutting the dashboard to do this. The panel that houses it was designed to appear OEM. Everything down to the shape, the matte/engraved/gloss combo, the texture of the outer beveled rim, etc.. all of this was taken into account. Why did I choose these locations? Because they look OEM, and this location typically yields the best sounding end results. The pattern on the top mimics the OEM speaker grilles that are a part of the door panels OEM speaker location.

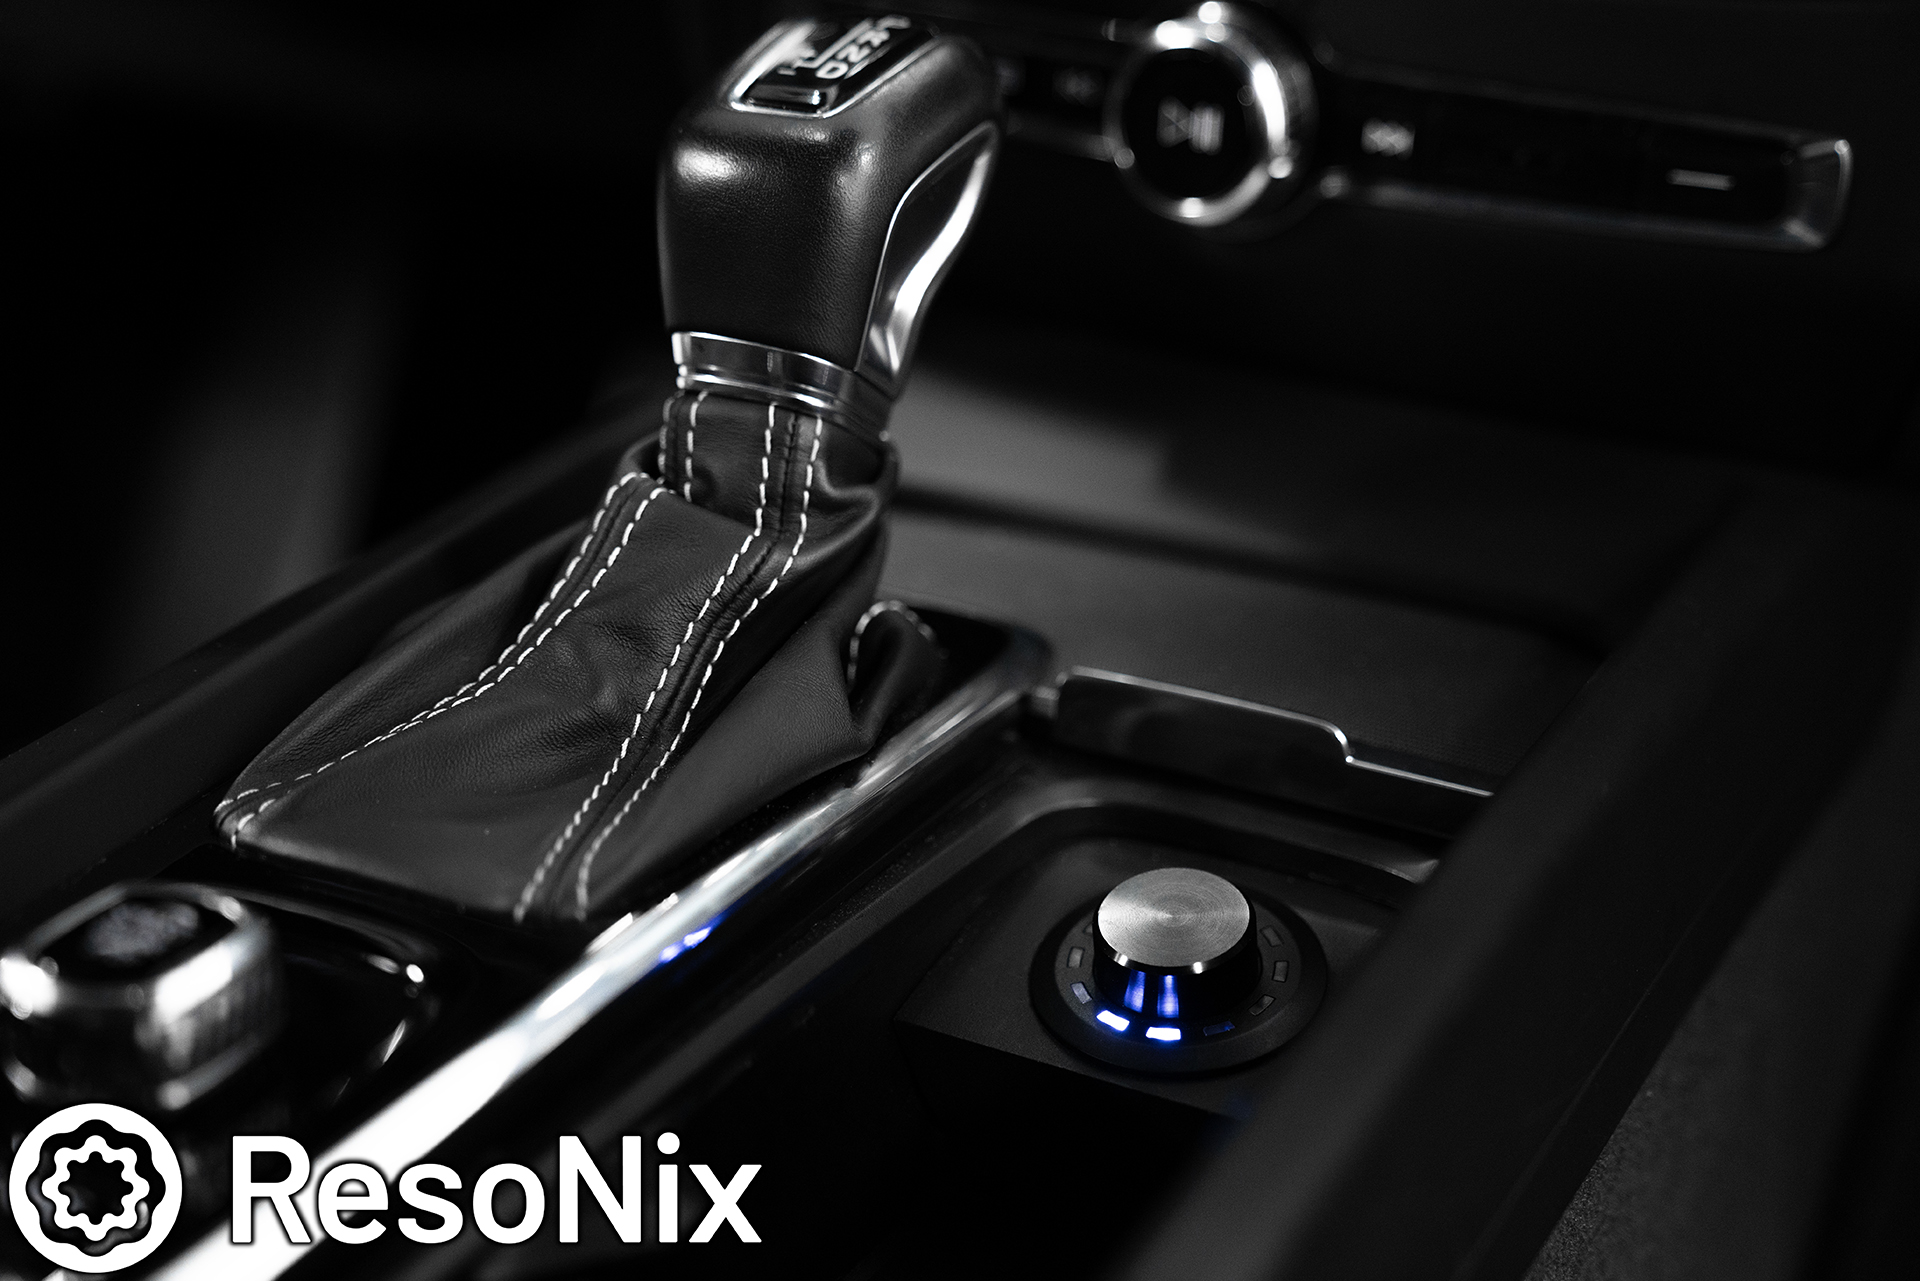
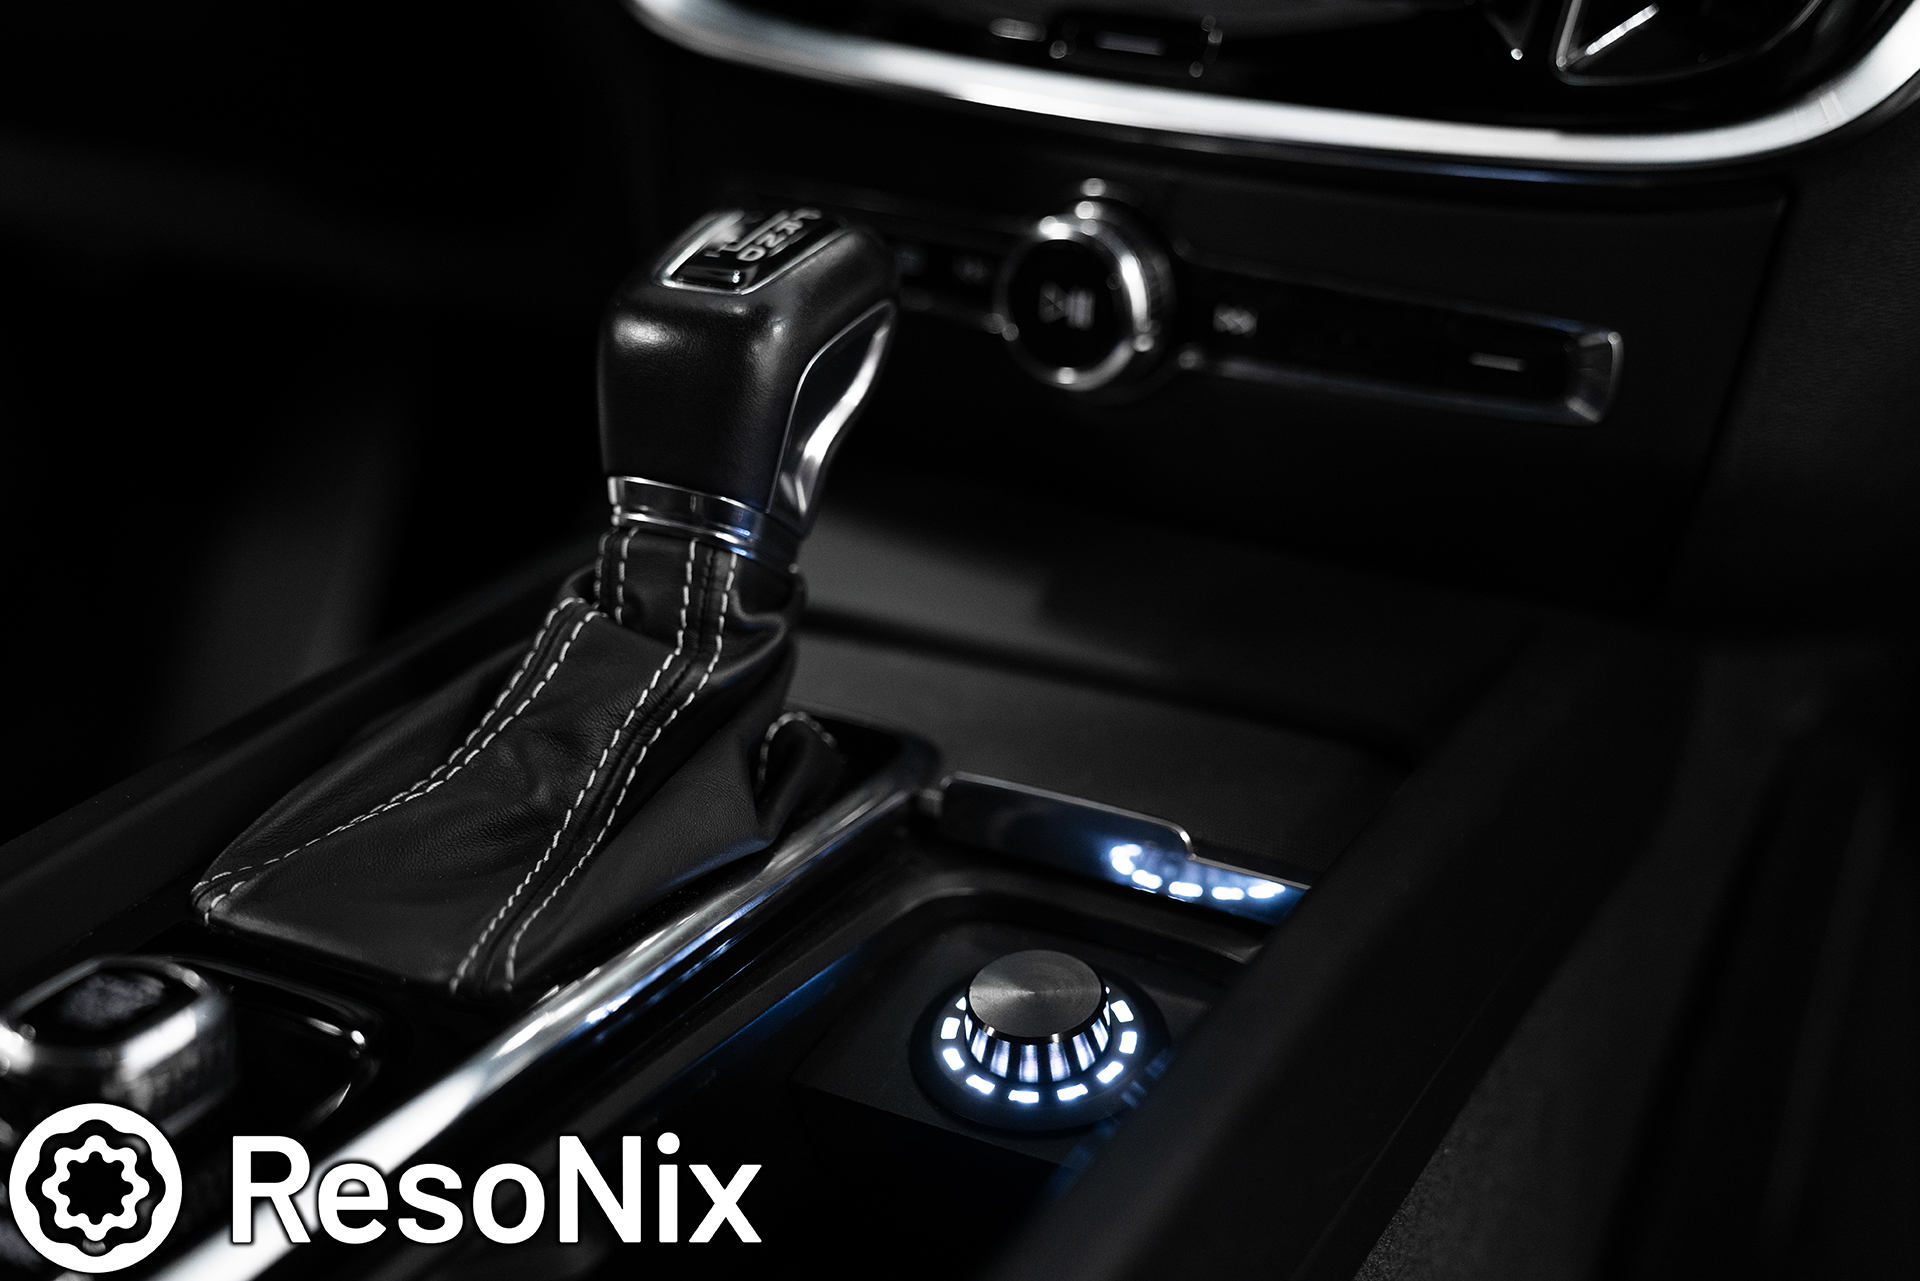
The Helix Conductor is installed right where the 12v cig output was located. The OEM cover can still slide over and cover it. The Conductor, in this install, controls master volume, subwoofer volume, digital volume, HEC volume 1, HEC volume 2, tone controlls (bass and treble over the whole system), and presets. This thing is amazing for what it is. It can be fully covered up by the OEM sliding panel.
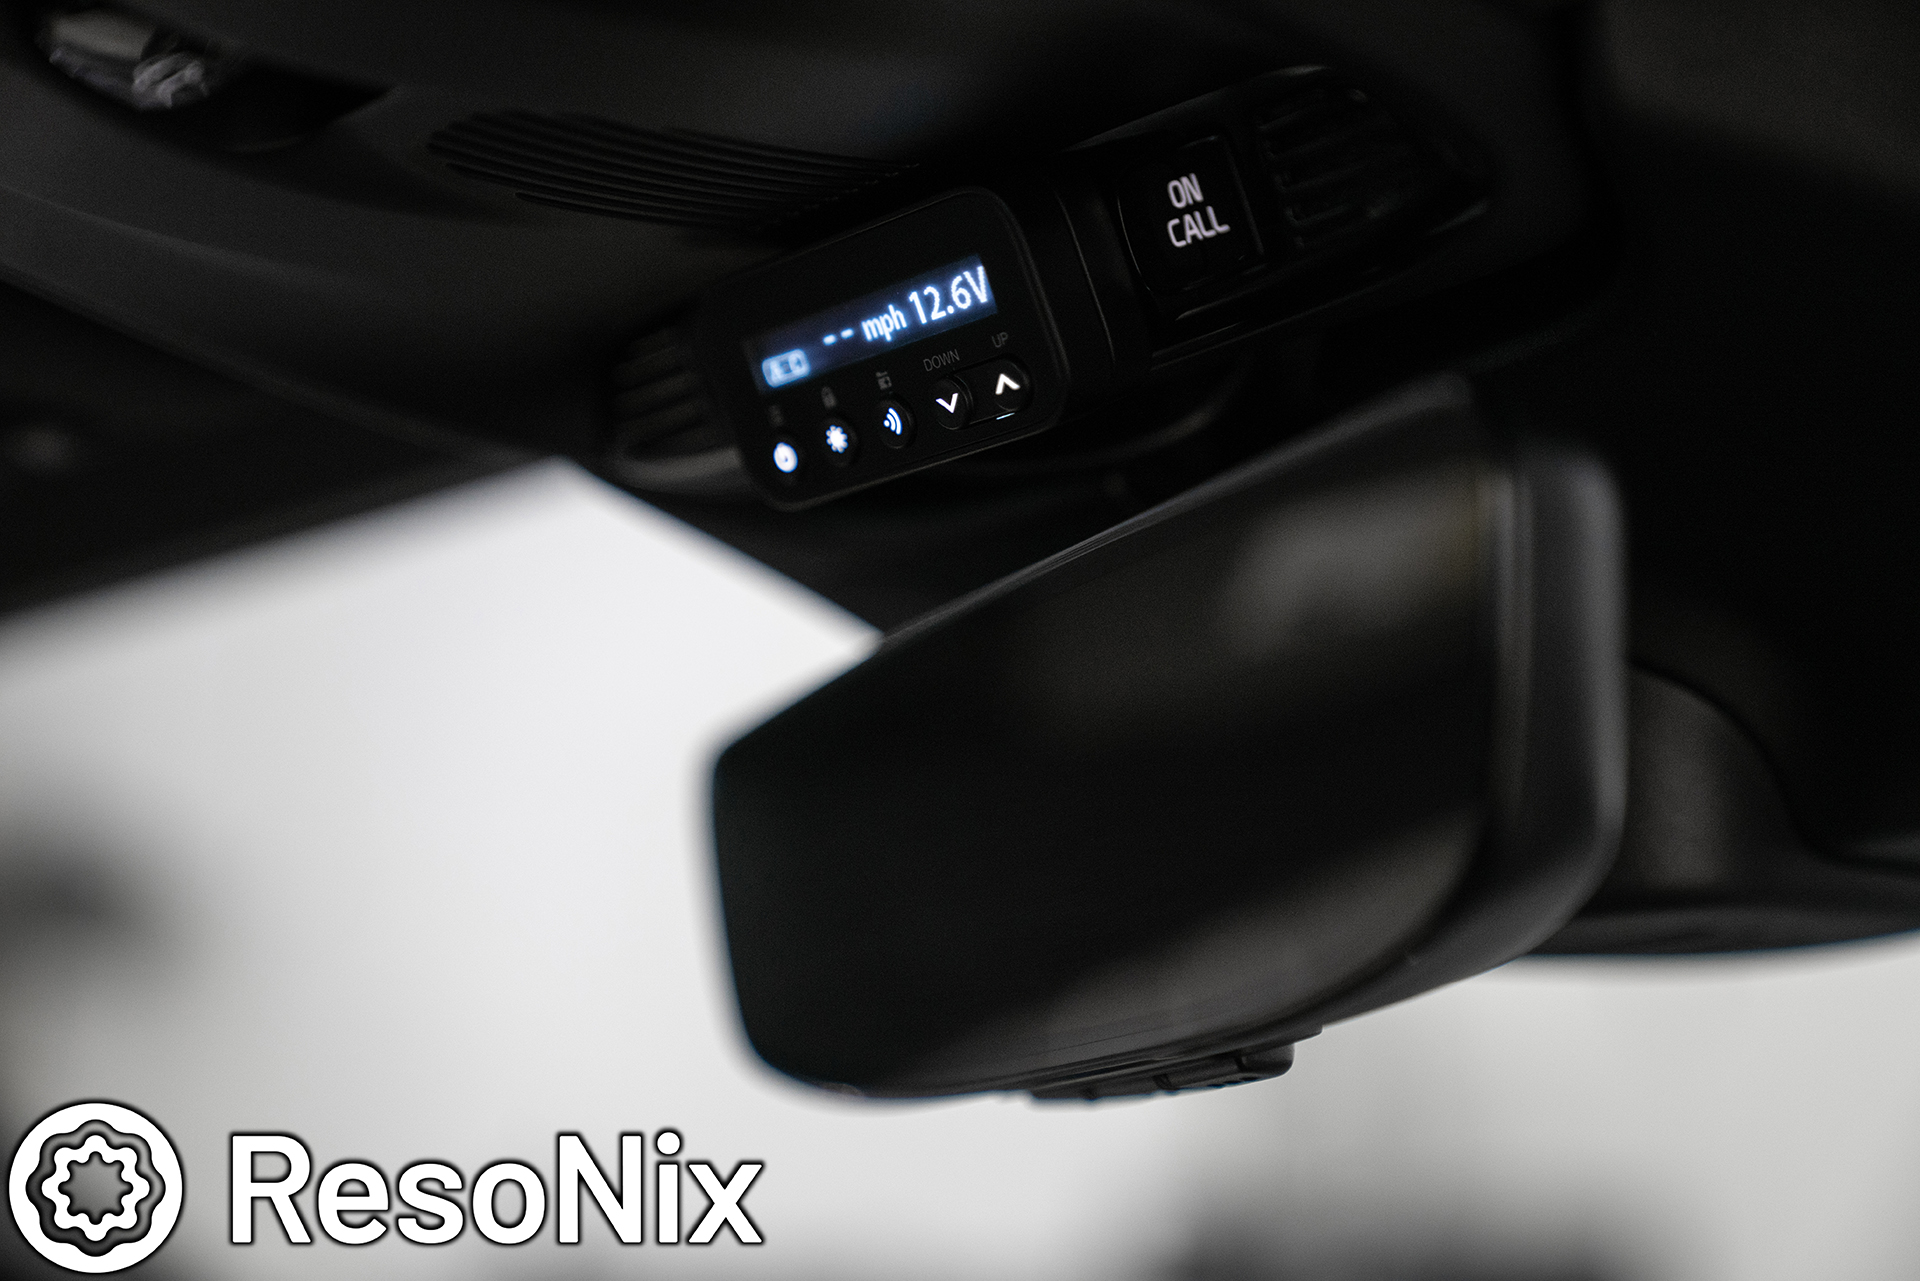
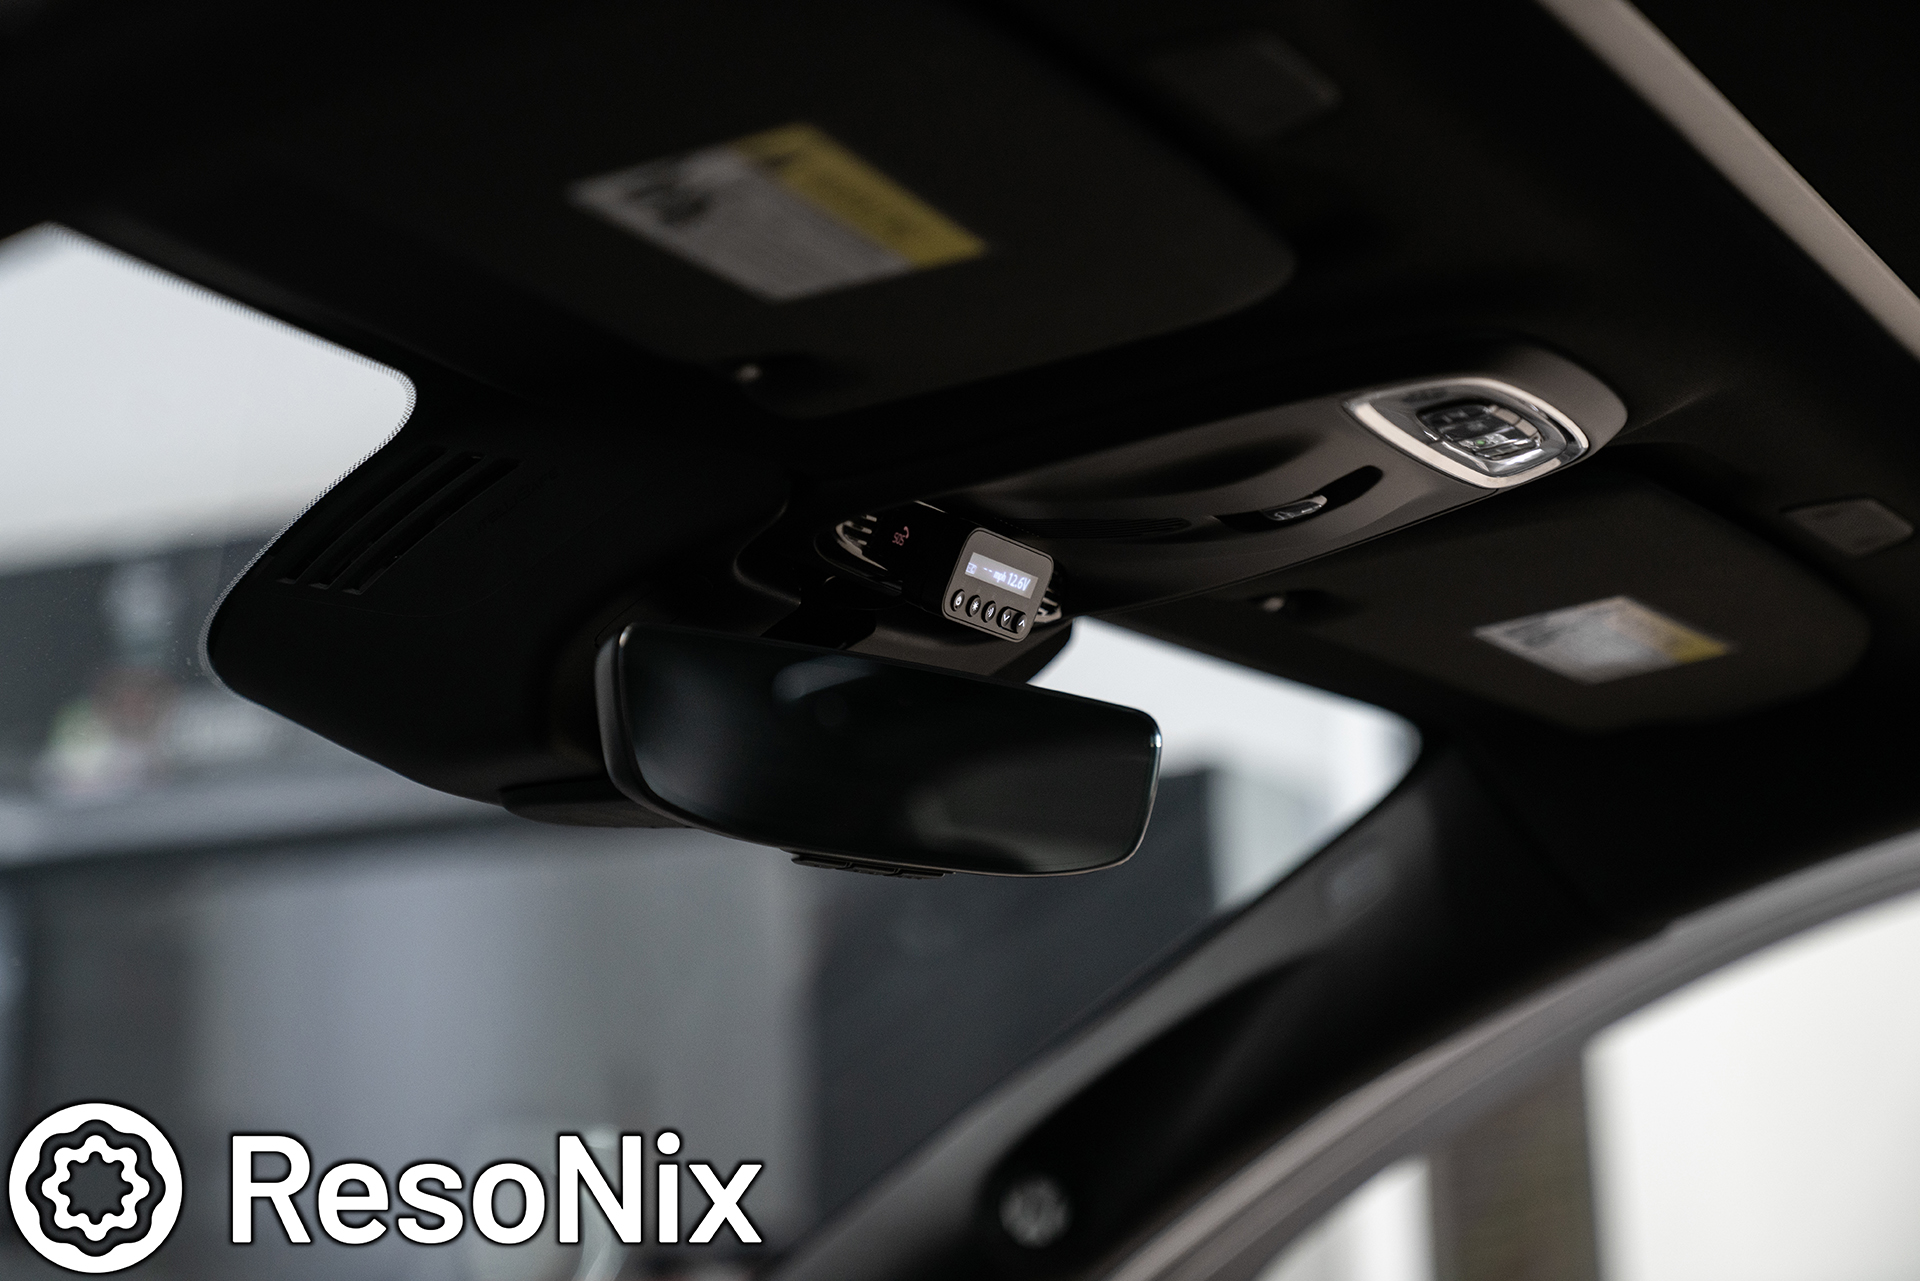
The Radenso RC-M Ultimate Edition controller was installed in an easy to reach and see location right above the rear view mirror.
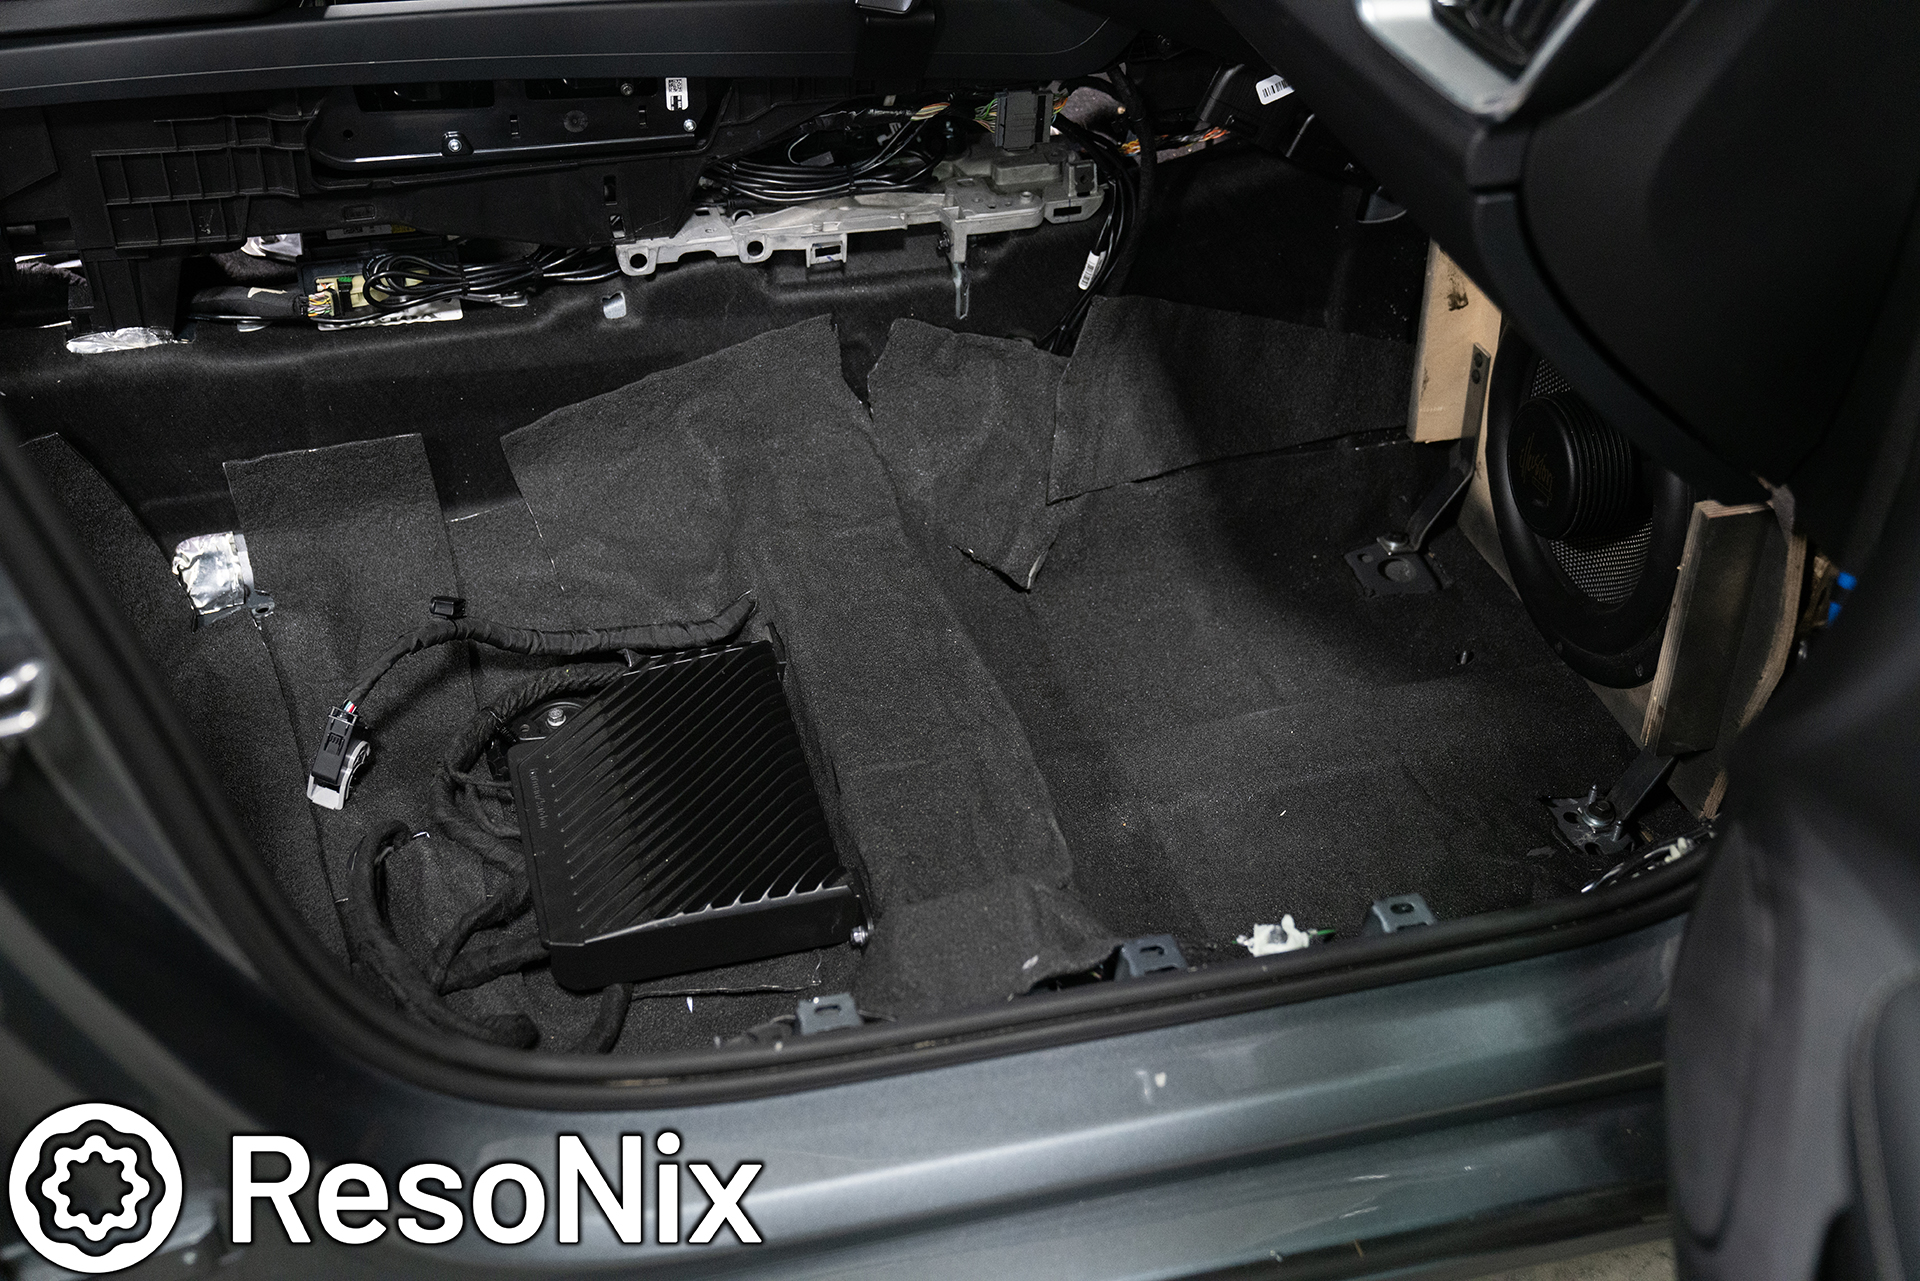
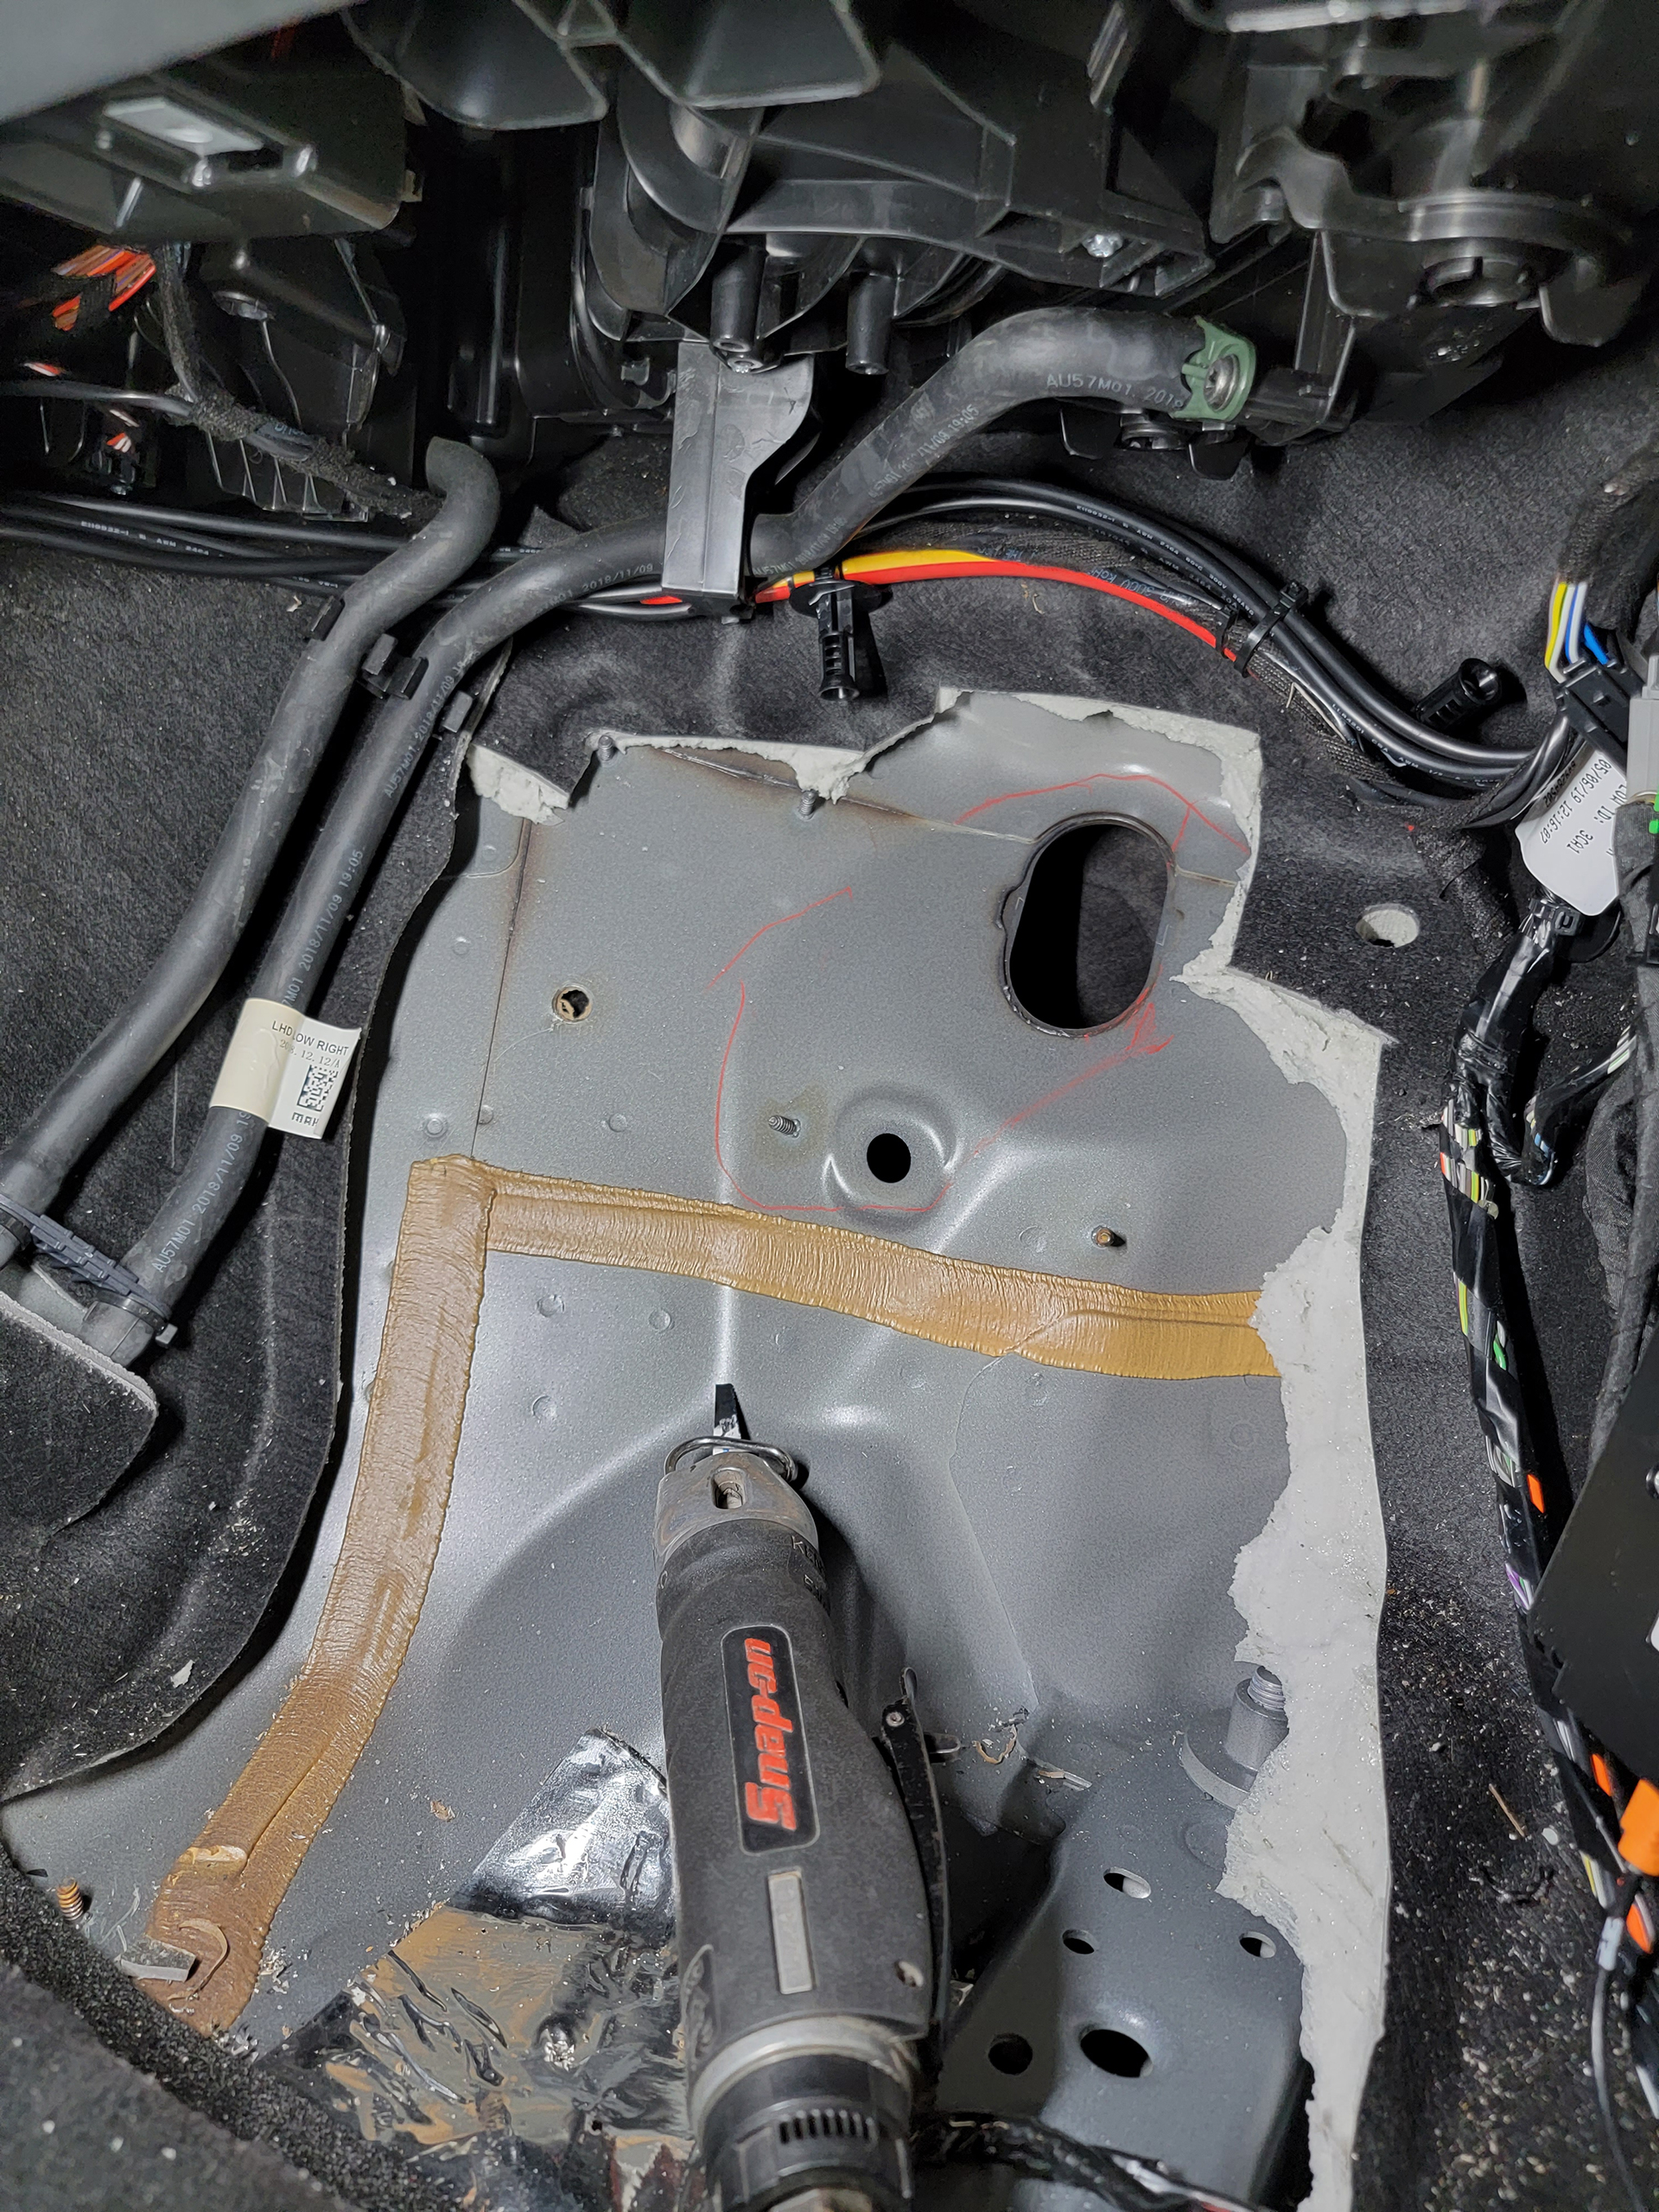
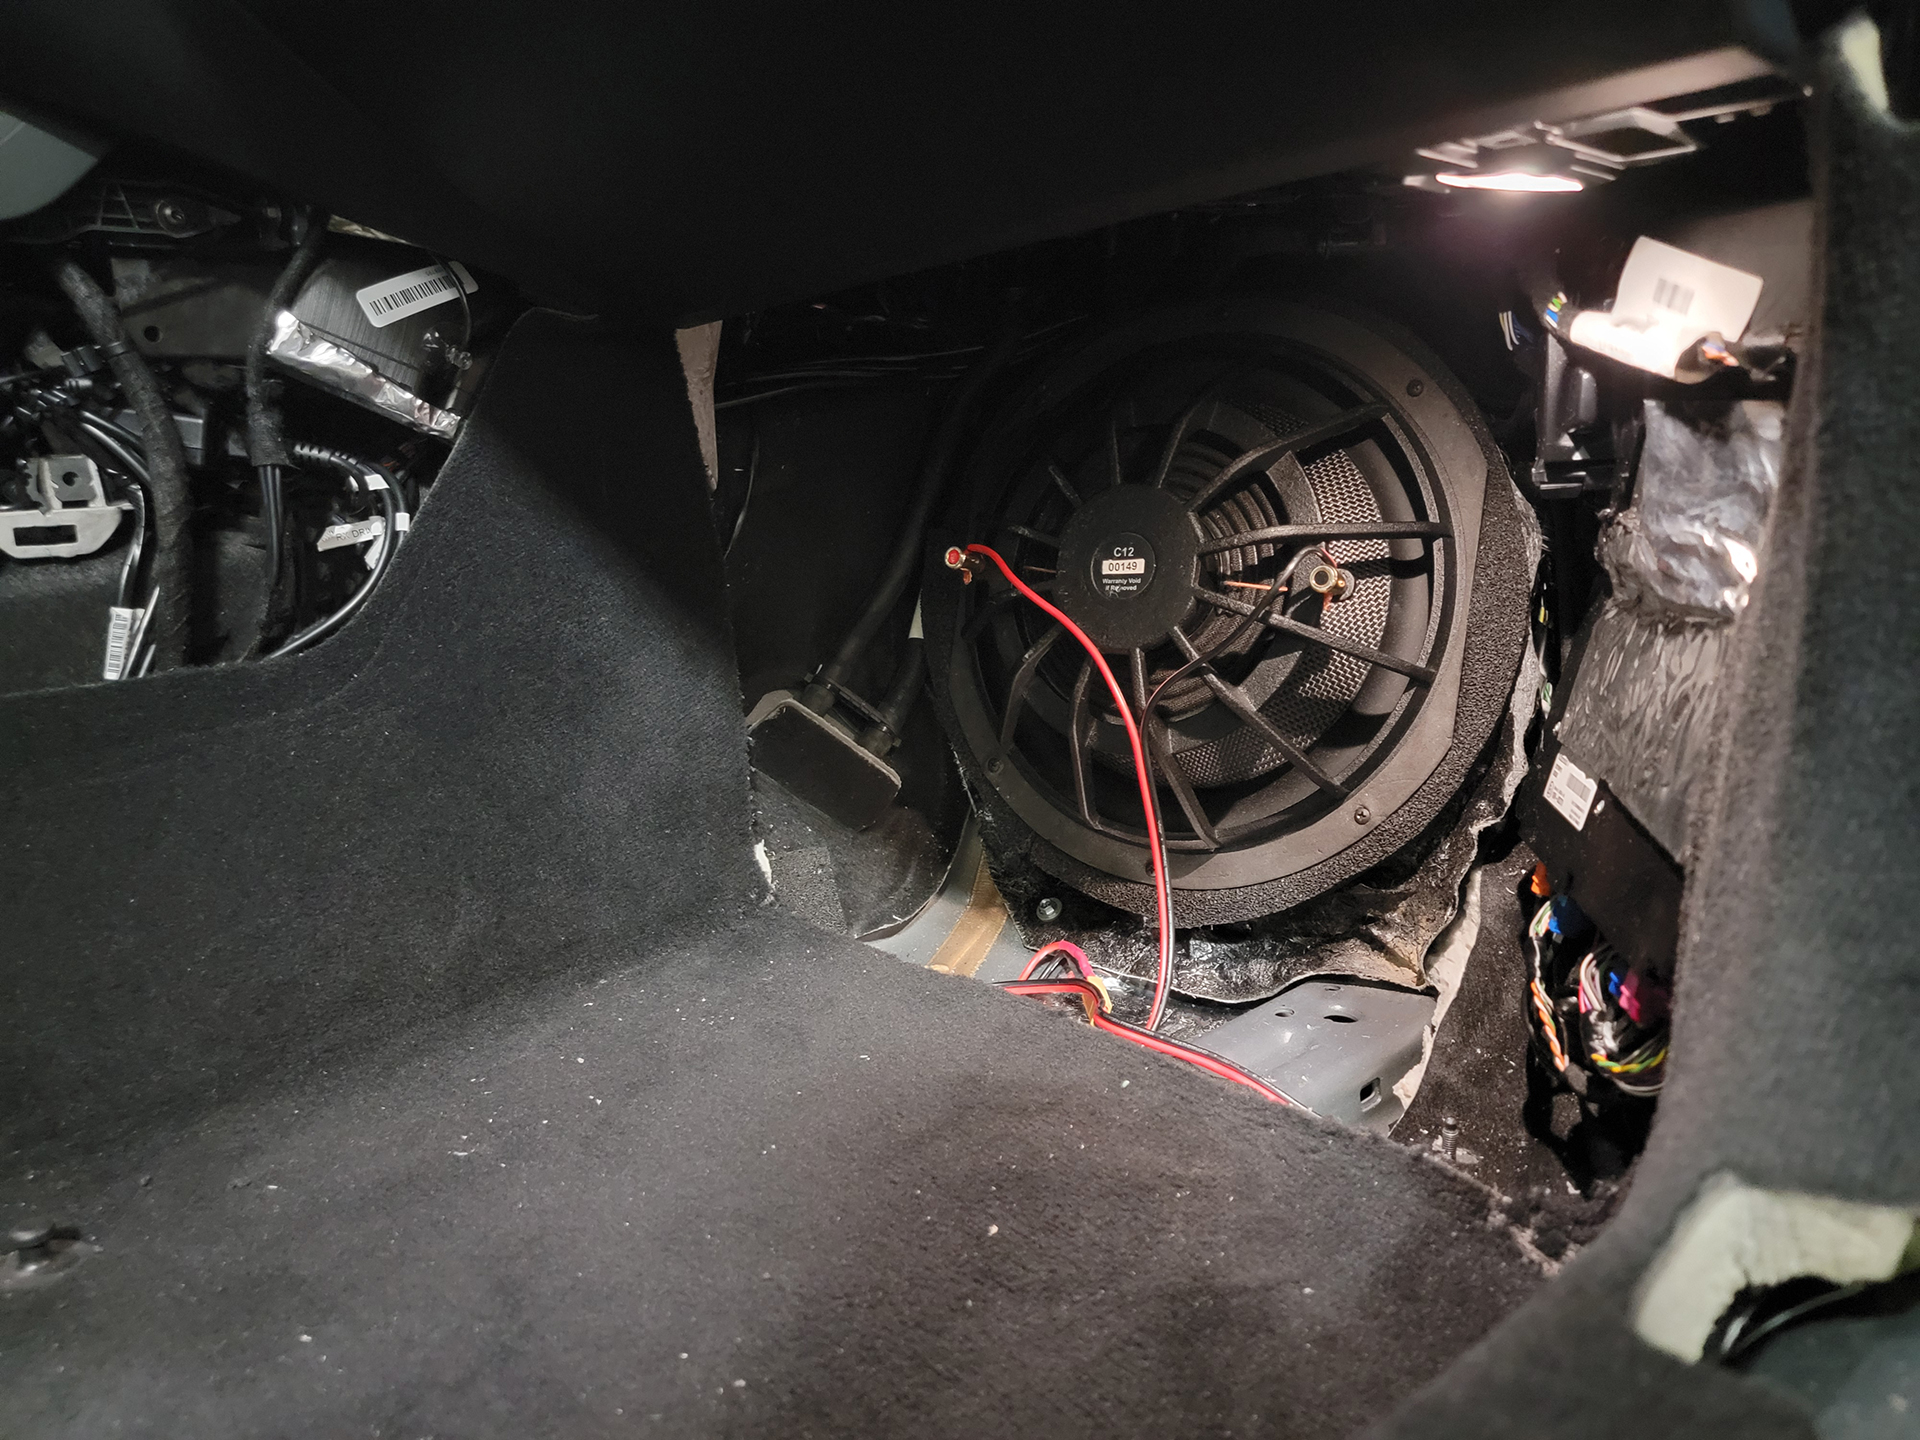
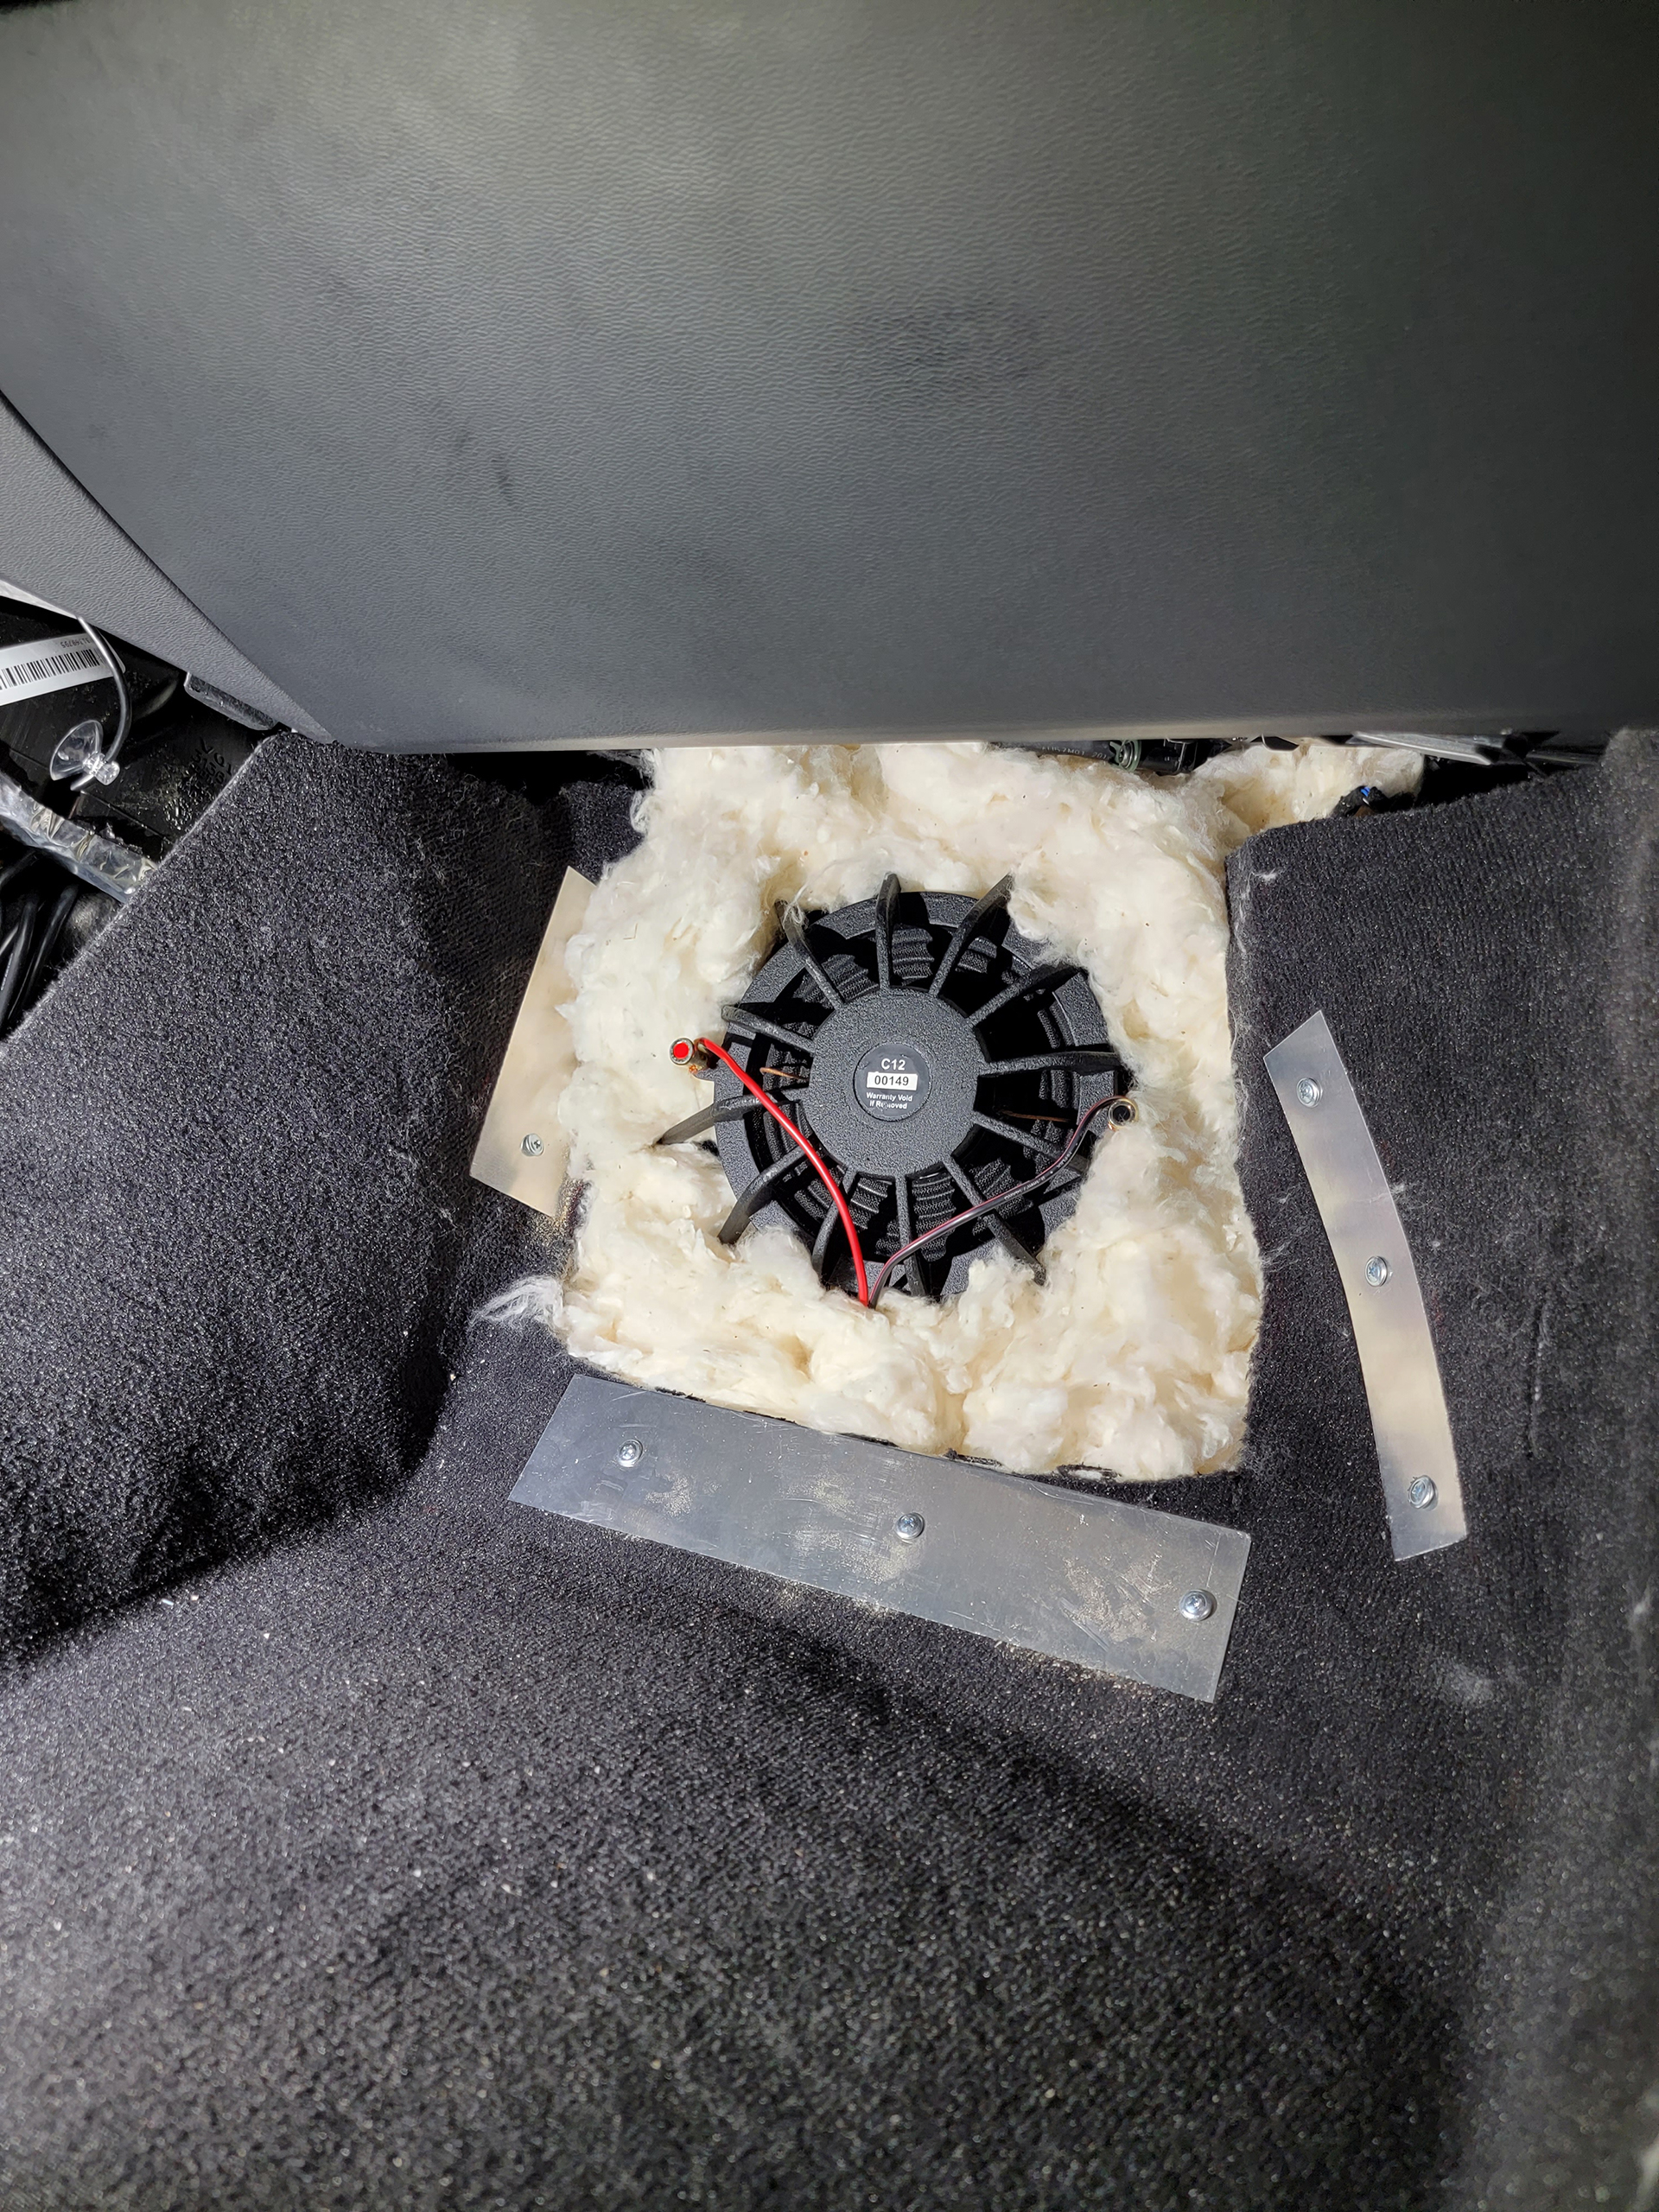
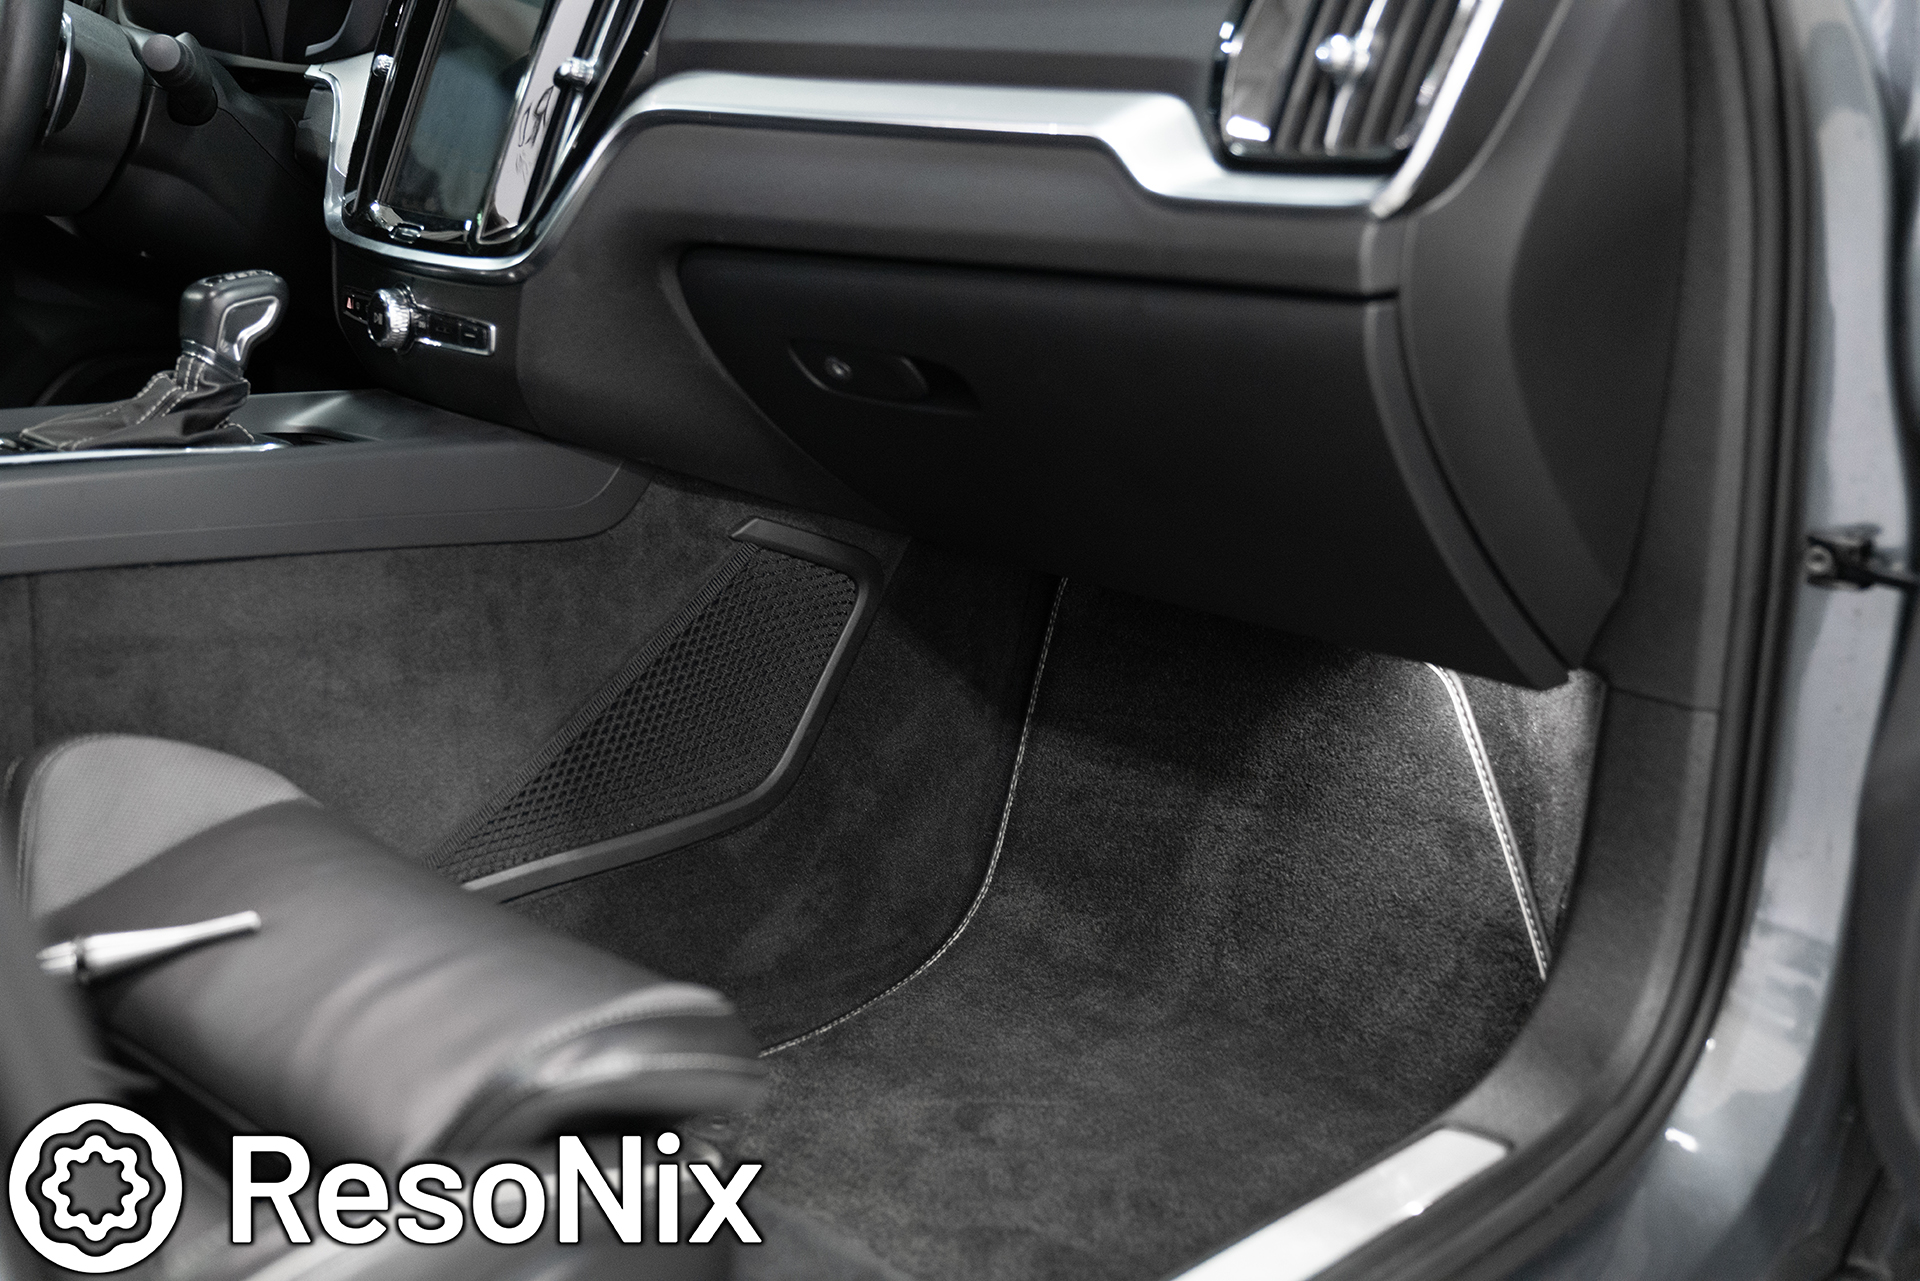
Now for the front subwoofer. The Illusion C12 Carbon 12″ shallow subwoofer was installed here in an infinite baffle configuration. Yes, you read that correctly. Why did I do this? Many reasons. 1) I was wrong in the past by thinking you can have perfect, up-front bass by doing a sub in the rear and door-mounted midbass drivers and getting them perfectly in time/in phase. Yes, you can have great end results with this traditional method, but it is no match for large, kick panel mounted midbass drivers, or an up-front sub to go between the sub to midbass transition. Resonance and rattles will ALWAYS be a problem in doors as well no matter how well you deaden and treat it. Also, in most cars you will have a cancellation from door mounted midbass driver at around 80hz on the drivers side, and many cars also have a cancellation in the ~100hz area with a trunk mounted subwoofer. You can still work around it with very careful filter selection and tuning, but again, its near impossible to get it truly perfect. I was never a proponent for front mounted subs. After trying it in the sealed enclosure first, and then moving to this, I am now a firm believer. Sorry to those who I misled in the past.
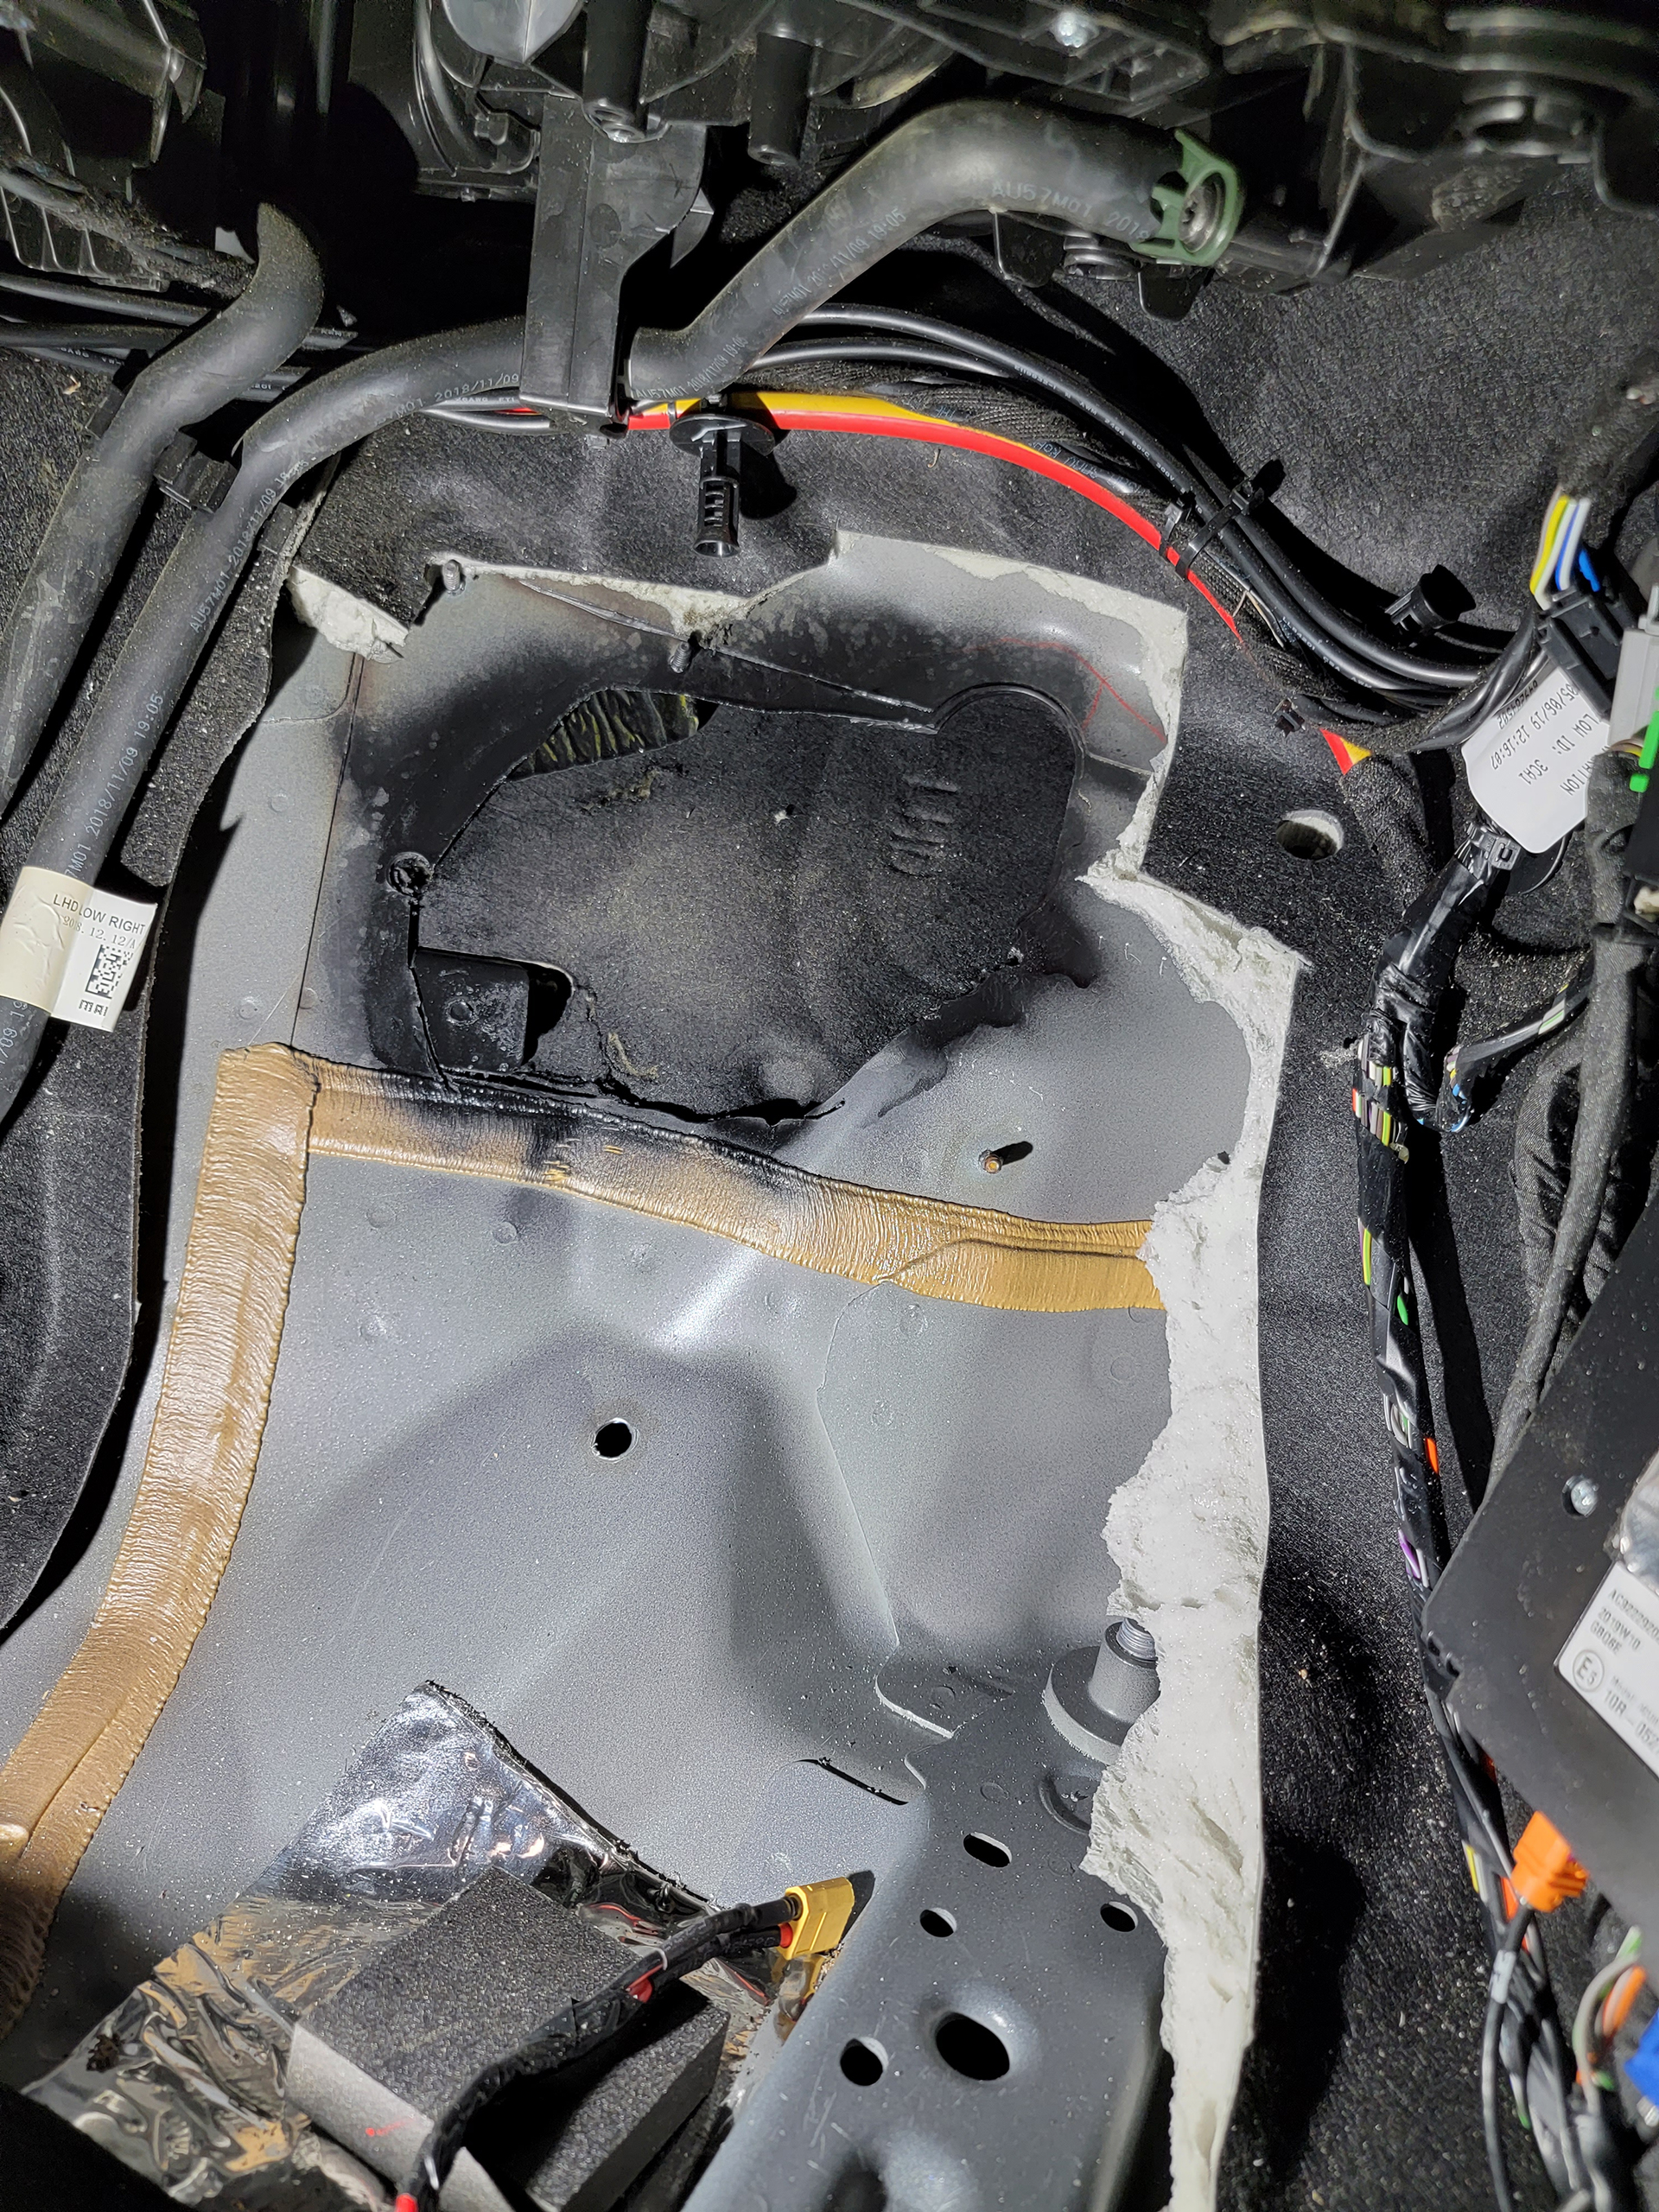
Why did I do it this way? Well in the middle of this whole 2 year long build, I had a front sub mounted in a sealed enclosure so I could have my whole trunk and spare tire. Problem was, my fiance has legs like telephone poles and wasn’t a fan of the lack of leg room. So, here is my solution to all of it. Infinite baffle through the firewall. Yeah, it doesn’t sound pretty, but my car happened to be perfect for it. There was a small pocket in the firewall in the passenger footwell that had a large section that was made out of single layer non-structural steel. There was also a ton of foam behind the carpet, so the plan was to open the firewall up where it was non-structural, build a small “enclosure” around it, and bolt it in. I was going into this on a whim, not sure how it would work and if the open area was enough to act as if it were actually infinite baffle, or if it was acting as a improperly sized/tuned ported enclosure. I lucked out. After all was said and done, I used Dayton DATS to check how the enclosure was behaving, and sure enough, true IB. QTS matched outside of the baffle, and when mounted to it. Measured frequency response was actually insanely impressive. Flat down to 10hz. Of course this subwoofer can only do 10hz at lower volumes, but it can do enough, and I now know I can fully remove the rear enclosure in the winter when I need to haul my snowboard gear and still have a full frequency range. One thing to note for those that will inevitably try to call me out on this, the heat is a non-issue. There is a thick fiberglass heatshield on the other side of the firewall which was spaced about 2″ away from the opening, and the “enclosure” was also filled with fiberglass insulation, then topped with polyfill (to keep the fiberglass away from the subwoofer). After a 2 hour ride, you still cannot feel a hint of warmth on the cone or surround.
One more cool thing to note. Not even a full inch was lost vs the OEM floor. Only the thickness of the half inch birch that was used to secure the grill was added.
**sorry for the crappy phone pics**

The updates that I recently made some to the trunk. I added a pair of Sinfoni Prestigio amplifiers to power the midranges and tweeters. Loving the trunk re-design that it required too. So now, I have 9 amplifiers and two processors in the car lol.
These are incredible amplifiers and are some that I have always wanted. I love the sound, the look, etc. They were also even further upgraded by Gordon Taylor. Once again, fully wired by ResoNix Solderless Custom RCA System.
That wraps it up for our first car audio install at our new location! If you have any questions, feel free to ask. If you are interested in having a high-performing sound system installed or an already existing one improved upon in your vehicle, feel free to reach out! Again, I am very excited to be back doing this, and am especially grateful that I am able to make this a fun side-gig as opposed to my full time career.
Elevating the Volvo S60 Experience: A nearly completely hidden sound system upgrade with one extra goal; to keep it OEM
How to Sound Deaden a Car: A Comprehensive Guide to Quieter Rides Are you tired of road noise disrupting your
ResoNix Sound Solutions is a company with a specialty in high-end car audio and automotive sound treatment that offers top quality products and services that provide superior performance in their respective categories. No gimmicks, no baseless claims, no nonsense. Constrained layer dampers, sound absorbers, decouplers, noise barriers, and car audio DSP tuning and consultation services are part of our line-up with a focus on data-backed, solutions-based products developed by professional enthusiasts, for enthusiasts.
