2019+ GMC SIERRA 1500/CHEVY SILVERADO 1500 (FOURTH GEN.): DOORS

2019+ GMC Sierra/Chevy Silverado 1500 Door Sound Deadening

This guide is for a Fourth Gen. 2019 GMC Sierra 1500 with a Stage 2 treatment for the doors, but may also apply to other GM vehicles such as the Chevy Silverado, Suburban, Tahoe, etc.

Products used:

For the 2019 GMC Sierra 1500, this is what you will find once you remove the door panels.
Once you have the door panel off, remove the OEM moisture barrier. These will not be re-used, but we kept them anyway since they are not flimsy plastic that gets destroyed during its first removal.
Once the moisture barrier was removed, we applied ResoNix Squares to the outer door skin. We ended up with about 85% coverage
After the ResoNix Squares were applied, we added Butyl Rope to the gaps between the outer door skin and crash bars. Don’t forget to leave some gaps for water to escape through.
For this Stage 2 install, we also opted for absorption tiles from another manufacturer to help with the absorption of the rear wave. This will help lower distortion as well as further lower resonance due to the decreased energy of the rear wave and its effect on the door skins.
Once the other door skin was fully taken care of, we used 3/16″ plastic to seal the holes of this door. This is one of the things that separates our Stage 1 install from a Stage 2 install, such as this.
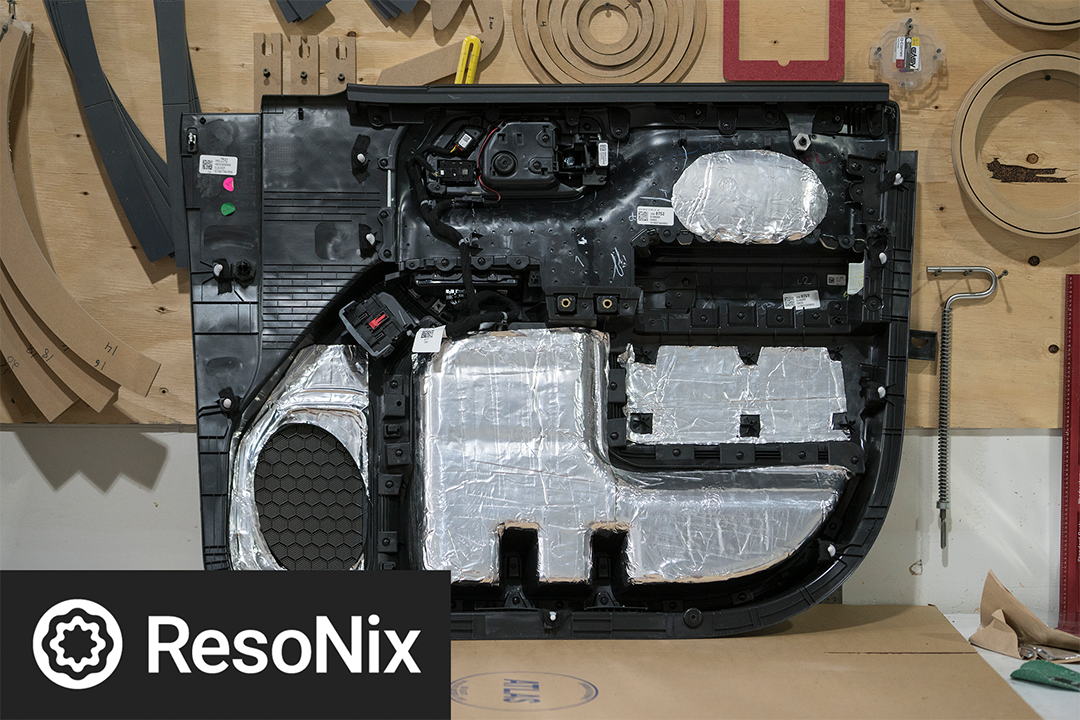
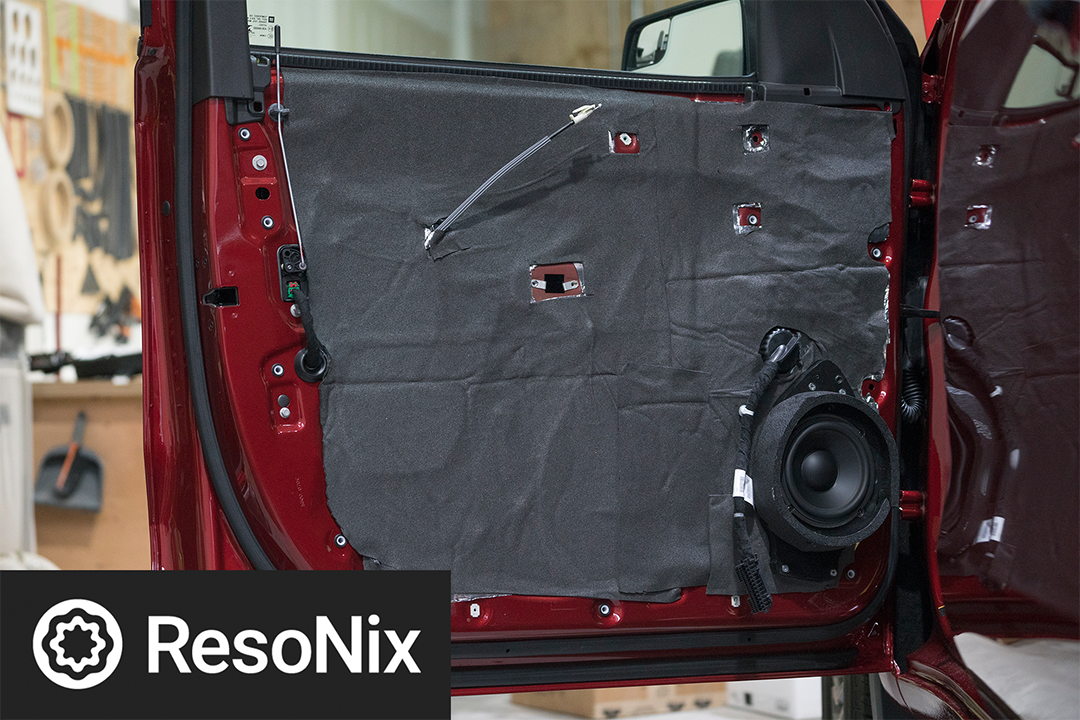
Since this door was relatively flat, we decided to do ResoNix Squares over the plastic panels we added, then full coverage with ResoNix Rectangles. We know that full coverage is well past diminishing returns, but the price difference in the extra amount of ResoNix Rectangles wasn’t enough to justify the extra labor it would have taken to meticulously plan, cut, and apply them. 100% coverage on a relatively flat panel requires no extra thinking or planning and you can finish it up much quicker vs. planning. For your situation as a DIY’er, this may not be the best route, but here at the shop, time = money. The product cost less than the time we saved going this route. Plus, while it is past diminishing returns, more is better after all.
Once our resonance control efforts using our CLD products were done, we moved our attention to reducing panel-on-panel vibration and rattles. Closed cell foam was applied to the inner door skin with 100% coverage. Side note, our FD1 & FD2 were not in stock at the time of this install. We had to use another CCF we had left over. For this install, I would suggest FD2.
Once the inner door skin was done, we moved into the door panel. Here you can see the OEM fiber mat in place.
Here is the door panel with said fiber mat removed. As you can see, there are a lot of nooks and crannies of this door panel that needed to be spot treated to reduce the chance of any rattles or vibration.
We applied ResoNix Squares to the pictured areas to help reduce the resonance of the door panel.
Once that was done we spot treated all appropriate areas with butyl rope, tesa tape, and foam. The areas we targeted are circled in red.
The OEM fiber mat was re-installed before the door panel was put back on.
After the doors have all CLD and CCF applied, we installed our speaker with its baffle and applied a CCF ring around the baffle to couple the speaker to the cabins air space. This also helps stabilize the door panel. That said, the CCF ring should be mated up to the door panel, otherwise, it’s not doing much.

Installation Products

CONTACT

LINKS